Pertama instal slackware
Masuk ke seting bios, rubah seting untuk membaca pada cdrom..
Masukkan cd Slacware kemuadian tekan enter sampai ada tulisan root, ketik root
Partition a Hard Disk
* ketik cfdisk
* Select Disk Drive [/dev/hda]
- Buangkan semua partisi yang ada. Arahkan ke [ Delete ]
* Tambahkan partisi linux.Arahkan ke [ New ] --> [Primary] ---> 2 X Jumlah memory M (256 )---> [Beginning] ß Untuk /swap àhda1
* Gunakan 'arrow key', pilih bahagian 'Free Space', [ New ] ---> [Primary] ---> 50 ---> [Beginning] ß untuk /boot àhda2
* Gunakan 'arrow key', pilih bahagian 'Free Space', [ New ] ---> [Primary] ---> 500 ---> [Beginning] ß untuk / àhda3
* Gunakan 'arrow key', pilih bahagian 'Free Space', [ New ] ---> [Logical] ---> Paling banyak diatas 1 G (1500) ---> [Beginning] ß Untuk /usr --à hda4
* Gunakan 'arrow key', pilih bahagian 'Free Space', [ New ] ---> [Logical] ---> 500 ---> [Beginning] ß Untuk/var -àhda5
* Gunakan 'arrow key', pilih bahagian 'Free Space', [ New ] ---> [Logical] ---> 500 ---> [Beginning] ß Untuk /squid -àhda6
* Gunakan 'arrow key', pilih bahagian 'Free Space', [ New ] ---> [Logical] ---> Diatas 1 G(1500) ---> [Beginning] ß Untuk /cache -àhda7
* Gunakan 'arrow key', pilih bahagian 'Free Space', [ New ] ---> [Logical] --->300 ---> [Beginning] ß Untuk /tmp -àhda8
* Gunakan 'arrow key', pilih bahagian 'Free Space', [ New ] ---> [Logical] ---> Kesemua Bagian / Enter ---> [Beginning] ß /home -àhda9
* Buat partisi 'swap'. Gunakan 'arrow key', pilih bahagian 'hda1', [ Type ] ---> 82
* Sahkan partisi yg dibuat. [ Write ] ---> yes
* Keluar dari utiliti cfdisk. [ Quit ]
Reboot komputer untuk mengetahui hasilnya, pake perintah “reboot”
Bios Tetap pada setingan cdrom, masuk ke utility “root”
Ketik “setup”
Akan keluar Pilihan jenis yang akan di instal kl pilihan full memerlukan kurang lebih 2 G, bila tanpa tampilan desktop kde,gnmo,games,xaplication bisa di hilangkan tekan enter
Pilih swap ( kl gk salah, lupa..:P) untuk mengaktifkan swap, akan kedeteck hda1 dengan sendirinya, enter pilih refisier (sabangsa itu, lupa lagi,qiqiiqiq)enter ampe selesai…
Trus pilih hda3 (inga-inga hda3) ,refisier akan diminta Select Mount Point ketik / (untuk partisi root) enter
Trus pilih hda2 ,refisier, Select Mount Point ketik /boot
Pilih hda4 ,refisier, Select Mount Point ketik /usr
Pilih hda5 ,refisier, Select Mount Point ketik /var
Pilih hda6 ,refisier, Select Mount Point ketik /squid
Pilih hda7 ,refisier, Select Mount Point ketik /cache
Pilih hda8 ,refisier, Select Mount Point ketik /tmp
Pilih hda9 ,refisier, Select Mount Point ketik /home
Kutipan dr http://www.sdn.or.id/share/ServerLinux/node25.html
Setup
Setelah mengaktifkan swap, jalankan skrip setup dari Slackware.
# setup
Akan muncul menu :
* Help ; File help dari slackware, menyangkut instalasi
* Key Map ; Memetakan keyboard, jika menggunakan keyboard non english
* Swap ; Membuat dan mengaktifkan swap file
* Target; Menentukan direktori tempt Linux akan diinstal
* Source ; Menentukan direktori sumber file yang akan diinstal
* Select ; Memilih perangkat lunak yang akan diinstal
* Instal; Memulai instalasi dari paket program yang telah dipilih sebelumnya
* Configure ; Mengkonfigurasikan Linux sebelum di restart
* Exit ; Selesai instalasi dan keluar
Perlu dicatat bahwa menu tersebut merupakan urutan instalasi yang harus dipilih satu demi satu. Untuk memulai instalasi, Anda dapat abaikan dua menu pertama.
Swap
Secara default, Anda akan ditanya apakah akan memasukkan /dev/hda1 sebagai swap. Jika ya, maka Slackware akan menjalankan perintah mkswap untuk memformat /dev/hda3 dengan file sistem swap, kemudian mengaktifkannya dengan perintah swapon. Karena perintah ini telah dilakukan sebelumnya, Anda dapat abaikan. Yang penting adalah memasukkan /dev/hda1 ke dalam file fstab sehingga saat Linux boot dapat langsung menggunakan swap.
Catatan :
Linux menuliskan semua sistem file dan divais yang dipergunakan ke dalam file /etc/fstab. Saat akan dipergunakan dengan perintah mount, Linux akan membaca file ini. Divais yang dipergunakan termasuk semua hard disk dan partisinya, CDROM, floppy dan divais untuk back up. Untuk lebih jelasnya, ketikkan man fstab pada shell prompt.
.
kembali ke saya..:P~
pilih jenis instalasi Instal Slackware from CD-ROM
Select
Slackware memberikan pilihan paket aplikasi yang akan diinstal. Paket yang ditawarkan adalah :
1. A Aplikasi dasar yang dibutuhkan sistem Linux
2. AP Berbagai aplikasi yang dapat dijalankan di console tanpa membutuhkan X
3. D Program pengembangan, terdiri atas berbagai bahasa pemrograman
4. E GNU Emacs, editor teks
5. F Daftar FAQ, dan dokumentasi How To lengkap
6. K Sumber (Source) dari kernel Linux
7. N Networking (TCP/IP, UUCP, Mail, News)
8. T Program pengolah kata tingkat lanjut TCL Bahasa Skrip Tcl/Tk
9. X X Free, Server untuk tampilan grafis
10. XD Program pengembangan X Free
11. XV X View (Window Manager dan berbagai aplikasi tampilan grafis)
12. Y Games yang tidak membutuhkan X (dijalankan di console)
Kemudian pilih expert , enter,eter, exit reboot
****** Rokok’an sek ….kl luput sorry…gogling aja dulu, berarti aku wes lali..qiqiqiqiqi********
Detikin ip card
Biasanya kl lancard kita pasang duluan waktu instal udah langsung ke deteck
Tapi bisa juga dengan cara manual
*kutipan dr http://ipv6.gemblung.org/modules.php?op=modload&name=News&file=article&sid=133
****nyontek…..lah ra iso jeee..isone gogling…:P*****
Asumsi:
Linux box, dengan menggunakan 2 (dua) buah ethernet card, masing-masing untuk koneksi ke "luar" (internet) dan koneksi ke dalam (LAN).
Sebelum mengkonfigurasikan jaringan (network), tentu kita harus mengaktifkan kedua ethernet card tersebut, yaitu dengan menggunakan perintah "modprobe".
Andaikan kita mempunyai 2 (dua) buah ethernet card yang berbeda, maka seletah menjalankan perintah "modprobe" untuk masing-masing "module" yang dipergunakan pada saat mengaktifkan ethernet card tersebut kita akan memperoleh "pesan" bahwa module-module tersebut berhasil diaktifkan atau tidak, dan kita dapat melihatnya melalui pesan yang muncul pada file "log" "messages" atau "syslog" yang berada di direktori "/var/log/" dengan batuan perintah "tail", atau dapat pula dilihat melalui perintah "dmesg" atau menggunakan perintah "lsmod" untuk melihat daftar module-module kernel yang telah aktif.
contoh:
root@hostname:~# modprobe 3c59x
root@hostname:~# modprobe 8139too
root@hostname:~# tail /var/log/messages
root@hostname:~# tail /var/log/syslog
root@hostname:~# dmesg
root@hostname:~# lsmod
Nah, apabila terdapat keterangan-keterangan tentang kedua ethernet card dari hasil perintah-perintah tersebut, berarti kedua ethernet card tersebut telah aktif. dan kita nanti nya akan memiliki 2 (dua) buah "interface" yang telah aktif, masing-masing adalah: "eth0" dan "eth1".
Pada kasus lain, kita secara kebetulan mempunyai 2 (dua) buah ethernet yang mempunyai "module" yang sama, hal ini dapat terjadi walaupun kedua ethernet tersebut berbeda merek, namun karena "chipset" untuk kedua ethernet tersebut sama, maka "module" untuk mengaktifkannya pun tentu akan sama pula. Dan ini memang dapat terjadi, karena pada dasarnya module-module kernel yang ada untuk mengaktifkan driver-driver TIDAK berdasarkan merek melainkan berdasarkan CHIPSET.
Dan pada kasus ini, kita hanya perlu mengaktifkan "module" tersebut hanya satu kali, karena secara otomatis, kedua ethernet tersebut akan teraktifkan langsung kedua-duanya. Untuk module ethernet card yang sering mempunyai chipset yang sama adalah dari jenis "cloning" realtek 8139 (8139too), yang dapat berasal dari REALTEK, COMPEX, D-Link. Namun karena terdapat perbedaan pada MAC-Address nya, maka kedua ethernet card yang memiliki module yang sama tersebut akan dapat aktif sebagai interface "eth0" dan "eth1".
Catatan: jika kita mengaktifkan "hotplug" seperti pada slackware mulai versi 9.0 maka secara otomatis module-module yang secara umum mudah terdeteksi, akan segera diaktifkan pada saat proses "booting", sehingga kita tidak perlu mengaktifkannya kembali, kita hanya perlu memeriksa bahwa module-module tersebut telah aktif melalui perintah-perintah seperti: "dmesg" atau "lsmod" saja.
Selanjutnya, bagaimanakah cara menggunakan interface yang telah aktif tersebut agar dapat dikoneksikan dengan baik, untuk ke internet maupun untuk sharing dari LAN?
Dalam contoh kasus kali ini, kita menggunakan koneksi "static" untuk koneksi ke internet nya. Koneksi static ini, biasanya akan kita dapatkan apabila kita menggunakan jenis koneksi seperti Leased-Line atau Wireless-Line, dimana IP-IP yang nantinya kita dapatkan umumnya lebih dari 1 (satu) IP.
Sebelumnya, IP-IP dapat diibaratkan sebagai alamat-alamat yang terdapat pada suatu jaringan (network) tertentu baik itu di internet maupun di LAN. Kita dapat menggunakan IP-IP yang kita gunakan tersebut untuk menuju ke suatu tempat (IP) yang terdapat pada suatu jaringan (network) (internet/LAN) dimana kita akan kunjungi.
Namun, karena keterbatasan akan mengingat terhadap IP-IP yang sedemikian banyaknya tersebut bila kita terkoneksi ke internet maka dibuatlah suatu nama (domaina/subdomain) agar kita dapat dengan mudah mengingatnya, walaupun sebetulnya yang kita tuju tersebut tidak lain adalah alamat yang berupa IP.
Untuk koneksi "static" ke internet yang perlu kita ketahui atau tanyakan dari ISP (provider) adalah:
- IP-IP yang kita peroleh.
- IP Gateway yang akan digunakan.
- Netmask atau juga mungkin Broadcast Address nya.
- serta DNS-DNS resolver dari ISP nya.
contoh:
IP: 202.155.2.101-202.155.2.116
Gateway: 202.155.2.1
Broadcast: 202.155.2.255
Netmask: 255.255.255.0
DNS: 202.155.0.15,202.155.0.10
Dari keterangan yang kita dapatkan tersebut kita dapat langsung mengaktifkan koneksi ke internet nya, dengan asumsi bahwa untuk koneksi ke internet kita menggunakan interface "eth0" dan untuk koneksi LAN nya kita menggunakan interface "eth1".
root@hostname:~# ifconfig eth0 202.155.2.101 up
untuk melihat hasilnya kita dapat menggunakan perintah "ifconfig" saja.
root@hostname:~# ifconfig
sedang untuk melewatkan paket-paket data nya ke internet kita harus mengaktifkan "jalur" (routing) nya, yaitu dengan bantuan perintah "route".
root@hostname:~# route add default gw 202.155.2.1 eth0
Untuk melihat "routing" yang telah kita aktifkan dapat mengggunakan perintah "route" saja.
root@hostname:~# route -n
root@hostname:~# ping -c 5 202.155.15.26
Sampai di sini sebetulnya kita telah terhubung ke internet, namun kita hanya mendapatkan koneksi dengan menggunakan IP-IP saja, sementara kita belum tentu dapat menjelajah ke internet dengan cara menuliskan nama-nama domain atau situs-situs (website) yang biasa dipergunakan di internet. Untuk itu kita perlu memasukkan IP-IP DNS yang telah kita dapatkan tersebut ke dalam file yang bernama "resolv.conf" yang terletak pada direktori "/etc". Biasanya isi file ini masih kosong. Untuk melihatnya kita dapat menggunakan perintah "cat"
root@hostname:~# cat /etc/resolv.conf
Dan untuk menambahkan isi ke dalamnya kita dapat menggunakan perintah "echo".
root@hostname:~# echo "nameserver 202.155.0.15" > /etc/resolve.conf
root@hostname:~# echo "nameserver 202.155.0.10" >> /etc/resolv.conf
Catatan: tanda ">" akan mengisikan baris baru dan menghapus isi yang sudah ada sebelumnya pada file. Sementara untuk tanda ">>" akan menambahkan baris berikutnya pada file.
Nah... sejauh ini kita telah berhasil mengaktifkan koneksi ke internet dengan baik. Anda dapat menggunakan perintah "ping" untuk memeriksa pakah koneksi telah berjalan sebagaimana mestinya.
root@hostname:~# ping -c 5 www.indosat.net.id
Dah itu aja Slac udah jadi server cuma untuk isa browsing di client , client harus di isi dns isp…..mubazir kan buat server tapi dns tetep di isi di client bikin capek…….hehehehehe
Agar client gk usah di isi dns kita harus aktivkan bind
Buka inet2 pake perintah pico /etc/rc.d/rc.inet2
Cari file named biasanya di akhir dewe
# # Start the BIND name server daemon:
#
# # Option number one: Start the NAMED/BIND name server as root.
# # Note that BIND has a somewhat spotty history in terms of security,
# # but they recommend running it as root, and if you don't, not all
# # the features (especially when attached to a dynamic IP such as
# # through PPP) will neccessary work correctly).
#if [ -x /usr/sbin/named ]; then
# echo "Starting BIND: /usr/sbin/named"
# /usr/sbin/named
#fi
# # Done starting the BIND server using option #1.
Tanda pagar di buka semua
# # Start the BIND name server daemon:
#
# # Option number one: Start the NAMED/BIND name server as root.
# # Note that BIND has a somewhat spotty history in terms of security,
# # but they recommend running it as root, and if you don't, not all
# # the features (especially when attached to a dynamic IP such as
# # through PPP) will neccessary work correctly).
if [ -x /usr/sbin/named ]; then
echo "Starting BIND: /usr/sbin/named"
/usr/sbin/named
fi
# # Done starting the BIND server using option #1.
Begitu juga yang bawahnya tanda pagar juga di buka
# # instructions on running BIND in a "chroot jail":
# # /usr/doc/Linux-HOWTOs/Chroot-BIND-HOWTO
if [ -x /usr/sbin/named ]; then
echo "Starting BIND: /usr/sbin/named -u daemon"
/usr/sbin/named -u daemon
fi
# # Done starting the BIND server using option #2.
Kemudian kita masuk ke /etc/rc.d/rc.modules
Jangan lupa pake pico (tapi terserah ding pake vi juga isa pake mc juga isa ambil gampangnya aja..:P~)
cari bagian ini dan buka buang tanda # nya sehingga menjadi seperti ini
# IP masquerading modules:
# These modules are used with IP masquerading, a process which allows you to
# use a Linux box connected to the Internet (via PPP or SLIP, or some other
# means) as a gateway for other Linux, Windows, Macintosh boxes on your local
# network that don't have real IP addresses on the Internet. The packets
# going through the Linux machine are "masqueraded", or made to look as if
# they're all coming from the one real IP address on the Internet.
#
# As a quick example (for a much more extensive treatment, see the IP-Masquerade
# mini-HOWTO) to allow Internet access to a local network 192.168.11.0 with a
# netmask of 255.255.255.0, you'd use these commands in /etc/rc.d/rc.local:
#
echo 1 > /proc/sys/net/ipv4/ip_forward
echo "Setting up NAT (Network Address Translation)..."
# # by default, nothing is forwarded.
* itu ada di bawah tapi gk bawah sendiri….
Edit named.conf
Pico /etc/named.conf tambahkan forwarders sehingga jadi begini :
options {
directory "/var/named";
forwarders { 202.134.1.10; 202.134.0.155; };
/*
* If there is a firewall between you and nameservers you want
* to talk to, you might need to uncomment the query-source
* directive below. Previous versions of BIND always asked
* questions using port 53, but BIND 8.1 uses an unprivileged
* port by default.
*/
// query-source address * port 53;
};
tes apakah bind-nya jalan apa enggak
ps ax | grep named
atau pake
ls ax
liat apakah ada tulisan /usr/sbin/named
kl ada berarti dah jalan tuh named kl belum coba aktivkan dulu pake perintah /usr/sbin/named
kalo tetep gk jalan coba liat kesalahannya di tail -f /var/log/messages ama tail -f /var/log/syslog
dah selesai…belum…..sekarang masuk ke pico /etc/rc.d/rc.local tambahkan sehingga jadi begini…
#!/bin/sh
#
# /etc/rc.d/rc.local: Local system initialization script.
#
# Put any local setup commands in here:
#-----Nat------
iptables -F
iptables -F -t nat
iptables -t nat -A POSTROUTING -o eth0 -j SNAT --to ip publick
#---modul---
/sbin/modprobe ip_conntrack_irc
/sbin/modprobe ip_conntrack_ftp
/sbin/modprobe ip_nat_ftp
/sbin/modprobe ip_nat_irc
/sbin/modprobe ip_conntrack
#---named----
/usr/sbin/named
apalagi yak ?…oh ya coba buka /etc/rc.d/rc.inet2 lagi
pada bagian
# Start the RPC portmapper:
if [ -x /sbin/rpc.portmap ]; then
echo "Starting RPC portmapper: /sbin/rpc.portmap"
fi
# Done starting the RPC portmapper.
Tutupen ngarepe
jadi #if [ -x /sbin/rpc.portmap ]; then
dah untuk sementara slack kita dah isa buat jadi server….
Mensetup Jaringan Server dan Client Pada sistem Operasi Linux Slackware 9.0
Dual Boot Windows-Linux dan Linux-linux
Yang tertarik nyoba Linux tapi ga mau kehilangan Windows, bisa dicoba nginstall dual-boot. Misal pake Ubuntu, tapi should be fine pake distro lain semisal Fedora cs, Knoppix cs, Mandriva, dll. Diasumsikan, Windows n’ Linux diinstall di harddisk yang sama sehingga MBR (Master Boot Record)-nya cuman satu.
Ada 3 skenario dalam instalasi dual-boot :
1. Windows diinstall duluan, lalu Linux diinstall belakangan
Ini cara yang paling gampang, karena secara otomatis boot-loader Linux akan mendeteksi ada Windows, dan memberikan menu untuk masuk ke dalamnya. Klo pake Ubuntu, boot-loadernya adalah Grub. Setelah berhasil menginstall Windows dan Ubuntu, maka Grub akan tampil saat kita booting, dan memberikan pilihan mau booting ke Ubuntu apa Windows. Simpel, ga butuh setting macem-macem
2. Linux diinstall duluan, baru Windows belakangan
Masalah utama pada skenario ini adalah : Windows mengoverwrite MBR dengan boot-loadernya ndiri (sehingga Grub-nya Linux mati), tapi Windows ga mau ngedeteksi adanya Linux (sehingga ga ada pilihan buat booting ke Linux). Jadi walopun udah nginstall Ubuntu n’ Windows, tapi karena menu untuk masuk Ubuntu ga ada, jadilah kita cuma bisa booting ke Windows.
Solusinya, kita bakal overwrite lagi MBR dengan Grub. Caranya :
1. Booting menggunakan Rescue Disk / Live CD Linux. Coba cek keterangan di distro masing-masing. Klo Ubuntu pake aja Live CD-nya
2. Klo udah masuk, jalanin perintah di bawah ini dengan privileges “root” (tambahkan “sudo” di depan tiap perintah, buat Ubuntu)
* sudo grub //setelah itu akan masuk ke program grub dengan tanda “grub>” di terminal
o root (hd0,0) // ganti “(hd0,0)” sesuai dengan setting harddisk-mu, yakni root-nya instalasi Linux. “(hd0,0)” menunjukkan instalasi Linux ada di harddisk pertama, partisi pertama.
o install (hd0) // ini berarti menginstall Grub ke MBR harddisk pertama, menggantikan MBR Windows yang rese’
o quit // keluar dari program Grub
* sudo vim /boot/grub/menu.lst // edit file menu.lst dengan editor sembarang
o cari baris pendefinisian Operating System, biasanya di paling bawah file
o tambahin baris sebagai berikut untuk ngedefinisiin Windows :
+ title Mikocop Windossss
+ rootnoverify (hd0,2) // ganti dengan partisi Windows diinstall, contoh ini berarti di partisi ketiga
+ makeactive
+ chainloader +1
o save aja file-nya
3. restart komputer, terus pastikan Grub sudah bisa booting ke Linux n’ Mikocop Windosss :)
3. Entah mana yang diinstall duluan, pokoknya jadi ga bisa booting!
Kasus ini terjadi misalnya pas nge-repair Windows, ato ngutak-atik partisi harddisk, ato nambah harddisk baru, dll. Solusinya, mirip seperti yang skenario ke-2 tadi. Masuk ke Rescue Disk / Live CD, trus pastiin Grub keinstall di MBR, trus pastiin settingan kayak (hd0,0), (hd0,2)-nya sesuai sama keadaan harddisk sekarang. Jadi, pastiin dulu skema partisi harddiskmu, misalkan pake program gparted (buat Ubuntu). Terus, jangan lupa juga buat ngecek file “/etc/fstab” di Linux, dan pasttin settingannya bener, sesuai partisi-partisi yang ada.
*****
Untuk yang instal semua pake linux
Keuntungan dari instalasi multi-distro tersebut, Anda bisa mempelajari beberapa jenis distro yang memiliki "sifat" serta "kelakuan" yang berbeda sehingga pengetahuan Anda tentang Linux akan semakin kaya.
Pembuatan Partisi
Setiap distro Linux membutuhkan setidaknya dua partisi, yaitu / (root) dan swap. Kebutuhan akan partisi swap sebenarnya bisa diperdebatkan, utamanya apabila Anda memiliki RAM yang besar (misalnya di atas 512MB). Namun bukan hal yang salah apabila partisi swap tetap ingin digunakan.
Dalam kondisi minimal, sediakan n+1 partisi dengan n adalah jumlah distro yang ingin diinstall. Sebagai contoh penulis akan menginstall tiga distro, yaitu Fedora Core, Ubuntu, dan Slackware. Untuk itu, siapkan minimal empat partisi. Tiga partisi akan digunakan untuk partisi / bagi setiap distro, dan satu partisi digunakan sebagai swap. Mengapa partisi swapnya hanya satu? Karena pada satu kurun waktu hanya satu sistem operasi yang dapat beroperasi. Jadi partisi swapnya akan digunakan secara bergantian.
Apabila Anda menginginkan pemisahan partisi /home dari partisi /, sebaiknya partisi untuk /home tersebut juga disediakan sebanyak distro yang ingin diinstall. Jika diinginkan adanya partisi yang dapat digunakan untuk bertukar data antardistro, sebaiknya partisi tersebut disediakan tersendiri.
Besarnya setiap partisi juga harus disesuaikan dengan kebutuhan. Partisi untuk Fedora Core misalnya, jangan sampai terlalu kecil karena jumlah CD instalasi Fedora Core adalima (bandingkan dengan Ubuntu yang hanya satu). Sebagai contoh, penulis akan menyediakan lima partisi untuk instalasi Fedora Core, Ubuntu, dan Slackware. Tiga partisi untuk partisi/setiap distro, satu partisi untuk partisi swap, dan satu partisi lagi disediakan untuk tukar menukar data antardistro.
Diasumsikan harddisk yang digunakan berukuran 80GB, dan komputer memiliki RAM 512MB. Susunan partisinya seperti pada gambar berikut.
Instalasi Distro Pertama
Katakanlah distro yang diinstall pertama kali adalah Fedora Core. Untuk itu, buatlah susunan partisi seperti di atas. Namun yang dimount hanyalah /dev/hdal sebagai /, /dev/hda6 Sebagai swap, dan /dev/hda5 sebagai partisi (untuk sharing data yang mungkin akan di-mount di /sharing).
Formatlah berbagai partisi tersebut dengan file system yang dikenal oleh seluruh distro. Namun Anda tidak perlu terlalu cemas karena umumnya hampir semua distro telah mengenal ext2, ext3, serta reiserfs sebagai file system. Penulis menyarankan untuk menggunakan ext3 saja, karena file system tersebut bisa dikatakan sebagai yang paling populer. Saat anaconda (software instalasi Fedora Core) meminta Anda untuk menginstall GRUB, letakkan GRUB di MBR (dalam hal ini adalah di /dev/hda).
Instalasi Distro Kedua
Pada saat instalasi distro kedua, sebagian susunan partisi telah digunakan untuk distro pertama. Misalnya, distro kedua yang diinstall adalah Ubuntu. Untuk itu, lakukan proses mount hanya terhadap partisi /dev/hda2 untuk / dan /devl hda6 untuk swap. Nantinya partisi untuk sharing data akan dilakukan secara manual.
Jika pada saat instalasi GRUB, installer Ubuntu mengenal adanya distro lain (Fedora Core) yang telah terinstall dan membuat entri untuk booting ke Fedora Core, Anda boleh menggantikan GRUB Fedora Core dengan GRUB Ubuntu. Anda tinggal menginstall GRUB Ubuntu di MBR, maka GRUB yang telah ada di MBR sebelumnya akan hilang. Namun jika Anda menginginkan untuk tetap menggunakan GRUB milik Fedora Core, lakukan instalasi GRUB Ubuntu tersebut di partisi / Ubuntu, yaitu di /dev/hda2.
Instalasi Distro Ketiga
Sama dengan langkah instalasi distro yang kedua, sebagian susunan partisi telah digunakan untuk distro yang pertama dan kedua. Untuk distro Slackware, lakukan mount dan format hanya untuk /dev/hda3 sebagai partisi / dan /dev/hda6 sebagai partisi swap. Partisi untuk sharing dapat dilakukan secara manual.
Sebagai boot loader, secara default Slackware menggunakan LILO. Penulis lebih memilih untuk menggunakan GRUB, karena itu lakukan instalasi LILO di partisi / Slackware, dalam hal ini adalah Idev/hda3.
Konfigurasi Akhir
Beberapa konfigurasi akhir harus dilakukan agar nantinya pada menu GRUB akan muncul ketiga distro yang digunakan.
Mula-mula bootinglah ke distro Fedora Core. Biasanya akan segera timbul masalah, yaitu partisi swap yang tidak ditemukan oleh Fedora Core. Hal itu terjadi karena Fedora Core menggunakan nama label dalam merujuk ke partisi swap, bukan posisi partisinya. Untuk mengatasinya, ada dua solusi yang ditawarkan, yaitu memberi kembali nama label pada partisi swap, atau menyunting file /etc/fstab Fedora Core agar merujuk partisi swap pada posisi partisinya, bukan nama swapnya.
Entri pada file /etdfstab yang merujuk pada partisi swap adalah:
LABEL = SWAP-hda6 swap swap defaults 0 0
Dari entri tersebut terlihat bahwa nama label untuk partisi swap adalah SWAP-hda6. Anda bisa memberi label pada partisi swap dengan perintah berikut:
# mkswap -L SWAP-hda6 /dev/hda6
Cara yang kedua adalah dengan menyunting file /etd fstab tersebut sehingga partisi swap dirujuk berdasar posisi partisinya, bukan nama labelnya:
/dev/hda6 swap swap defaults 0 0
Nah, masalah pertama telah terselesaikan. Sekarang Anda harus menambah entri pada GRUB agar nantinya muncul item untuk booting ke Ubuntu dan Slackware. Untuk melakukan hal tersebut, Anda harus "mengintip" isi konfigurasi GRUB dan LILO milik Ubuntu dan Slackware. Tentunya partisi / Ubuntu dan partisi / Slackware harus dimount terlebih dahulu. Ketikkan perintah berikut (Anda bisa mengetikkan perintah ini secara cepat dalam satu baris):
# cd /mnt; mkdir ubuntu; mkdir slackware; mount -t ext3 /dev/hda 2/mnt/ubuntu; mount -t ext3; /dev/hda3 /mnt/slackware
Lalu, bukalah file /boot/grub/grub.conf yang terdapat di Fedora Core. Agar aman, backup file tersebut terlebih dahulu. Isi file /boot/grub/grub.conf tersebut kira-kira sebagai berikut:
default = 0
timeout = 5
splashimage=(hd0,0)/grub/splash.xpm.gz
# hiddenmenu
title Fedora Core (kernel 2.6.17-1.2157_FC5)
root (hd0,0)
kernel /vmlinuz-2.6.17-1.2157_FC5 ro root= LABEL=/1
rhgb quiet
initrd/initrd-2.6.17-1.2157 FC5.img
Kemudian buka file menu.lst milik Ubuntu yang terdapat di /mnt/ubuntu/boot/grub/menu.lst. Entri yang menunjukkan informasi booting ke Ubuntu adalah:
title Ubuntu, kernel 2.6.15-23-386
root (hd0,1)
kernel /boot/vmlinuz-2.6.15-23-386 root=/dev/hdb5
ro quiet splash
initrd /boot/initrd.img-2.6.15-23-386
Setelah itu, salinlah entri tersebut ke file /boot/grub/grub. conf, dan letakkan di bawah entri Fedora Core. Terakhir, buka file lilo.conf milik Slackware yang terdapat di /mnt/slackware/etc/lilo.conf. Entri yang menunjukkan informasi booting ke Slackware adalah:
boot = /dev/hda3 prompt
timeout = 50
vga = 773
image = /boot/vmlinuz
root = /dev/hda3
label = slackware
read-only
Catatan: Informasi tersebut telah disunting dengan tidak menampilkan bagian yang diberi tanda #. Karena entri pada lilo.conf tidak sama dengan entri pada grub.conf, Anda harus membuat entri sendiri pada file /boot/grub/grub.conf dengan nilai-nilai yang disesuaikan dengan entri pada lilo.conf tersebut. Entri tersebut sebagai berikut:
title Slackware
root (hd0,2)
kernel /boot/vmlinuz root=/dev/hda3 vga=773
Letakkan entri tersebut di bawah entri Fedora Core dan Ubuntu, kemudian simpan file /boot/grub/grub.conf tersebut, dan reboot komputer Anda. Sekarang pada menu GRUB telah muncul tiga entri, yaitu Fedora Core, Ubuntu, Ban Slackware.
Sebagai langkah konfigurasi terakhir, pada Ubuntu dan Slackware buatlah direktori /sharing, dan sunting file /etd fstab dengan menambahkan item berikut:
/dev/hda5 /sharing ext3 defaults 0 0
Sekarang, partisi /dev/hda5 bisa digunakan oleh ketiga distro tersebut sehingga bisa difungsikan sebagai media untuk tukar-menukar data. Secara garis besar cara instalasi dan konfigurasi di atas dapat digunakan sebagai panduan untuk kombinasi distro yang berbeda.
Setting Mikrotik dengan Speedy
Sekedar pembelajaran dan koleksi, untuk mengingat langkah-langkah mensetup mikrotik menjadi sebuah router dengan akses Speedy. Tutorial ini dikutip dari forum diskusi mikrotik.Setting mikrotik ternyata sangat simple, walau tidak free seperti linux. Dari segi harga juga tidak begitu mahal seperti windows server.Modem speedy yang digunakan adalah modem ZyXEL Prestige 650R-31 - router, waktu ditanyakan ke telkom, mereka tidak mengakui adanya modem tersebut (hal yang aneh karena dapatnya modem juga dari telkom sendiri?) dan tentunya Mikrotik OS versi 2.9.6
Setting Modem
Melakukan konfigur modem tidak jauh beda dengan melakukan konfigur pada komputer, modem speedy juga include dengan router, dimana fungsinya sebagai pintu keluarnya data atau sebagai media atau sebagai jalur yang harus dilalui oleh computer lain untuk terhubung dengan Internet.
Hal utama harus tahu IP modem tersebut, secara default rata-rata menggunakan IP 192.168.1.1.Tentunya sebelum itu komputer harus sudah dihubungkan dengan modem, melalui cable yang disertakan pada waktu mengambil modem speedy.Kedua Tanyakan password modem.
1. Ketik http://192.168.1.1 pada browser.......isikan user name dan password secara default root/admin password root/admin/1234 (terdapat dalam buku panduan)
2. Setting LAN
Gunakan IP statik, mudahnya jadikan IP Statiknya menjadi 192.168.1.1, jadi semua gateway client harus mengarah ke router agar client bisa konek ke internet.
3. Setting Wan dan Account Speedy
yaitu setting koneksi ke telkom yang menggunakan jalur Wide Area Network, dalam mengakses WAN Telkom akan di butuhkan Account dan Password PPP, masukkan User Accout dan Password yang telah di berikan oleh telkom,sebelum itu rubah password speedy anda di speedy-telkom
4. save configurasi lalu tunggu beberapa saat, modem akan mendial ke server, setelah berhasil maka coba untuk ping ke salah satu site misal nya ke google, jika request berarti setting Modem Plus Router kita sudah benar, kalau belum berhasil coba isikan dns dikomputer dengan dns dari telkom 202.134.1.10/202.134.1.155. Bila di modem ada fasilitas dns, sebaiknya isikan dengan dns telkom,pada use dns jadikan enable
SETUP ROUTER MIKROTIK
* diambil dari Gembel
MikroTik RouterOS™, merupakan system operasi Linux base yang diperuntukkan sebagai network router. Didesain untuk memberikan kemudahan bagi penggunanya. Administrasinya bisa dilakukan melalui Windows application (WinBox). Webbrowser serta via Remote Shell (telnet dan SSH). Selain itu instalasi dapat dilakukan pada Standard computer PC. PC yang akan dijadi kan router mikrotikpun tidak memerlukan resource yang cukup besar untuk penggunaan standard, misalnya hanya sebagai gateway. Untuk keperluan beban yang besar ( network yang kompleks, routing yang rumit dll) disarankan untuk mempertimbangkan pemilihan resource PC yang memadai.
Fasilitas pada mikrotik antara lain sebagai berikut :
- Protokoll routing RIP, OSPF, BGP.
- Statefull firewall
- HotSpot for Plug-and-Play access
- remote winbox GUI admin
Lebih lengkap bisa dilihat di mikrotik
Meskipun demikian Mikrotik bukanlah free software, artinya keharusan membeli licensi terhadap segala fasiltas yang disediakan. Free trial hanya untuk 24 jam saja. Pembelian bisa berbentuk software mikrotik dalam bentuk CD yang diinstall pada Hard disk atau disk on module (DOM).
Bentuk DOM tidak perlu install tetapi tinggal menancapkan DOM pada slot IDE PC kita.
Instalasi Mikrotik ada beberapa cara :
1. Instalasi melalui NetInstall via jaringan
2. Instalasi melalui Floppy disk
3. Instalasi melalui CD-ROM.
Langkah-langkah berikut adalah dasar-dasar setup mikrotik yang dikonfigurasikan untuk jaringan sederhana sebagai PC Router/Gateway, Web Proxy, DNS Server, DHCP, Firewall serta Bandwidth Management. Konfigurasi ini dapat dimanfaatkan untuk membangun jaringan pada
Internet Cafe atau untuk Testing pada Laboratorium Pribadi.
--[2.1]-- Topologi Jaringan
Topologi jaringan ini di anggap koneksi Internetnya melalui MODEM xDSL (ADSL atau SDSL). Dengan catatan konfigurasi IP Publiknya ditanam didalam MODEM, artinya perlu pula dipilih MODEM yang memiliki fasilitas seperti Routing, Firewall, dan lain-lain. Semakin lengkap semakin bagus, namun biasanya harga semakin mahal, yang patut dipertimbangkan pilihlah MODEM yang memiliki fasilitas Firewall yang bagus.
Agar memudahkan konfigurasi, perlu dirancang topologi jaringan yang
dikonfigurasi. Sebagai contoh, skema dibawah ini:
(a) Skema Jaringan
_(
o--+ ____|
| / | Telpon
| _/ -(
+--[_] Splitter
|
| +----+
+---| | Modem xDSL
+--*-+
(1)| +---+
| | | (3)
| | +|---------+
| +-----+ | |. . . . . |
| a| | | +--|-|-|-|-+
+---|=====| | | | | |
| | | | | | |
| |---+ +-|-|-|--[client 1]
| |b +-|-|------------[client 2]
| | +-|----------------------[client 3]
L-----J +--------[client n]
(2)
Keterangan skema
(1) = Modem xDSL (Ip Address : 192.168.1.1/24)
(2) = Mikrotik Box dengan 2 ethernet card yaitu a (publik) dan b (local)
(3) = Switch
Untuk sambungan ke Client. Asumsi Client Jumlahnya 20 Client
Range Ip Address : 192.168.0.0/27
Alokasi Ip Client = 192.168.0.1-192.168.0.30
Ip Net ID : 192.168.0.0/27
Ip Broadcast : 192.168.0.31/27
(b) Alokasi IP Address
[*] Mikrotik Box
Keterangan Skema
a = ethernet card 1 (Publik) -> Ip Address : 192.168.1.2/24
b = ethernet card 2 (Local) -> Ip Address : 192.168.0.1/27
Gateway : 192.168.1.1 (ke Modem)
[*] Client
Client 1 - Client n, Ip Address : 192.168.0.n .... n (1-30)
Contoh:
Client 6
Ip Address : 192.168.0.6/27
Gateway : 192.168.0.1 (ke Mikrotik Box)
CATATAN :
Angka dibelakang Ip address ( /27) sama dengan nilai netmasknya
untuk angka (/27) nilainya sama dengan 255.255.255.224.
Untuk Sub Netmask blok ip address Local kelas C, dapat diuraikan
sebagai berikut :
Subnetmask kelas C
-------------------
255.255.255.0 = 24 -> 254 mesin
.. .128 = 25 -> 128 mesin
.. .192 = 26 -> 64 mesin
.. .224 = 27 -> 32 mesin
.. .240 = 28 -> 16 mesin
.. .248 = 29 -> 8 mesin
.. .252 = 30 -> 4 mesin
.. .254 = 31 -> 2 mesin
.. .255 = 32 -> 1 mesin
--[2.2]-- Persiapan
- Untuk PC Router Siapkan PC, minimal Pentium I, RAM 64, HD 500M atau pake flash memory 64 - Sebagai Web proxy, Siapkan PC, minimal Pentium III 450Mhz, RAM 256 Mb, HD 20 Gb. Melihat berapa minimum RAM dan HD yang dibutuhkan untuk Cache Silahkan lihat
http://adminpreman.web.id/download/Rumus Web Proxy Mikrotik.xls
- Siapkan minimal 2 ethernet card, 1 ke arah luar/Internet dan 1
lagi ke Network local
– Burn Source CD Mikrotik OS masukan ke CDROM.
- Versi mikrotik yang digunakan adalah Mikrotik RouterOS versi 2.9.6
--[3]-- Installasi Mikrotik Router
Setelah desain skema jaringan serta perangkat yang dibutuhkan telah
disiapkan, sekarang saatnya kita mulai proses instalasi ini.
--[3.1]-- Booting melalui CD-ROM
Atur di BIOS agar, supaya boot lewat CD-ROM, kemudian tunggu beberapa
saat di monitor akan muncul proses Instalasi.
-------------------------------------------------------------------------
ISOLINUX 2.08 2003-12-12 Copyrigth (C) 1994-2003 H. Peter Anvin
Loading linux..................
Loading initrd.rgz.............
Ready
Uncompressing Linux... Ok, booting the kernel
------------------------------------------------------------------------
--[3.2]-- Memilih paket software
Setelah proses booting akan muncul menu pilihan software yang
mau di install, pilih sesuai kebutuhan yang akan direncanakan.
Paket yang tersedia di Mikrotik
advanced-tools-2.9.27.npk
arlan-2.9.27.npk
dhcp-2.9.27.npk
gps-2.9.27.npk
hotspot-2.9.27.npk
hotspot-fix-2.9.27.npk
isdn-2.9.27.npk
lcd-2.9.27.npk
ntp-2.9.27.npk
ppp-2.9.27.npk
radiolan-2.9.27.npk
routerboard-2.9.27.npk
routing-2.9.27.npk
routing-test-2.9.27.npk
rstp-bridge-test-2.9.27.npk
security-2.9.27.npk
synchronous-2.9.27.npk
system-2.9.27.npk
telephony-2.9.27.npk
ups-2.9.27.npk
user-manager-2.9.27.npk
web-proxy-2.9.27.npk
webproxy-test-2.9.27.npk
wireless-2.9.27.npk
wireless-legacy-2.9.27.npk
--------------------------------------------------------------------------
Welcome to Mikrotik Router Software Installation
Move around menu using 'p' and 'n' or arrow keys, select with 'spacebar'.
Select all with 'a', minimum with 'm'. Press 'i' to install locally or 'r' to
install remote router or 'q' to cancel and reboot.
[X] system [ ] lcd [ ] telephony
[ ] ppp [ ] ntp [ ] ups
[ ] dhcp [ ] radiolan [ ] user-manager
[X] andvanced-tools [ ] routerboard [X] web-proxy
[ ] arlan [ ] routing [ ] webproxy-test
[ ] gps [ ] routing-test [ ] wireless
[ ] hotspot [ ] rstp-bridge-test [ ] wireless-legacy
[ ] hotspot [X] security
[ ] isdn [ ] synchronous
--------------------------------------------------------------------------
Umumnya Paket Mikrotik untuk Warnet, Kantor atau SOHO adalah :
a. SYSTEM : Paket ini merupakan paket dasar, berisi Kernel dariMikrotik
b. DHCP : Paket yang berisi fasilitas sebagai DHCP Server, DHCP client, pastikan memilih paket ini jika Anda menginginkanagar Client diberikan IP address otomatis dari DHCP Server
c. SECURITY : Paket ini berisikan fasilitas yang mengutamakan Keamananjaringan, seperti Remote Mesin dengan SSH, Remote via MACAddress
d. WEB-PROXY : Jika Anda memilih paket ini, maka Mikrotik Box anda telahdapat menjalan service sebagai Web proxy yang akan menyimpan cache agar traffik ke Internet dapat di reduksi serta browsing untuk Web dapat dipercepat.
e. ADVANCED TOOLS : Paket yang berisi Tool didalam melakukan Admnistrasi jaringan, seperti Bandwidth meter, Scanning, Nslookup, dan lain sebagainya.
--[3.3]-- Instalasi Paket
ketik "i" setelah selesai memilih software, lalu akan muncul menu
pilihan seperti ini :
- Do you want to keep old configuration ? [y/n] ketik Y
- continue ? [y/n] ketik Y
Setelah itu proses installasi system dimulai, disini kita tidak
perlu membuat partisi hardsik karena secara otomatis mikrotik akan
membuat partisi sendiri.
----------------------------------------------------------------------------
wireless-legacy (depens on system):
Provides support for Cisco Aironet cards and for PrismlI and Atheros wireless
station and AP.
Do you want to keep old configuraion? [y/n]:y
Warning: all data on the disk will be erased!
Continue? [y/n]:y
Creating partition..........
Formatting disk.......................................
Installing system-2.9.27 [################## ]
---------------------------------------------------------------------------
Proses installasi
---------------------------------------------------------------------------
Continue? [y/n]:y
Creating partition.......................
Formatting disk............................
Installed system-2.9.27
Installed advanced-tools-2.9.27
Installed dhcp-2.9.27
Installed security-2.9.27
installed web-proxy-2.9.27
Software installed.
Press ENTER to reboot
------------------------------------------------------------------------------
CATATAN :
Proses Installasi normalnya tidak sampai 15 menit, jika lebih berarti gagal,ulangi ke step awal. Setelah proses installasi selesai maka kita akan diminta untuk merestart system, tekan enter untuk merestart system.
--[3.5]-- Proses Check system disk
Setelah komputer booting kembali ke system mikrotik, akan ada pilihan untuk
melakukan check system disk, tekan "y".
----------------------------------------------------------------------------
Loading system with initrd
Uncompressing Linux... Ok, booting the kernel.
Starting.
It is recomended to check your disk drive for error,
but it may take while (~1min for 1Gb).
It can be done later with "/system check-disk".
Do you want to do it now? [y/n]
-----------------------------------------------------------------------------
--[3.6]-- Proses Instalasi Selesai
Setelah proses instalasi selesai, maka akan muncul menu login dalam modus
terminal, kondisi sistem saat ini dalam keadaan default.
Mikrotik login = admin
Password = (kosong, enter saja)
---------------------------------------------------------------------------
Mikrotik 2.9.6
Mikrotik Login:
MMM MMM KKK TTTTTTTTTTT KKK
MMMM MMMM KKK TTTTTTTTTTT KKK
MMM MMMM MMM III KKK KKK RRRRRR OOOOOO TTT III KKK KKK
MMM MM MMM III KKKKK RRR RRR OOO OOO TTT III KKKKK
MMM MMM III KKK KKK RRRRRR OOO OOO TTT III KKK KKK
MMM MMM III KKK KKK RRR RRR OOOOOO TTT III KKK KKK
MikroTik RouterOS 2.9.6 (c) 1999-2005 http://www.mikrotik.com/
Terminal vt102 detected, using multiline input mode
[admin@Mikrotikl] >
----------------------------------------------------------------------------
CATATAN :
Konfigurasi Standar untuk mikrotik ada 2 modus, yaitu modus teks dan
modus GUI. Modus Gui ada 2 juga, yaitu Via Browser serta Via Winbox.
--[4]-- Perintah Dasar
Perintah mikrotik sebenarnya hampir sama dengan perintah yang ada dilinux,sebab pada dasarnya mikrotik ini merupakan kernel Linux, hasil pengolahan kembali Linux dari Distribusi Debian. Pemakaian perintah shellnya sama, seperti penghematan perintah, cukup menggunakan tombol TAB di keyboard maka perintah yang panjang, tidak perlu lagi diketikkan, hanya ketikkan
awal nama perintahnya, nanti secara otomatis Shell akan menampilkan sendiri perintah yang berkenaan. Misalnya perintah IP ADDRESS di mikrotik. Cukup hanya mengetikkan IP ADD spasi tekan tombol TAB, maka otomatis shell akan mengenali dan menterjemahkan sebagai perintah IP ADDRESS.
Setelah login, cek kondisi interface atau ethernet card.
--[4.1]-- Melihat kondisi interface pada Mikrotik Router
[admin@Mikrotik] > interface print
Flags: X - disabled, D - dynamic, R - running
# NAME TYPE RX-RATE TX-RATE MTU
0 R ether1 ether 0 0 1500
1 R ether2 ether 0 0 1500
[admin@Mikrotik]>
Jika interfacenya ada tanda X (disabled) setelah nomor (0,1), maka periksa lagi
etherned cardnya, seharusnya R (running).
a. Mengganti nama interface
[admin@Mikrotik] > interface(enter)
b. Untuk mengganti nama Interface ether1 menjadi Public (atau terserah namanya), maka
[admin@Mikrotik] interface> set 0 name=Public
c. Begitu juga untuk ether2, misalkan namanya diganti menjadi Local, maka
[admin@Mikrotik] interface> set 1 name=Local
d. atau langsung saja dari posisi root direktori, memakai tanda "/", tanpa tanda kutip
[admin@Mikrotik] > /interface set 0 name=Public
e. Cek lagi apakah nama interface sudah diganti.
[admin@Mikrotik] > /interface print
Flags: X - disabled, D - dynamic, R - running
# NAME TYPE RX-RATE TX-RATE MTU
0 R Local ether 0 0 1500
1 R Public ether 0 0 1500
--[4.2]-- Mengganti password default
Untuk keamanan ganti password default
[admin@Mikrotik] > password
old password: *****
new password: *****
retype new password: *****
[admin@ Mikrotik]]>
--[4.3]-- Mengganti nama hostname
Mengganti nama Mikrotik Router untuk memudahkan konfigurasi, pada langkah ini
nama server akan diganti menjadi “routerku"
[admin@Mikrotik] > system identity set name=routerku
[admin@routerku]>
--[5]-- Setting IP Address, Gateway, Masqureade dan Name Server
--[5.1]-- IP Address
Bentuk Perintah konfigurasi
ip address add address ={ip address/netmask} interface={nama interface}
a. Memberikan IP address pada interface Mikrotik. Misalkan Public akan kita gunakan untuk
koneksi ke Internet dengan IP 192.168.1.2 dan Local akan kita gunakan untuk network LAN
kita dengan IP 192.168.0.1 (Lihat topologi)
[admin@routerku] > ip address add address=192.168.1.2
netmask=255.255.255.0 interface=Public comment="IP ke Internet"
[admin@routerku] > ip address add address=192.168.0.1
netmask=255.255.255.224 interface=Local comment = "IP ke LAN"
b. Melihat konfigurasi IP address yang sudah kita berikan
[admin@routerku] >ip address print
Flags: X - disabled, I - invalid, D - dynamic
# ADDRESS NETWORK BROADCAST INTERFACE
0 ;;; IP Address ke Internet
192.168.0.1/27 192.168.0.0 192.168.0.255 Local
1 ;;; IP Address ke LAN
192.168.1.2/24 192.168.0.0 192.168.1.255 Public
[admin@routerku]>
--[5.2]-- Gateway
Bentuk Perintah Konfigurasi
ip route add gateway={ip gateway}
a. Memberikan default Gateway, diasumsikan gateway untuk koneksi internet adalah
192.168.1.1
[admin@routerku] > /ip route add gateway=192.168.1.1
b. Melihat Tabel routing pada Mikrotik Routers
[admin@routerku] > ip route print
Flags: X - disabled, A - active, D - dynamic,
C - connect, S - static, r - rip, b - bgp, o - ospf
# DST-ADDRESS PREFSRC G GATEWAY DISTANCE INTERFACE
0 ADC 192.168.0.0/24 192.168.0.30 Local
1 ADC 192.168.0.0/27 192.168.1.2 Public
2 A S 0.0.0.0/0 r 192.168.1.1 Public
[admin@routerku]>
c. Tes Ping ke Gateway untuk memastikan konfigurasi sudah benar
[admin@routerku] > ping 192.168.1.1
192.168.1.1 64 byte ping: ttl=64 time<1 ms
2 packets transmitted, 2 packets received, 0% packet loss
round-trip min/avg/max = 0/0.0/0 ms
[admin@routerku]>
--[5.3]-- NAT (Network Address Translation)
Bentuk Perintah Konfigurasi
ip firewall nat add chain=srcnat action=masquerade out-inteface={ethernet
yang langsung terhubung ke Internet atau Public}
a. Setup Masquerading, Jika Mikrotik akan kita pergunakan sebagai gateway server maka agar
client computer pada network dapat terkoneksi ke internet perlu kita masquerading.
[admin@routerku] > ip firewall nat add chain=scrnat out-interface=Public action=masquerade
[admin@routerku]>
b. Melihat konfigurasi Masquerading
[admin@routerku] ip firewall nat print
Flags: X - disabled, I - invalid, D - dynamic
0 chain=srcnat out-interface=Public action=masquerade
[admin@routerku]>
--[5.4] Name server
Bentuk Perintah Konfigurasi
ip dns set primary-dns={dns utama} secondary-dns={dns ke dua}
a. Setup DNS pada Mikrotik Routers, misalkan DNS dengan Ip Addressnya
Primary = 202.134.0.155, Secondary = 202.134.2.5
[admin@routerku] > ip dns set primary-dns=202.134.0.155 allow-remoterequests=yes
[admin@routerku] > ip dns set secondary-dns=202.134.2.5 allow-remoterequests=yes
b. Melihat konfigurasi DNS
[admin@routerku] > ip dns print
primary-dns: 202.134.0.155
secondary-dns: 202.134.2.5
allow-remote-requests: no
cache-size: 2048KiB
cache-max-ttl: 1w
cache-used: 16KiB
[admin@routerku]>
c. Tes untuk akses domain, misalnya dengan ping nama domain
[admin@routerku] > ping yahoo.com
216.109.112.135 64 byte ping: ttl=48 time=250 ms
10 packets transmitted, 10 packets received, 0% packet loss
round-trip min/avg/max = 571/571.0/571 ms
[admin@routerku]>
Jika sudah berhasil reply berarti seting DNS sudah benar.
Setelah langkah ini bisa dilakukan pemeriksaan untuk koneksi dari jaringan local. Dan jika
berhasil berarti kita sudah berhasil melakukan instalasi Mikrotik Router sebagai Gateway
server. Setelah terkoneksi dengan jaringan Mikrotik dapat dimanage menggunakan WinBox yang
bisa di download dari Mikrotik.com atau dari server mikrotik kita. Misal Ip address server
mikrotik kita 192.168.0.30, via browser buka http://192.168.0.30. Di Browser akan ditampilkan
dalam bentuk web dengan beberapa menu, cari tulisan Download dan download WinBox dari situ.
Simpan di local harddisk. Jalankan Winbox, masukkan Ip address, username dan password.
--[7]-- DHCP Server
DHCP merupakan singkatan dari Dynamic Host Configuration Protocol, yaitu suatu program yang
memungkinkan pengaturan IP Address di dalam sebuah jaringan dilakukan terpusat di server,
sehingga PC Client tidak perlu melakukan konfigurasi IP Addres. DHCP memudahkan administrator
untuk melakukan pengalamatan ip address untuk client.
Bentuk perintah konfigurasi
ip dhcp-server setup
dhcp server interface = { interface yang digunakan }
dhcp server space = { network yang akan di dhcp }
gateway for dhcp network = { ip gateway }
address to give out = { range ip address }
dns servers = { name server }
lease time = { waktu sewa yang diberikan }
Jika kita menginginkan client mendapatkan IP address secara otomatis maka perlu kita setup
dhcp server pada Mikrotik. Berikut langkah-langkahnya :
a. Tambahkan IP address pool
/ip pool add name=dhcp-pool ranges=192.168.0.1-192.168.0.30
b. Tambahkan DHCP Network dan gatewaynya yang akan didistribusikan ke client.
Pada contoh ini networknya adalah 192.168.0.0/27 dan gatewaynya 122.168.0.1
/ip dhcp-server network add address=192.168.0.0/27 gateway=192.168.0.1 dns-server=192.168.0.1
comment=""
c. Tambahkan DHCP Server ( pada contoh ini dhcp diterapkan pada interface Local )
/ip dhcp-server add interface=local address-pool=dhcp-pool
d. Lihat status DHCP server
[admin@routerku] > ip dhcp-server print
Flags: X - disabled, I - invalid
# NAME INTERFACE RELAY ADDRESS-POOL LEASE-TIME ADD-ARP
0dhcp1 Local
Tanda X menyatakan bahwa DHCP server belum enable maka perlu dienablekan terlebih
dahulu pada langkah e.
e. Jangan Lupa dibuat enable dulu dhcp servernya
/ip dhcp-server enable 0
kemudian cek kembali dhcp-server seperti langkah 4, jika tanda X sudah tidak ada berarti
sudah aktif
f. Tes Dari client
Misalnya :
D:>ping www.yahoo.com
--[8]-- Transparent Proxy Server
Proxy server merupakan program yang dapat mempercepat akses ke suatu web yang sudah diakses oleh komputer lain, karena sudah di simpan didalam caching server.Transparent proxy menguntungkan dalam management client,karena system administrator tidak perlu lagi melakukan setup proxy di setiap browser komputer client karena redirection dilakukan otomatis di sisi server.
Bentuk perintah konfigurasi :
a. Setting web proxy :
- ip proxy set enable=yes
port={ port yang mau digunakan }
maximal-client-connections=1000
maximal-server-connections=1000
- ip proxy direct add src-address={ network yang akan di
NAT} action=allow
- ip web-proxy set parent-proxy={proxy parent/optional}
hostname={ nama host untuk proxy/optional}
port={port yang mau digunakan}
src-address={ address yang akan digunakan untuk koneksi
ke parent proxy/default 0.0.0.0}
transparent-proxy=yes
max-object-size={ ukuran maximal file yang akan disimpan
sebagai cache/default 4096 in Kilobytes}
max-cache-size= { ukuran maximal hardisk yang akan
dipakai sebagai penyimpan file cache/unlimited
| none | 12 in megabytes}
cache-administrator={ email administrator yang akan digunakan
apabila proxy error, status akan dikirim
ke email tersebut}
enable==yes
Contoh konfigurasi
-------------------
a. Web proxy setting
/ ip web-proxy
set enabled=yes src-address=0.0.0.0 port=8080
hostname="proxy.routerku.co.id" transparent-proxy=yes
parent-proxy=0.0.0.0:0 cache-administrator="support@routerku.co.id"
max-object-size=131072KiB cache-drive=system max-cache-size=unlimited
max-ram-cache-size=unlimited
Nat Redirect, perlu ditambahkan yaitu rule REDIRECTING untuk membelokkan
traffic HTTP menuju ke WEB-PROXY.
b. Setting firewall untuk Transparant Proxy
Bentuk perintah konfigurasi :
ip firewall nat add chain=dstnat
protocol=tcp
dst-port=80
action=redirect
to-ports={ port proxy }
Perintahnya:
--------------------------------------------------------------------------------
/ ip firewall nat
add chain=dstnat protocol=tcp dst-port=80 action=redirect to-ports=8080
comment="" disabled=no
add chain=dstnat protocol=tcp dst-port=3128 action=redirect to-ports=8080
comment="" disabled=no
add chain=dstnat protocol=tcp dst-port=8000 action=redirect to-ports=8080
--------------------------------------------------------------------------------
perintah diatas dimaksudkan, agar semua trafik yang menuju Port 80,3128,8000
dibelokkan menuju port 8080 yaitu portnya Web-Proxy.
CATATAN:
Perintah
/ip web-proxy print { untuk melihat hasil konfigurasi web-proxy}
/ip web-proxy monitor { untuk monitoring kerja web-proxy}
--[9]-- Bandwidth Management
QoS memegang peranan sangat penting dalam hal memberikan pelayanan yang baik pada client. Untuk itu kita memerlukan bandwidth management untuk mengatur tiap data yang lewat, sehingga pembagian bandwidth menjadi adil. Dalam hal ini Mikrotik RouterOs juga menyertakan packet software untuk memanagement bandwidth.
Bentuk perintah konfigurasi:
queue simple add name={ nama }
target-addresses={ ip address yang dituju }
interface={ interface yang digunakan untuk melewati data }
max-limit={ out/in }
Dibawah ini terdapat konfigurasi Trafik shaping atau bandwidth management dengan metode Simple Queue, sesuai namanya, Jenis Queue ini memang sederhana, namun memiliki kelemahan, kadangkala terjadi kebocoran bandwidth atau bandwidthnya tidak secara real di monitor. Pemakaian untuk 10 Client, Queue jenis ini tidak masalah.
Diasumsikan Client ada sebanyak 15 client, dan masing-masing client diberi jatah bandwidth minimum sebanyak 8kbps, dan maksimum 48kbps. Sedangkan Bandwidth totalnya sebanyak 192kbps. Untuk upstream tidak diberi rule, berarti masing-masing client dapat menggunakan bandwidth uptream secara maksimum. Perhatikan perintah priority, range priority di Mikrotik sebanyak delapan. Berarti dari 1 sampai 8, priority 1 adalah priority tertinggi, sedangkan priority 8 merupakan priority terendah.
Berikut Contoh kongirufasinya.
--------------------------------------------------------------------------------
/ queue simple
add name="trafikshaping" target-addresses=192.168.0.0/27 dst-address=0.0.0.0/0
interface=all parent=none priority=1 queue=default/default
limit-at=0/64000 max-limit=0/192000 total-queue=default disabled=no
add name="01" target-addresses=192.168.0.1/32 dst-address=0.0.0.0/0
interface=all parent=trafikshaping priority=1 queue=default/default
limit-at=0/8000 max-limit=0/48000 total-queue=default disabled=no
add name="02" target-addresses=192.168.0.2/32 dst-address=0.0.0.0/0
interface=all parent=trafikshaping priority=1 queue=default/default
limit-at=0/8000 max-limit=0/48000 total-queue=default disabled=no
add name="03" target-addresses=192.168.0.3/32 dst-address=0.0.0.0/0
interface=all parent=trafikshaping priority=1 queue=default/default
limit-at=0/8000 max-limit=0/48000 total-queue=default disabled=no
add name="04" target-addresses=192.168.0.4/32 dst-address=0.0.0.0/0
interface=all parent=trafikshaping priority=1 queue=default/default
limit-at=0/8000 max-limit=0/48000 total-queue=default disabled=no
add name="10" target-addresses=192.168.0.25/32 dst-address=0.0.0.0/0
interface=all parent=trafikshaping priority=1 queue=default/default
limit-at=0/8000 max-limit=0/48000 total-queue=default disabled=no
add name="05" target-addresses=192.168.0.5/32 dst-address=0.0.0.0/0
interface=all parent=trafikshaping priority=1 queue=default/default
limit-at=0/8000 max-limit=0/48000 total-queue=default disabled=no
add name="06" target-addresses=192.168.0.6/32 dst-address=0.0.0.0/0
interface=all parent=trafikshaping priority=1 queue=default/default
limit-at=0/8000 max-limit=0/48000 total-queue=default disabled=no
add name="07" target-addresses=192.168.0.7/32 dst-address=0.0.0.0/0
interface=all parent=trafikshaping priority=1 queue=default/default
limit-at=0/8000 max-limit=0/48000 total-queue=default disabled=no
add name="08" target-addresses=192.168.0.8/32 dst-address=0.0.0.0/0
interface=all parent=trafikshaping priority=1 queue=default/default
limit-at=0/8000 max-limit=0/48000 total-queue=default disabled=no
add name="09" target-addresses=192.168.0.9/32 dst-address=0.0.0.0/0
interface=all parent=trafikshaping priority=1 queue=default/default
limit-at=0/8000 max-limit=0/48000 total-queue=default disabled=no
add name="10" target-addresses=192.168.0.10/32 dst-address=0.0.0.0/0
interface=all parent=trafikshaping priority=1 queue=default/default
limit-at=0/8000 max-limit=0/48000 total-queue=default disabled=no
add name="11" target-addresses=192.168.0.11/32 dst-address=0.0.0.0/0
interface=all parent=trafikshaping priority=1 queue=default/default
limit-at=0/8000 max-limit=0/48000 total-queue=default disabled=no
add name="12" target-addresses=192.168.0.12/32 dst-address=0.0.0.0/0
interface=all parent=trafikshaping priority=1 queue=default/default
limit-at=0/8000 max-limit=0/48000 total-queue=default disabled=no
add name="13" target-addresses=192.168.0.13/32 dst-address=0.0.0.0/0
interface=all parent=trafikshaping priority=1 queue=default/default
limit-at=0/8000 max-limit=0/48000 total-queue=default disabled=no
add name="14" target-addresses=192.168.0.14/32 dst-address=0.0.0.0/0
interface=all parent=trafikshaping priority=1 queue=default/default
limit-at=0/8000 max-limit=0/48000 total-queue=default disabled=no
add name="15" target-addresses=192.168.0.15/32 dst-address=0.0.0.0/0
interface=all parent=trafikshaping priority=1 queue=default/default
limit-at=0/8000 max-limit=0/48000 total-queue=default disabled=no
Perintah diatas karena dalam bentuk command line, bisa juga di copy paste, selanjutnya di paste saja ke consol mikrotiknya. ingat lihat dulu path atau direktory aktif. Silahkan dipaste saja, kalau posisi direktorynya di Root.
-------------------------------------------------------------------
Terminal vt102 detected, using multiline input mode
[admin@mikrotik] >
------------------------------------------------------------------
Pilihan lain metode bandwidth manajemen ini, kalau seandainya ingin bandwidth tersebut dibagi sama rata oleh Mikrotik, seperti bandwidth 256kbps downstream dan 256kbps upstream. Sedangkan client yang akan mengakses sebanyak 10 client, maka otomatis masing-masing client mendapat jatah bandwidth upstream dan downstream sebanyak 256kbps dibagi 10. Jadi masing-masing dapat 25,6kbps. Andaikata hanya 2 Client yang mengakses maka masing-masing dapat 128kbps.
Untuk itu dipakai type PCQ (Per Connection Queue), yang bisa secara otomatis membagi trafik per client. Tentang jenis queue di mikrotik ini dapat dibaca pada manualnya di http://www.mikrotik.com/testdocs/ros/2.9/root/queue.php.
Sebelumnya perlu dibuat aturan di bagian MANGLE. Seperti :
--------------------------------------------------------------------
/ip firewall mangle add chain=forward src-address=192.168.0.0/27
action=mark-connection new-connection-mark=users-con
/ip firewall mangle add connection-mark=users-con action=mark-packet
new-packet-mark=users chain=forward
----------------------------------------------------------------------
Karena type PCQ belum ada, maka perlu ditambah, ada 2 type PCQ ini.
Pertama diberi nama pcq-download, yang akan mengatur semua trafik
melalui alamat tujuan/destination address. Trafik ini melewati
interface Local. Sehingga semua traffik download/downstream yang
datang dari jaringan 192.168.0.0/27 akan dibagi secara otomatis.
Tipe PCQ kedua, dinamakan pcq-upload, untuk mengatur semua trafik upstream
yang berasal dari alamat asal/source address. Trafik ini melewati
interface public. Sehingga semua traffik upload/upstream yang berasal
dari jaringan 192.168.0.0/27 akan dibagi secara otomatis.
Perintah:
-------------------------------------------------------------------------
/queue type add name=pcq-download kind=pcq pcq-classifier=dst-address
/queue type add name=pcq-upload kind=pcq pcq-classifier=src-address
-------------------------------------------------------------------------
Setelah aturan untuk PCQ dan Mangle ditambahkan, sekarang untuk aturan
pembagian trafiknya. Queue yang dipakai adalah Queue Tree, Yaitu:
-------------------------------------------------------------------------
/queue tree add parent=Local queue=pcq-download packet-mark=users
/queue tree add parent=Public queue=pcq-upload packet-mark=users
-------------------------------------------------------------------------
Perintah diatas mengasumsikan, kalau bandwidth yang diterima dari provider
Internet berflukstuasi atau berubah-rubah. Jika kita yakin bahwa bandwidth
yang diterima, misalkan dapat 256kbs downstream, dan 256kbps upstream, maka
ada lagi aturannya, seperti :
Untuk trafik downstreamnya :
------------------------------------------------------------------------
/queue tree add name=Download parent=Local max-limit=256k
/queue tree add parent=Download queue=pcq-download packet-mark=users
-------------------------------------------------------------------------
Dan trafik upstreamnya :
---------------------------------------------------------------------------
/queue tree add name=Upload parent=Public max-limit=256k
/queue tree add parent=Upload queue=pcq-upload packet-mark=users
---------------------------------------------------------------------------
--[10]-- Monitor MRTG via Web
Fasilitas ini diperlukan untuk monitoring trafik dalam bentuk grafik, dapat
dilihat dengan menggunakan browser. MRTG (The Multi Router Traffic Grapher)
telah dibuild sedemikian rupa, sehingga memudahkan kita memakainya. Telah
tersedia dipaket dasarnya.
Contoh konfigurasinya
-------------------------------------------------------------------------
/ tool graphing
set store-every=5min
/ tool graphing interface
add interface=all allow-address=0.0.0.0/0 store-on-disk=yes disabled=no
---------------------------------------------------------------------------
Perintah diatas akan menampilkan grafik dari trafik yang melewati interface
jaringan baik berupa Interface Public dan Interface Local, yang dirender
setiap 5 menit sekali. Juga dapat diatur Alamat apa saja yang dapat mengakses
MRTG ini, pada parameter allow-address.
--[11]-- Keamanan di Mikrotik
Setelah beberapa Konfigurasi diatas telah disiapkan, tentu tidak lupa kita
perhatikan keamanan dari Mesin gateway Mikrotik ini, ada beberapa fasilitas
yang dipergunakan. Dalam hal ini akan dibahas tentang Firewallnya. Fasilitas
Firewall ini secara pringsip serupa dengan IP TABLES di Gnu/Linux hanya saja
beberapa perintah telah di sederhanakan namun berdaya guna.
Di Mikrotik perintah firewall ini terdapat dalam modus IP, yaitu
[admin@routerku] > /ip firewall
Terdapat beberapa packet filter seperti mangle, nat, dan filter.
-------------------------------------------------------------------------
[admin@routerku] ip firewall> ?
Firewall allows IP packet filtering on per packet basis.
.. -- go up to ip
mangle/ -- The packet marking management
nat/ -- Network Address Translation
connection/ -- Active connections
filter/ -- Firewall filters
address-list/ --
service-port/ -- Service port management
export --
--------------------------------------------------------------------------
Untuk kali ini kita akan lihat konfigurasi pada ip firewall filternya.
Karena Luasnya parameter dari firewall filter ini untuk pembahasan Firewall
Filter selengkapnya dapat dilihat pada manual mikrotik, di
http://www.mikrotik.com/testdocs/ros/2.9/ip/filter.php
Konfigurasi dibawah ini dapat memblokir beberapa Trojan, Virus, Backdoor
yang telah dikenali sebelumnya baik Nomor Port yang dipakai serta Protokolnya.
Juga telah di konfigurasikan untuk menahan Flooding dari Jaringan Publik dan
jaringan Lokal. Serta pemberian rule untuk Access control agar, Rentang
jaringan tertentu saja yang bisa melakukan Remote atau mengakses service
tertentu terhadap Mesin Mikrotik kita.
Contoh Aplikasi Filternya
-----------------------------------------------------------------------------
/ ip firewall filter
add chain=input connection-state=invalid action=drop comment="Drop Invalid
connections" disabled=no
add chain=input src-address=!192.168.0.0/27 protocol=tcp src-port=1024-65535
dst-port=8080 action=drop comment="Block to Proxy" disabled=no
add chain=input protocol=udp dst-port=12667 action=drop comment="Trinoo"
disabled=no
add chain=input protocol=udp dst-port=27665 action=drop comment="Trinoo"
disabled=no
add chain=input protocol=udp dst-port=31335 action=drop comment="Trinoo"
disabled=no
add chain=input protocol=udp dst-port=27444 action=drop comment="Trinoo"
disabled=no
add chain=input protocol=udp dst-port=34555 action=drop comment="Trinoo"
disabled=no
add chain=input protocol=udp dst-port=35555 action=drop comment="Trinoo"
disabled=no
add chain=input protocol=tcp dst-port=27444 action=drop comment="Trinoo"
disabled=no
add chain=input protocol=tcp dst-port=27665 action=drop comment="Trinoo"
disabled=no
add chain=input protocol=tcp dst-port=31335 action=drop comment="Trinoo"
disabled=no
add chain=input protocol=tcp dst-port=31846 action=drop comment="Trinoo"
disabled=no
add chain=input protocol=tcp dst-port=34555 action=drop comment="Trinoo"
disabled=no
add chain=input protocol=tcp dst-port=35555 action=drop comment="Trinoo"
disabled=no
add chain=input connection-state=established action=accept comment="Allow
Established connections" disabled=no
add chain=input protocol=udp action=accept comment="Allow UDP" disabled=no
add chain=input protocol=icmp action=accept comment="Allow ICMP" disabled=no
add chain=input src-address=192.168.0.0/27 action=accept comment="Allow access
to router from known network" disabled=no
add chain=input action=drop comment="Drop anything else" disabled=no
add chain=forward protocol=tcp connection-state=invalid action=drop
comment="drop invalid connections" disabled=no
add chain=forward connection-state=established action=accept comment="allow
already established connections" disabled=no
add chain=forward connection-state=related action=accept comment="allow
related connections" disabled=no
add chain=forward src-address=0.0.0.0/8 action=drop comment="" disabled=no
add chain=forward dst-address=0.0.0.0/8 action=drop comment="" disabled=no
add chain=forward src-address=127.0.0.0/8 action=drop comment="" disabled=no
add chain=forward dst-address=127.0.0.0/8 action=drop comment="" disabled=no
add chain=forward src-address=224.0.0.0/3 action=drop comment="" disabled=no
add chain=forward dst-address=224.0.0.0/3 action=drop comment="" disabled=no
add chain=forward protocol=tcp action=jump jump-target=tcp comment=""
disabled=no
add chain=forward protocol=udp action=jump jump-target=udp comment=""
disabled=no
add chain=forward protocol=icmp action=jump jump-target=icmp comment=""
disabled=no
add chain=tcp protocol=tcp dst-port=69 action=drop comment="deny TFTP"
disabled=no
add chain=tcp protocol=tcp dst-port=111 action=drop comment="deny RPC
portmapper" disabled=no
add chain=tcp protocol=tcp dst-port=135 action=drop comment="deny RPC
portmapper" disabled=no
add chain=tcp protocol=tcp dst-port=137-139 action=drop comment="deny NBT"
disabled=no
add chain=tcp protocol=tcp dst-port=445 action=drop comment="deny cifs"
disabled=no
add chain=tcp protocol=tcp dst-port=2049 action=drop comment="deny NFS"
disabled=no
add chain=tcp protocol=tcp dst-port=12345-12346 action=drop comment="deny
NetBus" disabled=no
add chain=tcp protocol=tcp dst-port=20034 action=drop comment="deny NetBus"
disabled=no
add chain=tcp protocol=tcp dst-port=3133 action=drop comment="deny
BackOriffice" disabled=no
add chain=tcp protocol=tcp dst-port=67-68 action=drop comment="deny DHCP"
disabled=no
add chain=udp protocol=udp dst-port=69 action=drop comment="deny TFTP"
disabled=no
add chain=udp protocol=udp dst-port=111 action=drop comment="deny PRC
portmapper" disabled=no
add chain=udp protocol=udp dst-port=135 action=drop comment="deny PRC
portmapper" disabled=no
add chain=udp protocol=udp dst-port=137-139 action=drop comment="deny NBT"
disabled=no
add chain=udp protocol=udp dst-port=2049 action=drop comment="deny NFS"
disabled=no
add chain=udp protocol=udp dst-port=3133 action=drop comment="deny
BackOriffice" disabled=no
add chain=input protocol=tcp psd=21,3s,3,1 action=add-src-to-address-list
address-list="port scanners" address-list-timeout=2w comment="Port
scanners to list " disabled=no
add chain=input protocol=tcp tcp-flags=fin,!syn,!rst,!psh,!ack,!urg
action=add-src-to-address-list address-list="port scanners"
address-list-timeout=2w comment="NMAP FIN Stealth scan" disabled=no
add chain=input protocol=tcp tcp-flags=fin,syn action=add-src-to-address-list
address-list="port scanners" address-list-timeout=2w comment="SYN/FIN
scan" disabled=no
add chain=input protocol=tcp tcp-flags=syn,rst action=add-src-to-address-list
address-list="port scanners" address-list-timeout=2w comment="SYN/RST
scan" disabled=no
add chain=input protocol=tcp tcp-flags=fin,psh,urg,!syn,!rst,!ack
action=add-src-to-address-list address-list="port scanners"
address-list-timeout=2w comment="FIN/PSH/URG scan" disabled=no
add chain=input protocol=tcp tcp-flags=fin,syn,rst,psh,ack,urg
action=add-src-to-address-list address-list="port scanners"
address-list-timeout=2w comment="ALL/ALL scan" disabled=no
add chain=input protocol=tcp tcp-flags=!fin,!syn,!rst,!psh,!ack,!urg
action=add-src-to-address-list address-list="port scanners"
address-list-timeout=2w comment="NMAP NULL scan" disabled=no
add chain=input src-address-list="port scanners" action=drop comment="dropping
port scanners" disabled=no
add chain=icmp protocol=icmp icmp-options=0:0 action=accept comment="drop
invalid connections" disabled=no
add chain=icmp protocol=icmp icmp-options=3:0 action=accept comment="allow
established connections" disabled=no
add chain=icmp protocol=icmp icmp-options=3:1 action=accept comment="allow
already established connections" disabled=no
add chain=icmp protocol=icmp icmp-options=4:0 action=accept comment="allow
source quench" disabled=no
add chain=icmp protocol=icmp icmp-options=8:0 action=accept comment="allow
echo request" disabled=no
add chain=icmp protocol=icmp icmp-options=11:0 action=accept comment="allow
time exceed" disabled=no
add chain=icmp protocol=icmp icmp-options=12:0 action=accept comment="allow
parameter bad" disabled=no
add chain=icmp action=drop comment="deny all other types" disabled=no
add chain=tcp protocol=tcp dst-port=25 action=reject
reject-with=icmp-network-unreachable comment="Smtp" disabled=no
add chain=tcp protocol=udp dst-port=25 action=reject
reject-with=icmp-network-unreachable comment="Smtp" disabled=no
add chain=tcp protocol=tcp dst-port=110 action=reject
reject-with=icmp-network-unreachable comment="Smtp" disabled=no
add chain=tcp protocol=udp dst-port=110 action=reject
reject-with=icmp-network-unreachable comment="Smtp" disabled=no
add chain=tcp protocol=udp dst-port=110 action=reject
reject-with=icmp-network-unreachable comment="Smtp" disabled=no
-----------------------------------------------------------------------------
--[11.1]-- Service dan Melihat Service yang Aktif dengan PortScanner
Untuk memastikan Service apa saja yang aktif di Mesin mikrotik, perlu kita
pindai terhadap port tertentu, seandainya ada service yang tidak dibutuhkan,
sebaiknya dimatikan saja.
Untuk menonaktifkan dan mengaktifkan servise, perintah adalah :
Kita periksa dahulu service apa saja yang aktif
----------------------------------------------------------------------------------
[admin@routerku] > ip service
[admin@routerku] ip service> print
Flags: X - disabled, I - invalid
# NAME PORT ADDRESS CERTIFICATE
0 X telnet 23 0.0.0.0/0
1 ftp 21 0.0.0.0/0
2 www 80 0.0.0.0/0
3 ssh 22 0.0.0.0/0
4 www-ssl 443 0.0.0.0/0 none
[admin@routerku] ip service>
----------------------------------------------------------------------------------
Misalkan service FTP akan dinonaktifkan, yaitu di daftar diatas terletak pada
nomor 1 (lihat bagian Flags) maka :
---------------------------------------------------------------------------------
[admin@routerku] ip service> set 1 disabled=yes
---------------------------------------------------------------------------------
Perlu kita periksa lagi,
---------------------------------------------------------------------------------
[admin@routerku] ip service> print
Flags: X - disabled, I - invalid
# NAME PORT ADDRESS CERTIFICATE
0 X telnet 23 0.0.0.0/0
1 X ftp 21 0.0.0.0/0
2 www 80 0.0.0.0/0
3 ssh 22 0.0.0.0/0
4 www-ssl 443 0.0.0.0/0 none
[admin@router.dprd.provinsi] ip service>
---------------------------------------------------------------------------------
Sekarang service FTP telah dinonaktifkan.
Dengan memakai tool nmap kita dapat mencek port apa saja yang aktif pada mesin
gateway yang telah dikonfigurasikan.
Perintah : nmap -vv -sS -sV -P0 192.168.0.30
Hasil :
-------------------------------------------------------------------------------------
Starting Nmap 4.20 ( http://insecure.org ) at 2007-04-04 19:55 SE Asia Standard Time
Initiating ARP Ping Scan at 19:55
Scanning 192.168.0.30 [1 port]
Completed ARP Ping Scan at 19:55, 0.31s elapsed (1 total hosts)
Initiating Parallel DNS resolution of 1 host. at 19:55
Completed Parallel DNS resolution of 1 host. at 19:55, 0.05s elapsed
Initiating SYN Stealth Scan at 19:55
Scanning 192.168.0.30 [1697 ports]
Discovered open port 22/tcp on 192.168.0.30
Discovered open port 53/tcp on 192.168.0.30
Discovered open port 80/tcp on 192.168.0.30
Discovered open port 21/tcp on 192.168.0.30
Discovered open port 3986/tcp on 192.168.0.30
Discovered open port 2000/tcp on 192.168.0.30
Discovered open port 8080/tcp on 192.168.0.30
Discovered open port 3128/tcp on 192.168.0.30
Completed SYN Stealth Scan at 19:55, 7.42s elapsed (1697 total ports)
Initiating Service scan at 19:55
Scanning 8 services on 192.168.0.30
Completed Service scan at 19:57, 113.80s elapsed (8 services on 1 host)
Host 192.168.0.30 appears to be up ... good.
Interesting ports on 192.168.0.30:
Not shown: 1689 closed ports
PORT STATE SERVICE VERSION
21/tcp open ftp MikroTik router ftpd 2.9.27
22/tcp open ssh OpenSSH 2.3.0 mikrotik 2.9.27 (protocol 1.99)
53/tcp open domain?
80/tcp open http MikroTik router http config
2000/tcp open callbook?
3128/tcp open http-proxy Squid webproxy 2.5.STABLE11
3986/tcp open mapper-ws_ethd?
8080/tcp open http-proxy Squid webproxy 2.5.STABLE11
2 services unrecognized despite returning data. If you know the service/version,
please submit the following fingerprints at
http://www.insecure.org/cgi-bin/servicefp-submit.cgi :
==============NEXT SERVICE FINGERPRINT (SUBMIT INDIVIDUALLY)==============
SF-Port53-TCP:V=4.20%I=7%D=4/4%Time=4613A03C%P=i686-pc-windows-windows%r(D
SF:NSVersionBindReq,E,"�x0c�x06x81x84��������")%r(DNSStatusR
SF:equest,E,"�x0c��x90x84��������");
==============NEXT SERVICE FINGERPRINT (SUBMIT INDIVIDUALLY)==============
SF-Port2000-TCP:V=4.20%I=7%D=4/4%Time=4613A037%P=i686-pc-windows-windows%r
SF:(NULL,4,"x01���")%r(GenericLines,4,"x01���")%r(GetRequest,18,"
SF:x01���x02���d?xe4{x9dx02x1axccx8bxd1Vxb2Fxff9xb0")%r(
SF:HTTPOptions,18,"x01���x02���d?xe4{x9dx02x1axccx8bxd1Vx
SF:b2Fxff9xb0")%r(RTSPRequest,18,"x01���x02���d?xe4{x9dx02x
SF:1axccx8bxd1Vxb2Fxff9xb0")%r(RPCCheck,18,"x01���x02���d?
SF:xe4{x9dx02x1axccx8bxd1Vxb2Fxff9xb0")%r(DNSVersionBindReq,18,"
SF:x01���x02���d?xe4{x9dx02x1axccx8bxd1Vxb2Fxff9xb0")%r(
SF:DNSStatusRequest,4,"x01���")%r(Help,4,"x01���")%r(X11Probe,4,"
SF:x01���")%r(FourOhFourRequest,18,"x01���x02���xb9x15&xf1A
SF:]+x11nxf6x9bxa0,xb0xe1xa5")%r(LPDString,4,"x01���")%r(LDAP
SF:BindReq,4,"x01���")%r(LANDesk-RC,18,"x01���x02���xb9x15&
SF:xf1A]+x11nxf6x9bxa0,xb0xe1xa5")%r(TerminalServer,4,"x01��
SF:0")%r(NCP,18,"x01���x02���xb9x15&xf1A]+x11nxf6x9bxa0,
SF:xb0xe1xa5")%r(NotesRPC,18,"x01���x02���xb9x15&xf1A]+x1
SF:1nxf6x9bxa0,xb0xe1xa5")%r(NessusTPv10,4,"x01���");
MAC Address: 00:90:4C:91:77:02 (Epigram)
Service Info: Host: routerku; Device: router
Service detection performed. Please report any incorrect results at
http://insecure.org/nmap/submit/ .
Nmap finished: 1 IP address (1 host up) scanned in 123.031 seconds
Raw packets sent: 1706 (75.062KB) | Rcvd: 1722 (79.450KB)
---------------------------------------------------------------------------
Dari hasil scanning tersebut dapat kita ambil kesimpulan, bahwa service dan
port yang aktif adalah FTP dalam versi MikroTik router ftpd 2.9.27. Untuk
SSH dengan versi OpenSSH 2.3.0 mikrotik 2.9.27 (protocol 1.99). Serta Web
proxy memakai Squid dalam versi Squid webproxy 2.5.STABLE11.
Tentu saja pihak vendor mikrotik telah melakukan patch terhadap Hole atau
Vulnerabilities dari Versi Protocol diatas.
--[11.2]-- Tool administrasi Jaringan
Secara praktis terdapat beberapa tool yang dapat dimanfaatkan dalam mela
kukan troubleshooting jaringan, seperti tool ping, traceroute, SSH, dll.
Beberapa tool yang sering digunakan nantinya dalam administrasi sehari-hari
adalah :
o Telnet
o SSH
o Traceroute
o Sniffer
a. Telnet
Perintah remote mesin ini hampir sama penggunaan dengan telnet yang ada
di Linux atau Windows.
[admin@routerku] > system telnet ?
Perintah diatas untuk melihat sekilias paramater apa saja yang ada. Misalnya
mesin remote dengan ip address 192.168.0.21 dan port 23. Maka
[admin@routerku] > system telnet 192.168.0.21
Penggunaan telnet sebaiknya dibatasi untuk kondisi tertentu dengan alasan
keamanan, seperti kita ketahui, packet data yang dikirim melalui telnet
belum di enskripsi. Agar lebih amannya kita pergunakan SSH.
b. SSH
Sama dengan telnet perintah ini juga diperlukan dalam remote mesin, serta
pringsipnya sama juga parameternya dengan perintah di Linux dan Windows.
[admin@routerku] > system ssh 192.168.0.21
Parameter SSH diatas, sedikit perbedaan dengan telnet. Jika lihat helpnya
memiliki parameter tambahan yaitu user.
------------------------------------------------------------------------------
[admin@routerku] > system ssh ?
The SSH feature can be used with various SSH Telnet clients to securely connect
to and administrate the router
--
user -- User name
port -- Port number
[admin@routerku] >
------------------------------------------------------------------------------
Misalkan kita akan melakukan remote pada suatu mesin dengan sistem
operasinya Linux, yang memiliki Account, username Root dan Password
123456 pada Address 66.213.7.30. Maka perintahnya,
-----------------------------------------------------------------------------
[admin@routerku] > system ssh 66.213.7.30 user=root
root@66.213.7.30's password:
----------------------------------------------------------------------------
c. Traceroute
Mengetahui hops atau router apa saja yang dilewati suatu packet sampai packet
itu terkirim ke tujuan, lazimnya kita menggunakan traceroute. Dengan tool ini
dapat di analisa kemana saja route dari jalannya packet.
Misalkan ingin mengetahui jalannya packet yang menuju server yahoo, maka:
----------------------------------------------------------------------------
[admin@routerku] > tool traceroute yahoo.com ADDRESS STATUS
1 63.219.6.nnn 00:00:00 00:00:00 00:00:00
2 222.124.4.nnn 00:00:00 00:00:00 00:00:00
3 192.168.34.41 00:00:00 00:00:00 00:00:00
4 61.94.1.253 00:00:00 00:00:00 00:00:00
5 203.208.143.173 00:00:00 00:00:00 00:00:00
6 203.208.182.5 00:00:00 00:00:00 00:00:00
7 203.208.182.114 00:00:00 00:00:00 00:00:00
8 203.208.168.118 00:00:00 00:00:00 00:00:00
9 203.208.168.134 timeout 00:00:00 00:00:00
10 216.115.101.34 00:00:00 timeout timeout
11 216.115.101.129 timeout timeout 00:00:00
12 216.115.108.1 timeout timeout 00:00:00
13 216.109.120.249 00:00:00 00:00:00 00:00:00
14 216.109.112.135 00:00:00 timeout timeout
------------------------------------------------------------------------------
d. Sniffer
Kita dapat menangkap dan menyadap packet-packet yang berjalan
di jaringan kita, tool ini telah disediakan oleh Mikrotik yang berguna
dalam menganalisa trafik.
----------------------------------------------------------------------------
[admin@routerku] > tool sniffer
Packet sniffering
.. -- go up to tool
start -- Start/reset sniffering
stop -- Stop sniffering
save -- Save currently sniffed packets
packet/ -- Sniffed packets management
protocol/ -- Protocol management
host/ -- Host management
connection/ -- Connection management
print --
get -- get value of property
set --
edit -- edit value of property
export --
----------------------------------------------------------------------------
Untuk memulai proses sniffing dapat menggunakan perintah Start, sedangkan
menghentikannya dapat menggunaka perintah Stop.
[admin@routerku] > tool sniffer start
Proses sniffing sedang dikerjakan, tunggu saja beberapa lama, kemudian
ketikkan perintah stop jika ingin menghentikannya. Melihat hasil packet
yang ditangkap dapat menggunakan perintah print, untuk mengeksportnya
dalam bentuk file dapat digunakan perintah export.
--[12]-- Kesimpulan
Untuk pemakaian jaringan berskala Kecil-menengah produk dari Latvia ini,
dapat menjadi pilihan, saya disini bukan untuk mempromosikan Produk ini.
Namun sebagai gambaran, bagaimana memanfaatkan produk ini untuk berbagai
keperluan, lagipula sebagai alternatif dari produk sejenis yang harganya
cenderung mahal.
Dengan Mikrotik yang saat ini sedang populernya diterapkan pada berbagai
ISP Wireless, Warnet-warnet serta beberapa Perusahaan. Maka Administrasi
Sistem Jaringan dapat lebih mudah dan sederhana. Yang jelas untuk sekedar
memanfaatkan fasilitas Routing saja, PC TUA anda dapat digunakan.
Mudah-mudahan paparan diatas dapat membantu pembaca dalam memahami, apa
dan bagaimana mikrotik ini.
--[13]-- Referensi
Artikel ini merupakan kompilasi dari berbagai sumber
1. Web Blog
- http://dhanis.web.id
- http://okawardhana.web.id
- http://harrychanputra.web.id
2. Website
- http://www.cgd.co.id
- http://www.ilmukomputer.org
- http://www.mikrotik.com
- http://www.mikrotik.co.id
- http://forum.mikrotik.com
oO Using no way as a way, Using no limitations as a limitation Oo
Salam dan terimakasih,
r0t0r
-----------------------------------------------------------------------
Copyleft Unreserved by Law 1995 - 2007 Kecoak Elektronik Indonesia
http://www.kecoak-elektronik.net
.L.A.M.P.I.R.A.N.
Daftar Port dan Protocol berbagai jenis Trojan, Backdoor, Virus.
daftar ini dapat saja tidak berlaku, atau dapat pula perlu ditambah
seiring perkembangan Malware tersebut. Update terus Filter Rule
mesin mikrotik anda.
########## Pembatasan Brute Force #################################
/ ip firewall filter
add chain=input protocol=tcp dst-port=22 connection-limit=1,32
action=add-src-to-address-list address-list=ssh_logins
address-list-timeout=2m comment="" disabled=no
add chain=input protocol=tcp dst-port=22 src-address-list=!ssh_logins
action=accept comment="" disabled=no
add chain=forward src-address=192.168.1.10 protocol=tcp src-port=21
content="password incorrect" action=add-dst-to-address-list
address-list=ftp_logins address-list-timeout=1m comment="" disabled=no
add chain=forward src-address-list=ftp_logins action=drop comment="" disabled=no
########################################################################
Pemblokiran beberapa URL tertentu dapat dilakukan pada mikrotik.
Jika paket web-proxy telah terinstall dan web-proxynya juga telah
dikonfigurasi, maka perintah dibawah ini dapat disertakan.
Meningkatkan kinerja koneksi Jaringan Internet.
Jika anda memiliki masalah jaringan dan merasa perlu untuk meningkatkan kinerja jaringan anda, mungkin tutorial ini sedikit berguna walaupun sudah cukup lawas.
- Jika anda tidak perlu menggunakan file sharing dan printer sharing dalam jaringan ada baiknya anda ikuti step pertama dari artikel tersebut.
Start: Run > Regedit > HKEY_LOCAL_MACHINE > Software > Microsoft > Windows > CurrentVersion > RemoteComputer > NameSpace > . . .
“{2227A280-3AEA-1069-A2DE-08002B30309D}” adalah perintah untuk menampilkan shared printer, sedangkan “{D6277990-4C6A-11CF-8D87-00AA0060F5BF}” adalah perintah untuk explorer untuk menampilkan scheduled tasks.
- Matikan protocol jaringan yang tidak anda butuhkan di Networking Connection > Local Area Networking > Local Area Networking Properties.
- Gunakan cablenut.com untuk optimalisasi jaringan anda melalui settingan CSS file, atau gunakan speedguide.net untuk menganalisa jaringan anda. Jika anda ingin cara yang instant gunakan TCP/IP Optimizer yang merupakan execute program.
Sebaiknya backup dulu data anda atau gunakan fasilitas System Restore untuk mencoba tutor ini terlebih dahulu.
Tulisan ini saya rangkum dari extremetech.com
Sedikit review, sejauh ini saya belum menemukan settingan yang tetap untuk konfigurasi TCP/IP yang tepat. Mungkin ada teman-teman yang bisa bantu? atau ada solusi lain.. Silahkan.
Tutorial Setting Mikrotik RouterOS PPPoE Client Sebagai Gateway Telkom Speedy
Sebetulnya saya sendiri masih kurang begitu menguasai mikrotik, disini saya mencoba untuk berbagi pengalaman aja. Semoga bermanfaat.
Kita mulai setup dari modem adsl nya sebagai brigding protocol mode. Settingnya dapat anda temukan dari manual masing-masing modem. Contoh setting bridging protocol pada modem TECOM AR1031 pada menu Advance setup > WAN. Ikuti petunjuk gambar dibawah ini kemudian lakukan save/reboot.
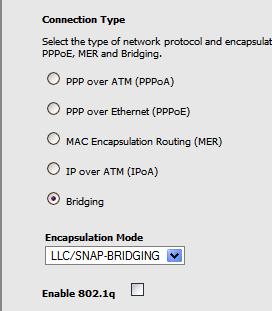
Selesai setting modem sebagai bridging yang tidak menyimpan password dan user ID anda di modem, bagi anda yang ingin mencoba mengganti IP address default modem bisa di konfigurasi terlebih dahulu melalui PC client. Caranya : kita ubah terlebih dahulu IP modem pada Advance Setup > LAN IP Address contoh 10.10.10.1 lakukan save/reboot. Kemudian lakukan pengubahan selanjutnya di IP client PC ke 10.10.10.2 selesai. Silahkan anda coba ketik di web browser anda IP modem (10.10.10.1). Berhasil?
Kita lanjut ke CPU Mikrotik RouterOS nya.
Tentukan IP Address masing-masing LAN card anda, misal LAN connector dari modem 10.10.10.2 (public), dan 192.168.1.1 ke jaringan lokal anda (lokal). Lakukan perintah ini terlebih dahulu jika anda ingin menspesifikasikan nama ethernet card anda.
interface ethernet set ether1 name=public
interface ethernet set ether2 name=lokal
Pastikan kembali dalam menentukan nama dan alur kabel tersebut, kemudian kita lanjut ke setting IP Address.
/ip address add address=10.10.10.2/24 interface=public
/ip address add address=192.168.1.1/24 interface=lokal
/ip address> print
Pastikan LAN card anda tidak dalam posisi disabled.
Selanjutnya anda bisa memasukkan entry PPPoE Client.
/interface pppoe-client add name=pppoe-user-mike user=mike password=123 interface=public service-name=internet disabled=no
Sebetulnya perintah diatas dapat anda lakukan di winbox, jika ingin lebih mudah sambil cek koneksi jaringan anda ke mikrotik.
Menentukan Gateway dan Routingnya dilanjutkan ke masquerading
/ip route add gateway=125.168.125.1 (IP Gateway Telkom Speedy anda)
/ip route print
IP gateway diatas belum tentu sama, lihat terlebih dahulu ip pppoe client anda. Jika anda belum yakin 100% ip client anda dan gateway nya, lakukan login dan dialing melalui modem anda terlebih dahulu bukan pada mode bridging seperti diatas. Pada menu Device Info akan tampil informasi Default Gateway dan IP client pppoe anda. Ok?
Selanjutnya masquerading, untuk penerusan perintah dari routing yang diteruskan ke nat firewall mikrotik untuk proses routing ke semua client yang terkoneksi
/ip firewall nat add chain=srcnat action=masquerade
Selesai.. tahap routing sudah terlaksanakan. Coba lakukan ping ke mikrotik dan gateway nya. Jika anda ingin sharing ke komputer client jangan lupa masukkan ip gateway pada settingan Network Connection (windows) sesuai dengan IP lokal pada mikrotik anda.
Banyak sekali settingan mikrotik yang dapat anda pelajari dari berbagai sumber. Jika terkesan terlalu rumit dengan sistem pengetikan anda bisa melakukannya dengan winbox mode, setiap tutorial yang anda butuhkan pun dapat anda copy dan paste ke winbox nya mikrotik.
Setting DNS dan Web Proxy Transparant
Input DNS dan web-proxy pun terasa lebih mudah di winbox mode, masukkan primary, secondary dan allow remote request nya, atau dengan perintah di terminal winbox.
/ip dns set primary-dns=203.130.206.250
/ip dns set primary-dns=202.134.2.5
/ip dns allow-remote-request=yes/ip web-proxy set enabled=yes port=8080 hostname=proxy.koe transpa
rent-proxy=yes
/ip firewall nat add in-interface=lokal dst-port=80 protocol=tcp action=redirect to-ports=8080 chain=dstnat dst-address=!192.168.1.1/24
Link-link firewall pada mikrotik
http://www.mikrotik.com/testdocs/ros/2.9/ip/filter.php
http://wiki.mikrotik.com/wiki/Firewall
Semoga membantu.
Jangan lupa untuk menset IP gateway client anda ke 192.168.1.1 agar terkoneksi ke server mikrotik anda dan tidak lupa saya ucapkan terima kasih untuk “kadhol” yang dahulu berkenan memberikan tutor step by step setup mikrotik router newbie buat saya.
Misteri CIA di Seputar G 30 S PKI
Author: Rita Uli Hutapea
Publisher: detikcom
Language: Bahasa Indonesia
Page: 26
Description:
Publik Indonesia dikejutkan dengan kabar ditariknya dokumen rahasia tentang kiprah pemerintahan AS pada saat terjadinya Gerakan 30 September 1965 (G 30 S). Padahal, baru beberapa hari sebelumnya, dokumen itu dibuka menyusul dilantiknya Megawati Soekarnoputri, putri mantan Presiden Soekarno, menjadi presiden RI ke-5.
Menariknya, penarikan dokumen tersebut terjadi bukan karena protes. Sejak dibuka diam-diam, tak satu pun pihak ya ng menyatakan keberatan atas isi dokumen. Ini jelas suatu keanehan. Adakah yang janggal dalam peristiwa itu? Siapa saja yang sebenarnya terlibat versi CIA dalam tragedi tersebut?
Ebook Format: PDF
License: Other
Download Link:
Misteri CIA Di Seputar G 30 S PKI
Pass: www.eh.web.id
Langkah - Langkah Membersihkan Virus Pada komputer
Jika komputer kita terserang virus memang menjengkelkan, penyebab /sumbernya beragam, mulai dari media penyimpanan external seperti flash disk, floppy disk, hingga perilaku browsing yang “kurang wajar”
, maksudnya sering browsing - browsing situs “aneh” ya jangan terkejut kalau juga mendapatkan hasil yang “aneh” ![]()
Langkah - langkah disini saya paparkan berdasar pengalaman saya dan tanya sana-sini
. Selain itu biar memudahkan saya memberikan link klo ada yg tanya-tanya melalui YM tentang membersihkan komputer dari virus
. Secara umum dibagi menjadi 5 jenis / tahap “pembersihan” (sebenarnya ada 6 tapi yang keenam rasanya tidak dapat dikategorikan sebagai pembasmian virus)
1. Scan PC menggunakan antivirus kita,
- Update antivirus kita
- Disable fungsi System Restore Windows
- Restart, masuk safe mode.
- Scan komputer kita melalui safe mode
- Setelah selesai, restart, dan jangan lupa aktifkan kembali fungsi System Restore Windows
masih ada virus???
2. Scan PC kita menggunakan antivirus online.
- Disable fungsi System Restore Windows
- Restart, masuk Safe Mode With Networking (agar kita tetap bisa akses inet didalam safe mode)
- Scan menggunakan antivirus online, misalnya: http://security.symantec.com/ (rata2x antivirus online hanya support browser Internet explorer)
- Setelah selesai, restart, dan jangan lupa aktifkan kembali fungsi System Restore Windows
masih ada jugaaa???
3. Memeriksa secara manual
- Ctrl + Alt + Del (task manager)
- Pada task manager lihat aktivitas mencurigakan dari file2x yang bekerja di background (biasanya berekstensi .dll atau .exe)
- Jika ditemukan, tandai dan cari informasi dimana letak file “tersangka” ini
- Jika sudah didapat, restart, masuk ke Safe Mode.
- Dari safemode hapus file mencurigakan tadi
bingung / tidak menemukan file mencurigakan? (biasanya kalau terlalu banyak program)
4. Memeriksa Startup Manager
- Start -> Run -> msconfig
- Pada jendela msconfig kita periksa, file startup mana yang terlihat janggal, disable saja, kalau perlu dihapus (gunakan metode no. 3)
kok masih ada???
5. Memeriksa System Registry kita
Cara ini yang paling melelahkan, meskipun ada softwarenya, namun jika kita salah menggunakan, bisa fatal akibatnya bagi kestabilan system.
Waduh.. masih ada juga…
Langkah terakhir…… install ulang system operasi kita ![]()
Rasa Gatal Pada Vagina
Gejala:
Gatal pada Vagina, bila digaruk terasa nikmat, kalau tidak digaruk gatalnya minta ampun.
Penyebab:
Vagina yang sering lembab, sering ditinggal suami berhari - hari atau wanita yang tengah menjanda.

Bahan Obat:
- 7 lembar daun sirih
- 2 Gelas air
- Asam yang sudah lama (asam kawak)
Pengolahan:
Semua bahan tadi direbus hingga mendidih, setelah rebusan tadi dingin, baru diminum.
Lalu setiap kali habis buang air kecil, basuhkan vagina anda dengan air yang dicampur dengan rebusan ramuan tadi.
Lakukan dengan rutin, maka rasa gatal niscaya akan hilang.
SMS Gratis / Free SMS
Hari gini dikasih yg gratisan? siapa yg nolak…
Berikut adalah salah satu provider SMS gratis. Jika dilihat dari coverage areanya, provider ini dapat dikatakan sudah menjangkau seluruh dunia. Bagaimana tidak lebih dari 150 negara sudah menjadi jangkauannya.
Untuk Indonesia sendiri sudah support di semua operator seluler. Ok, untuk menghilangkan penasaran tentang provider ini akan saya kupas dan bahas disini, mengapa bisa gratis? sistem apa yang mereka gunakan? benarkah kita dapat menaruh aplikasi mereka di web/blog kita? simak yang berikut.
Provider ini berdiri sejak tahun 2003, namun untuk layanan sms gratisnya sendiri baru dimulai pada akhir tahun 2007 kemarin. Diawal pendiriannya provider ini baru melayani 20 negara, lalu dengan pesat berkembang hingga dilebih dari 150 negara. Untuk layananSMS gratis sendiri, mereka mengandalkan iklan pada website mereka, serta sponsor.
Target iklannya tentu saja yang mengunjungi website mereka, ditambah lagi bagi yang menggunakan fasilitas gratis aplikasi sms pada web/blog kita. Dengan aplikasi ini para pengunjung web/blog kita akan dapat mengirim sms melalui web/blog kita… Aplikasinya hanya berupa rangkaian kode HTML sederhana saja.
Nah berminat untuk SMS gratis langsung dari website mereka atau ingin mendapatkan kode untuk web/blog kita?
silahkan kunjungi websitenya dibawah ini:
FREE SMS
Read More..111 way to say I love you
Hello, i found this in many source, “I love you” mean from 111 different language. Because Love is Universal, say it across race and nation. Hope this can be helpful, of course after say “I love you” in many language, you must studying her/his language if want more deep relationship. Here’s the words:
1. Afrikaans - Ek is lief vir jou
2. Albanian - te dua
3. Alentejano (Portugal) - Gosto De Ti, Porra!
4. Alsacien (Elsass) - Ich hoan dich gear
5. Amharic (Aethio.) - Afekrishalehou
6. Arabic - Ana Ahebak / Ana Bahibak
7. Armenian - yes kez shat em siroom
8. Assamese - Moi tomak bhal pau
9. Assyr - Az tha hijthmekem
10. Bahasa Malayu (Malaysia) - Saya cinta mu
11. Bambara - M’bi fe
12. Bangla - Ami tomakay bala basi
13. Bangladeschi - Ami tomake walobashi
14. Basque - Nere maitea
15. Batak - Holong rohangku di ho
16. Bavarian - tuI mog di
17. Belarusian - Ya tabe kahayu
18. Bengali - Ami tomake bhalobashi
19. Berber - Lakh tirikh
20. Bicol - Namumutan ta ka
21. Bisaya - Nahigugma ako kanimo
22. Bolivian Quechua - Qanta munani
23. Bosnian - Ja te volim (formally) or volim-te Turkish seni seviyorum
24. Bulgarian - As te obicham
25. Bulgarian - Obicham te
26. Burmese - chit pa de
27. Cambodian (to the female) - bon saleng oun
28. Cambodian (to the male) - oun saleng bon
29. Canadian French - Je t’adore (”I love you”)
30. Canadian French - Je t’aime (”I like you”)
31. Catalan - T’estim (mallorcan)
32. Cebuano - Gihigugma ko ikaw
33. Chamoru (or Chamorro) - Hu guaiya hao
34. Cherokee - Tsi ge yu i
35. Cheyenne - Ne mohotatse
36. Chichewa - Ndimakukonda
37. Chickasaw - Chiholloli (first ‘i’ nasalized)
38. Chinese - Ngo oi ney a (Cantonese)
39. Chinese - Wuo ai nee (Mandarin)
40. Corsican - Ti tengu cara (to female)
41. Corsican - Ti tengu caru (to male)
42. Creol - Mi aime jou
43. Croatian - Volim te (used in common speech)
44. Czech - Miluji Te
45. Danish - Jeg elsker dig
46. Dutch - Ik hou van jou
47. Dutch - Jeg elsker dig
48. Ecuador Quechua - Canda munani
49. English - I love thee (used only in Christian context)
50. English - I love you
51. Eskimo - Nagligivaget
52. Esperanto - Mi amas vim
53. Estonian - Ma armastan sind / Mina armastan sind (formal)
54. Ethiopia - afekereshe alhu
55. Faroese - Eg elski teg
56. Farsi - Tora dost daram
57. Filipino - Mahal ka ta
58. Finnish (Minä) rakastan sinua
59. Flemish (Ghent) - ‘k’ou van ui
60. French (formal) - Je vous aime
61. Friesian - Ik hald fan dei
62. Gaelic - Tá mé i ngrá leat
63. Galician - Querote (or) Amote
64. Georgian - Miquar shen
65. German - Ich liebe Dich
66. Ghanaian - Me dor wo
67. Greek - agapo se
68. Greek - S’agapo
69. Greenlandic - Asavakit
70. Gronings - Ik hol van die
71. Gujarati - oo tane prem karu chu
72. Hausa - Ina sonki
73. Hawaiian - Aloha au ia`oe
74. Hebrew - Ani ohevet ota
75. Hiligaynon - Guina higugma ko ikaw
76. Hindi - Main tumsey pyaar karta hoon / Maine Pyar Kiya
77. Hmong - Kuv hlub koj
78. Hokkien - Wa ai lu
79. Hopi - Nu’ umi unangwa’ta
80. Hungarian - Szeretlek te’ged
81. Icelandic - Eg elska thig
82. Ilocano - Ay ayating ka
83. Indi - Mai Tujhe Pyaar Kartha Ho
84. Indonesian - Saya cinta padamu (’Saya’, commonly used, the other is`Aku`)
85. Inuit - Negligevapse
86. Iranian - Mahn doostaht doh-rahm
87. Irish - taim i’ ngra leat
88. Italian - Ti amo/Ti voglio bene
89. Japanese - Anata wa, dai suki desu
90. Javanese (formal) - Kulo tresno marang panjenengan
91. Javanese (informal) - aku terno kowe
92. Kannada - Naanu ninna preetisuttene
93. Kapampangan - Kaluguran daka
94. Kenya (Kalenjin) - Achamin
95. Kenya (Kiswahili) - Ninakupenda
96. Kikongo - Mono ke zola nge (mono ke’ zola nge’)
97. Kiswahili - Nakupenda
98. Konkani - Tu magel moga cho
99. Korean - SA LANG HAE / Na No Sa Lan Hei
100. Kurdish - Khoshtm Auyt
101. Laos - Chanrackkun
102. Latin - Te amo
103. Latvian - Es mîlu Tevi
104. Lebanese - Bahibak
105. Lingala - Nalingi yo
106. Lithuanian - As Myliu Tave
107. Lojban - mi do prami
108. Luo - Aheri
109. Luxembourgeois - Ech hun dech gäer
110. Macedonian - Jas Te Sakam
111. Madrid - lingo Me molas, tronca
MAFIA BERKELEY DAN PEMBUNUHAN MASSAL DI INDONESIA
Author: Ramparts and David Ransom
Publisher: Koalisi Anti Utang
Language: Bahasa Indonesia
Page: 80
Description:
Para pemegang otoritas kebijakan ekonomi Indonesia pada masa Orde Baru diisi oleh orang-orang yang dibina oleh pemerintah Amerika Serikat. Mereka membawa perekonomian Indonesia kearah ekonomi pasar liberal atau liberalisme. Para penguasa kebijakan ini kemudian dikenal dengan sebutan Mafia Berkeley.
Para ekonom yang menguasai kebijakan perekonomian nasional sejak Orde Baru berkuasa antara lain adalah Widjojo Nitisastro, Subroto, Ali Wardhana, Mohammad Sadli, dan Emil Salim.
Pemerintahan yang dikendalikan para ekonom Mafia Berkeley ini selain menunda pembayaran utang luar negeri selama beberapa tahun, mereka juga menggalang pembuatan utang luar negeri baru, dan membuka pintu bagi masuknya investasi asing secara besar-besaran ke Indonesia.
Ternyata kehadiran Mafia Berkeley yang tidak dapat dipisahkan dari proyek besar kapitalisme internasional untuk menggulingkan Soekarno telah hadir jauh sebelum Soekarno digulingkan. Mafia Berkeley bekerja keras mempersiapkan segala alat legitimasi, berupa Undang Undang, rencana pembangunan, dan proposal pinjaman, yang memungkinkan bekerjanya tangan-tangan kapitalisme internasional dan pemerintahan tangan besi di sini.
Format: .pdf
Lisence: Free
Download Link:
Mafia Berkeley
Convert HTML css template to Joomla Template
Author: Anh Nam
Publisher: http://joomlahax.com
Language: English
Page: 7
Description:
This tutorial is focused on people who have worked with the web before and would be able to program an HTML page with CSS or Tables, this tutorial will teach you common practices in how to add Joomla to your current websites. And is focused on a beginner to Joomla but not a beginner to basic web programming
Ebook Format: PDF
License: Free
Download Link:
Convert Joomla
Lihat Tutorial Video Tentang Joomla
Thus Spake Zarathustra
Author: Friedrich Wilhelm Nietzsche
Publisher: Unknown
Language: English
Page: 266
Description:
When Zarathustra was thirty years old, he left his home and the lake of his home, and went into the mountains. There he enjoyed his spirit and solitude, and for ten years did not weary of it.
But at last his heart changed, and rising one morning with the rosy dawn, he went before the sun, and spake thus unto it:
Thou great star! What would be thy happiness if thou hadst not those for
whom thou shinest!.
Ebook Format: PDF
License: Free
Download Link
Adobe Photoshop: Tips and Tricks from the Experts
Author: Bruce Fraser, Bert Monroy, John Paul Caponigro, Rick Sammon, Ben Willmore, Richard Harrington, George DeWolfe, Dave Montizambert, Sherry London, Katrin Eismann, Michael Baumgardt, Martin Evening, Doc Baumann, Greg Vander Houwen
Publisher: Adobe Systems Incorporated.
Language: English
Page: 56
Description:
E Book Contain Adobe Photoshop tips and trick about F-stop corrections, Creating Metallic Type, Smoke, Creating the Magical Mirror Effect, Creative Photo Cropping, Lightblast!, Total Contrast Control Using Two Images, Digital Light Painting, Woodcuts, Photo Filters to the Rescue, Gif Animation: Swipe Effect, Working with Lens Blur, Looking Through a Glass, Rain Drops.
Ebook Format: PDF
License: Other
Download Link:
Adobe Photoshop: Tips and Tricks from the Experts
Pass: www.eh.web.id
See Also Video Tutorial About Photoshop
BUNG KARNO PENJAMBUNG LIDAH RAKJAT INDONESIA
![]()
Author: CINDY ADAMS
Publisher: Unknown
Language: Bahasa Indonesia
Page: 109
Description:
Orang mengatakan bahwa Presiden Republik Indonesia terlalu banjak memiliki darah seorang seniman.”Akan tetapi aku bersjukur kepada Jang Maha Pentjipta, karena aku dilahirkan dengan perasaan halus dan darah seni. Kalau tidak demikian, bagaimana aku bisa mendjadi Pemimpin Besar Revolusi, sebagairnana 105 djuta rakjat menjebutku ?
Kalau tidak demikian, bagairnana aku bisa memimpin bangsaku untuk merebut kembali kemerdekaan dan hak-azasinja, setelah tiga setengah abad dibawan pendjadjahan Belanda? Kalau tidak demikian bagaimana aku bisa mengobarkan suatu revolusi ditahun 1945 dan mentjiptakan suatu Negara Indonesia jang bersatu, jang terdiri dari pulau Djawa, Bali, Sumatra, Kalimantan, Sulawesi, Kepulauan Maluku dan bagian lain dari Hindia Belanda ?
Ebook Format: PDF
License: Lainnya
Download:
Biografi Soekarno
Lex Luthor the unauthorized biography
Author: DC Comic
Publisher: DC Comic
Language: English
Page: 97
Description:
When John Byrne re-booted Superman in 1986, he created Lex Luthor as a businessman, rather than the mad scientist we knew and loved (well, you know what I mean). Three early issues showcase the new Luthor.
Ebook Format: PDF
License: Free
Download Link:
Lex Luthor Unauthorized
Biography of Che Guevara

Publisher: Unknown
Language: English
Page: 148
Description:
In 1956 Guevara, Castro and eighty other men and women arrived in Cuba in an attempt to overthrow the government of General Fulgencio Batista. This group became known as the July 26 Movement. The plan was to set up their base in the Sierra Maestra mountains. On the way to the mountains they were attacked by government troops.
By the time they reached the Sierra Maestra there were only sixteen men left with twelve weapons between them. For the next few months Castro’s guerrilla army raided isolated army garrisons and were gradually able to build-up their stock of weapons.
Ebook Format: PDF
License: Free
Download:
Che Guevara
Rahasia Bisnis Online

Cara Mendapatkan Ratusan Dolar dari Paypal
melakukan verifikasi paypal tanpa perlu memiliki Credit card
melakukan transfer dari paypal ke Bank lokal
Berburu Paypal dengan Mudah

Klik Disini Untuk Mengetahuinya
Blog Templetes Free
Original Publisher: freecsstemplates.org and Blogandweb.com
Score : 8/10
Type : New Blogger Template (.xml)
Review :
Totally an awesome Blogger template. Any personal bloggers must have this template. This template is so cool and glassy bright design with gradiented blue background. Just such cristalize bright view but this template is more than clear and bright. Ported by blogandweb.com to be a blogger template.
Its rounded corners makes this template very webish 2.0 on every pages. Using only two coloumns layout. Use it either personal or bussiness blogging. Downloadable version of this cool blogger skin from this page is widgeted already by us. You can simply customize any elements of this template. So download and use it now.


Original publisher: Blogcrowd - blogcrowds.com
Score: 5/10
Type: New blogger template .xml
Review:
I love this blogger template coz it is light, fast loading, and simple enough. But still above all its powerfull perfomance this template can bring us soul of web 2.0 layout with enlighten design.
Just see how this template shows us fresh aura and good looking layout with blue colour. Three coloumns blogger template on its surface, with every single posting focused at the midle of your blog. Cool enough to download.

Original publisher: Blogcrowds.com
Score: 7/10
Type: Blogger new template .xml
Review:
Looking for glossy template?so this template may satisfied your need. You can directly use this template by uploading it. But in the downloadable zip file included all images needed by this blogger skin.
You can see blue glossy layout on its look. All font here designed up to be webbish 2.0 completely simple. You can feel once more the aura of web 2.0 layout in your blogger based blog.

Original publisher: Iam Main http://e-lusion.com
Score: 6/10
Type: Blogger new template .xml
Review:
This marine green layout is really adaptable and easily configured. I think its greeny aura can't bring fresh lookin' design. But how ever it has elegant greeny web 2.0 layout. designed up for faster loading in any browser.
Nothing more to say but this template can rock against your blog. Try it if you are considering to use three coloumns template.

Original publisher: J. Maloney Blogcrowds.com
Score:6/10
Type: Blogger new template
Review:
You can feel how fresh the summer is. This blogger template is very suitable for personal blogs, journey and travelling blogs. I give this template scored at 6/10 coz I can see spirits on its butterfly just like summer.
Images needed still can be found at this template zipped file. Just download it free now. Click on the link below
Original Publisher: http://www.finalsense.com
Score: 5/10
Type: New blogger template with xml
Review:
I think thsi template brings beauty on its face. You can see flowered header coz this template was designed up to fulfill desired love aura.
It didn't bring any absolute pinky, but just by vieweing this template any people will know that this flower template is suitable for any girls.
If you are a romantic, than downloading this template could be your another suggested steps before you start blogger.Here download link

Original Publisher : geckoandfly.com
Score : 5/10
Type : Classic Template blogger (edit html)
Review:
Not so web 2.0 but this template brings simplicity and minimalis aura. Not so much comments but this blogger skin still deserve to be downloaded.
Just an added value, this version of Firefox template includes simple plugin from BlogSocializer.

Original Publisher: www.jackbook.com
Score : 6/10
Type : New Blogger Template (.xml)
Review :
This cleant layout blogger template displays Photoshop CS2 feather. Simple two coloumns rounded corners Blogger layout. Very clear and elegant just as its name. Designed well by Jackbook.com which is making it simple to view and to use. You can put up any banner or ads code on its template. Very easy to cuztomize.
You can download the mirrored version from BlogTemplate20 which is already been injected by BlogSocializer code as social bookmarker plugin for Blogger users.

Original Publisher: Ustadz.net
Score : 8/10
Type : New Blogger Template (.xml)
Review :
An Indonesian made this Blogger template. Can be obtained freely at Ustadz.net site. Simple 2 coloumns layout designed so well and clear. Named as TypoXP v2.1 thi template can be customized. Some of its features are: Complete Fonts and Colors Tags for Layout; Header Image supported; Top Navigation Links; Four Sidebar Widgets Area; Selective expandable post summaries; TypoXP Sidebar Title Icon Set; Author Comment Highlight.
This template is available for download from its original location at Ustadz.net or just download from mirored link by BlogTemplate20 below. But as usal, we give free addition with added social bookmarker plugin widget for Blogger.

Original Publisher: peety-passion.com and jackbook.com
Score : 6/10
Type : New Blogger Template (.xml)
Review :
Glossy blogger template but red dark enough to bring serious sensation and mood. Designed well and pretty good. Very suitable for kinda personal and gaming blog, or even tutorial blogging. 3 coloumns layout and glossy enough to be deserved for download.
Looking for three coloumns layout with glossy red and dark blogger layout? So this one could be the answer for you. This template is available for free download below. Mirrored and added some BlogSocializer widget by us, BlogTemplate20.

Original Publisher: Erica and Sosuechtig.de
Score : 7/10
Type : New Blogger Template (.xml)
Review :
This glossy blogger template comes with six variants. It is very cool and elegant template for personal blogging site. Designed clearly with glossy effects at the top part, the template looked so bright. Originally deigned for worpress based blog and now it’s converted and optimized for Blogger platform. You can see at screenshoot above, it is the orange web 2.0 templates variant. Cool huh..
You can download this template which is mirrored by us for your pleasure. This Sosuechtig Blogger template is very suitable for personal blog which talks about daily life. We added socialize widget injected inside the template.

Original Publisher: JackBook.com
Score : 7/10
Type : New Blogger Template (.xml)
Review :
Named as Buy iPod Blogger template, released from JackBook.com site. This blogger skin is totally good design and has more colomns to use. Users can place any ads or banner in just editing original xml code and set up their ads code, including Google ads. More breathing areaa can be found easily as it is simple detected character from web 2.0 layout. Coloumns are rounded corners. Nice a bit dark template.
Included editable psd file to change blog logo, and also other images used by this template. If you need than you can host it else where you want. Very simple and neat to modify. You have to download it trust me. Added some widget by us too.

Original Publisher: www.jackbook.com
Score : 7/10
Type : New Blogger Template (.xml)
Review :
Three coloumns, oh no, many other coloumns below. This magazine style blogger template is really more expert. Even personal blogger can use this template but it is more suitable to be used for more informative or new based blog. Designed well with red theme.
If you decided to make tutorial blog or news blog, than this template could satisfy your will. You can download mirored version of this template below. And once again, widget is already included.

Original Publisher: designdisease.com and blogandweb.com
Score : 7/10
Type : New Blogger Template (.xml)
Review :
May be it is a colourful blogger layout with web 2.0 stylish layout ever. Its colorful 3 coloumns layout is very cool rounded corners. Honestly I said that this Blogy Smashing template is a simple three colomns layout with colorful interface but still beautiful. Colorful doesn't mean to be old-fashioned coz every single color element were blended so well.
Named as Blogy Smashing, this template is coolest skin ever for personal Blogger user. Must download this template if you are cool and young smart blogger. Don't worry about bookmarker widget, BlogTemplate20 is always gives you added value from every mirrored downloadable template.

Original Publisher: jackbook.com design by Themey.com
Score : 5/10
Type : New Blogger Template (.xml)
Review :
This iPhone blogger template is not so web 2.0 stylish layout. But in other way this blogger skin is still cool and deserved to download. Very simple, dark and very rounded.
I personaly do not like this template so much. But I feel this Blogger template is cooler than other old-schooled template. Colorful header, but you can change it part. Just use and download it if you really like Finding Nemo.

Original Publisher: Blogandweb.com from publisher freecsstemplates.org
Score: 6/10
Type: Blogger xml new Template
Review:
This Blogy Cultivado is not so webish 2.0 on overall layout. Designed corectly to always bring fresh aura on its readers. In other side this blogger template also looked like more natural. I think this template is suitable for personal blog, dayly blogging, or elegant ladies. Again, this version of Cultivado (downloaded from this page) skin is already injected with social bookmarker widgets.
Once more I said, this blogger skin is more suitable for daily activity blogging or girls and ladies personal blog.
Oiginal Publisher: Blogandweb.com design by pinkseo.info
Score: 7/10
Type: Illustration new Blogger skin (xml)
Review:
It has large header area with cool illustration. Not so web 2.0 design but very cool to be downloaded. Bringing famous aura to its owner. This type of skin is suitable for personal blog of cool people with cool personality.
If you are looking for better personal blog template than this skin is great and fittest for you. Downloadable Blogy Rosa from this page is injected with social bookmarker widgets already. Make this template more cool.
Original publisher: hellowiki.com modified by blogcrowds.com
Score: 8/10
Type: Blogger New Template .xml
Review:
This Hello Wiki blogger skin has web 2.0 soul of simplicity and smoothness. Using this template can make your blog dressed up with web 2.0 layout in the face. Just designed up with smoothness on its body, you can publish your posts with labels on it. This template is a new xml blogger template. Downloadable zip file (at bottom of this page) contains template file in xml format plus images need by this template.
You don't need to upload all images file, by default you can use this template directly. But all images still included inside zip file because if any times you want to change with your own images, or if something gonna wrong then you can reupload images on your own. You can also change hello wiki logo.

Read More..
Download Mp3 Indonesia (No Multiply No Cry)
Andien - Bisikan Hati (2008)
Download Full Album Mp3 song Andien - Bisikan Hati, You can download free mp3 Andien - Bisikan Hati with 2 part link this:

Track List :
1. Bisikan hati
2. Detik Tak Bertepi
3. The Boy From Ipanema
4. Meniti Pelangi
5. Mungkinkah
6. My Funny Valentine
7. Isyarat Cinta
8. Deras Hujan
9. The Boy FRom Ipanema (Reprise)
Naff - Rahasia Hati [ Album 2008 ]
Download full album mp3 music song Naff - Rahasia Hati silahkan pilih link download dibawah:

Download ketengan lagu mp3 naff - rahasia hati satu persatu single lagu klik pada judul tracklist dibawah!!!
Track List :
01 - Izinkan Aku
02 - Tak Seindah Cinta Yang Semestinya
03 - Kaulah Hidup Dan Matiku
04 - Sejenak Disampingmu
05 - Kekasih Kecil
06 - Hati Yang Lain
07 - Aku Slalu Disini
08 - Rahasia Hati
09 - Mengenangmu [ Ibu ]
10 - Buat Aku Tersenyum
11 - Perempuanku
Polaris - Keabadian Cinta (2008)
Download Full Album Mp3 song Polaris - Keabadian Cinta, You can download free mp3 Polaris - Keabadian Cinta with Three mirror link this:

Track List :
1. Penghianatan Cinta
2. Bayang
3. Kumaafkanmu Karena Cinta
4. Lagu Untuk Seorang Sahabat
5. Nyanyian hati Untuk Ayah
6. Lagu Untuk Seorang Kasih
7. Putih Cinta
8. Biarkanlah Cinta Ini
9. Dariku Untukmu
10. Arti Kesetiaan
11. Keabadian Cinta
CARA MEMBUAT SITUS IKLAN GRATIS

Contoh :
http://pub23.bravenet.com/classified/show.php?usernum=1929612834&cpv=2
Untuk mengedit tampilan situs iklan anda , masuklah ke account bravenet anda lalu pilih "webtool" lalu klik "classifieds" dan pilihlah bagian yang akan anda edit. Silahkan melakukan berbagai macam percobaan untuk memperoleh hasil yang terbaik menurut anda sendiri, gampang koq !
Cara Buat Situs Web GRATIS Penghasil Dollar
- Untuk bisa masuk ke halaman utama, silahkan klik Di Sini
- Pergunakan "Main Menu" untuk menavigasi isi website tutorial ini.
- Sebaiknya anda membaca seluruh isi blog ini mulai dari awal agar anda dapat memperoleh informasi dari tutorial ini dengan sejelas-jelasnya.
- Silahkan anda "save as" isi tutorial website ini ke dalam disket, flash disk, atau hard disk anda untuk membantu anda agar dapat menghemat biaya berinternet & mempermudah anda dalam mempelajarinya secara mandiri.
- Gunakan browser Firefox atau Opera untuk dapat melakukan "save as" isi tutorial website ini. Anda tidak akan bisa melakukannya jika anda menggunakan Internet Explorer. Untuk mendownload Firefox secara GRATIS silahkan anda kunjungi Blog ini. Link downloadnya ada di bagian kiri atas. Kelebihan lain Firefox adalah : Sangat aman & jauh lebih mudah serta lebih efektif pengoperasiannya dibandingkan dengan browser lainnya, selain itu pula, Firefox mempunyai daya jelajah yang lebih cepat karena softwarenya lebih "ringan" dibandingkan dengan yang lain. Oleh karena itulah software ini sangat direkomendasikan sekali oleh Google. Silahkan anda download secara GRATIS !!!
- Untuk mulai mempelajarinya, silahkan anda baca menu "Benefits Of Making Website" agar anda dapat mempunyai semangat yang kuat untuk mempelajari cara membuat website ini, sebab anda sudah bisa mengetahui keuntungan & manfaatnya untuk bisa mempunyai sebuah website.
- Teruskan dengan membaca menu "About Website" untuk mengetahui apa sih sebenarnya sebuah website itu dan hal - hal apa saja yang diperlukan.
- Di bagian menu "Making Website Part I" anda akan belajar membuat website gratis dengan cara yang sangat sederhana sekali dan dengan memanfaatkan webhosting gratisan.
- Setelah anda cukup mahir, teruskan dengan mempelajari materi "Making Website Part II" . Di bagian ini anda akan mempelajari secara garis besar cara membuat website dengan Microsoft Frontpage atau Publisher.
- Jika anda ingin membuat website dengan cara instan, cepat & mudah, silahkan pilih menu "Making Website Part III". Di sini anda akan belajar secara garis besar cara membuat website dengan Instant Page Builder atau Instant Website Builder.
- Untuk mempercantik dan melengkapi kebutuhan website anda, dapat anda dapatkan di bagian menu "Webtools For Webmaster".
- Dibagian "Promoting Your Website" anda akan belajar cara untuk mempromosikan website anda agar bisa banyak dikunjungi orang.
- Untuk mempelajari cara menghasilkan dollar dari website anda , silahkan baca menu "Make Money With Website"
- Untuk melihat bukti bahwa tutorial website ini telah bisa memberikan penghasilan dollar bagi saya sendiri, silahkan lihat di bagian menu "My Comission Report"
Selamat belajar, semoga ketekunan anda dalam belajar membuat website akan memberikan manfaat yang terbaik untuk anda dikemudian hari. Buatlah website yang bermanfaat untuk sesama, hindari materi website yang berbau pornografi, kekerasan, perjudian, dan hal-hal lain yang dilarang oleh agama dan pemerintah.
Keuntungan Membuat Website
Membuat website sekarang bukanlah hal yang sulit lagi, karena sudah banyak fasilitas alat yang bisa membuat website dengan cara yang sangat mudah & sederhana walaupun tanpa harus menguasai pemrograman atau bahasa HTML sekalipun. Tapi .... pertanyaan terbesarnya adalah: Untuk apa kah kita membuat website, apa tujuannya, apa untungnya? Ya.... kita memang harus tahu, karena jika tidak, maka website yang akan kita buat itu akan sia-sia belaka. Berikut ini adalah beberapa manfaat yang bisa kita peroleh dengan mempunyai website:
* Website anda bisa memberikan penghasilan tambahan : Jika anda punya situs iklan, maka penghasilan anda adalah dari para pengunjung yang memasang iklan di website anda, klik di sini jika anda ingin bisa membuat situs iklan gratis dengan mudah dan cepat atau jika website anda bagus, anda dapat mengikuti program afiliasi dengan cara meletakkan link atau spanduk mereka di website anda, atau anda juga dapat bergabung dengan program Google Adsense untuk dapat menghasilkan uang dari iklan yang sesuai dengan isi website anda.
* Website anda bisa membantu mengembangkan usaha anda : Jika anda mempunyai semacam usaha atau jasa, anda dapat mempromosikannya melalui website, sehingga akan membantu untuk mengembangkan usaha anda secara nasional bahkan global. Artinya, anda akan dapat untung lebih banyak dari usaha atau jasa anda dengan bantuan promosi website.
* Anda dapat berbagi pendapat, pengalaman & wawasan dengan lebih mudah: Seperti halnya blog ini, weblog ini membantu saya untuk dapat berbagi sedikit pengetahuan & pengalaman saya untuk membantu anda agar dapat membuat website dengan lebih mudah & bagaimana untuk dapat menghasilkan uang dari website gratisan sekalipun :)
* dll
LearnKey's - CompTIA A+
CompTIA A+ certification has been established as the standard credential for anyone beginning an information technology career. In this certification course from LearnKey, you will dive into the inner workings of the personal computer with Mike Meyers; the IT industry's leading CompTIA A+ authority. Meyers shows you how hardware components and operating systems work together for optimum functionality. At the conclusion of this training, you will be confident with real world PC hardware and DOS/Windows system software and be prepared to pass the most recent CompTIA A+ certification exam.
This training set consist of 11 Sessions.
33 Hours of interactive training
Download:
http://rapidshare.com/files/50875475/LKey_-oooA000_.part01.rar
http://rapidshare.com/files/50875616/LKey_-oooA000_.part02.rar
http://rapidshare.com/files/50875778/LKey_-oooA000_.part03.rar
http://rapidshare.com/files/50875910/LKey_-oooA000_.part04.rar
http://rapidshare.com/files/50876057/LKey_-oooA000_.part05.rar
http://rapidshare.com/files/50876257/LKey_-oooA000_.part06.rar
http://rapidshare.com/files/50876434/LKey_-oooA000_.part07.rar
http://rapidshare.com/files/50876619/LKey_-oooA000_.part08.rar
http://rapidshare.com/files/50876853/LKey_-oooA000_.part09.rar
http://rapidshare.com/files/50877059/LKey_-oooA000_.part10.rar
http://rapidshare.com/files/50877218/LKey_-oooA000_.part11.rar
http://rapidshare.com/files/50877437/LKey_-oooA000_.part12.rar
http://rapidshare.com/files/50877622/LKey_-oooA000_.part13.rar
http://rapidshare.com/files/50877798/LKey_-oooA000_.part14.rar
http://rapidshare.com/files/50877966/LKey_-oooA000_.part15.rar
http://rapidshare.com/files/50878110/LKey_-oooA000_.part16.rar
http://rapidshare.com/files/50880011/LKey_-oooA000_.part17.rar
http://rapidshare.com/files/50880164/LKey_-oooA000_.part18.rar
http://rapidshare.com/files/50880322/LKey_-oooA000_.part19.rar
http://rapidshare.com/files/50880493/LKey_-oooA000_.part20.rar
http://rapidshare.com/files/50880625/LKey_-oooA000_.part21.rar
http://rapidshare.com/files/50880739/LKey_-oooA000_.part22.rar
http://rapidshare.com/files/50880849/LKey_-oooA000_.part23.rar
http://rapidshare.com/files/50881001/LKey_-oooA000_.part24.rar
http://rapidshare.com/files/50881150/LKey_-oooA000_.part25.rar
http://rapidshare.com/files/50881334/LKey_-oooA000_.part26.rar
http://rapidshare.com/files/50881459/LKey_-oooA000_.part27.rar
http://rapidshare.com/files/50881663/LKey_-oooA000_.part28.rar
http://rapidshare.com/files/50881847/LKey_-oooA000_.part29.rar
http://rapidshare.com/files/50881984/LKey_-oooA000_.part30.rar
http://rapidshare.com/files/50882166/LKey_-oooA000_.part31.rar
http://rapidshare.com/files/50882347/LKey_-oooA000_.part32.rar
http://rapidshare.com/files/50882476/LKey_-oooA000_.part33.rar
http://rapidshare.com/files/50875327/LKey_-oooA000_.part34.rar
CBT Nuggets On The Job Training Series C#
Have you heard that the best way to learn a foreign language is by submersion? Live in the culture that speaks it, and you'll pick it up quick.
That's trainer Robert Barr's approach to these C# ("C sharp") videos. He doesn't talk much theory, or speak in generalities. He sits down with you and walks you through the process, step-by-step, of creating applications using C#. Along the way, you learn not only how to program in C#, but also what goes into a well-written application. He even creates errors so he can walk you through the process of debugging and fixing them, to make it easier for you to fix your own errors as you learn the language.
Learn valuable real-world C# skills
The On The Job Training Series: C# videos teach you how to go from an "interest in C# programming" to using it as a powerful development tool. You learn about how C# treats variables, operators, and expressions - the core elements of computer programming. You learn about methods, classes, objects, and assemblies. You learn many of the common functionalities you need to know to create applications for the enterprise. Plus, you learn how to use C# to create data-driven applications leveraging the power of XML and ADO.NET.
Although this series starts with the basics, Robert quickly turns up the power. You'll find that by the end of the training you'll know how to tap the potentials that programming in C# offers. You'll know how to develop data-driven Web and Windows applications. You'll have ideas for using C# to create real-world solutions - and you'll know exactly how to act on those ideas. Plus you'll have the foundation you need to go much deeper into C# on your own, to create unique functionality specific to your needs.
Instead of mapping to a specific certification, these videos cover the need-to-know skills for developing enterprise applications using C#.
Download:http://rapidshare.com/files/50807240/C000_C-B-T.part01.rar
http://rapidshare.com/files/50807330/C000_C-B-T.part02.rar
http://rapidshare.com/files/50807402/C000_C-B-T.part03.rar
http://rapidshare.com/files/50807472/C000_C-B-T.part04.rar
http://rapidshare.com/files/50807526/C000_C-B-T.part05.rar
http://rapidshare.com/files/50807604/C000_C-B-T.part06.rar
http://rapidshare.com/files/50807663/C000_C-B-T.part07.rar
http://rapidshare.com/files/50808705/C000_C-B-T.part08.rar
http://rapidshare.com/files/50808604/C000_C-B-T.part09.rar
http://rapidshare.com/files/50807171/C000_C-B-T.part10.rar
CorelDRAW Graphics Suite X3 Essential Training

CorelDRAW Graphics Suite X3 Essential Training
with: Mark Abdelnour
With CorelDRAW Graphics Suite X3, you can confidently tackle a wide variety of projects, from logos and Web graphics to multi-page marketing brochures. In CorelDRAW Graphics Suite X3 Essential Training, Mark Abdelnour teaches you the essential tools and techniques you'll need to start using this powerful software collection effectively. Mark begins with an overview of the interface and moves on to cover basic drawing, coloring, and editing. He then advances to transparency, type, the new Interactive Design Tools, special effects, and much more. Tips and specific examples that teach users how to improve workflows and maximize productivity are also included. This training is flexible, so experienced CorelDRAW users can go directly to the movies on features new to X3, while beginning users can watch all of the movies in progression. Exercise files accompany the training videos, allowing you to follow along and learn at your own pace.
Download:
http://rapidshare.com/files/36677917/CorelDraw13_-_CD1.part1.rar
http://rapidshare.com/files/36678495/CorelDraw13_-_CD1.part2.rar
http://rapidshare.com/files/36679067/CorelDraw13_-_CD1.part3.rar
http://rapidshare.com/files/36679558/CorelDraw13_-_CD1.part4.rar
http://rapidshare.com/files/36680283/CorelDraw13_-_CD1.part5.rar
http://rapidshare.com/files/36680441/CorelDraw13_-_CD1.part6.rar
http://rapidshare.com/files/36681371/CorelDraw13_-_CD2.part1.rar
http://rapidshare.com/files/36682429/CorelDraw13_-_CD2.part2.rar
http://rapidshare.com/files/36683031/CorelDraw13_-_CD2.part3.rar
http://rapidshare.com/files/36683599/CorelDraw13_-_CD2.part4.rar
http://rapidshare.com/files/36684307/CorelDraw13_-_CD2.part5.rar
http://rapidshare.com/files/36684529/CorelDraw13_-_CD2.part6.rar
Joomla magic Video Tutorial
Spend weeks/months trying to work it out for yourself. While this is an awesome technology jump there's a steep learning curve in store for the the average web site owner has a steep learning curve.
Spend an hour or two with these easy to follow training videos that will put you head and shoulders above your competitors.
These Flash Based Joomla Magic Videos are going to wake up a lot of people to the incredible benefits of Content Management Systems -
Here's just a little of what's included in this awesome video guide:
Why Content Management Systems.
Beyond WordPress - The Time To Move Is Now! (And the dangers you face if you don't)
The varieties of CMS (And why Joomla?)
The Technical Side Covered in-depth and made easy:
Downloading Joomla For Free
3 Different Ways To Create Your Database
Uploading Joomla To Your Site
Installing And Configuring Joomla
A Walk Around The Front-End
It's All About Content Baby!
The Back End - Administrator Help
- Creating Sections - Creating Categories - Creating Content Items
Linking To Menus
Installing New Templates
Info:
Importantly this isn't just a 'technical guide' - because it's video based you get to see real world examples of how people are already using this incredible system to run their businesses. The video also focuses on areas we know you need to know more about. . .
. . . You'll see how to create the following kind of sites:
How To Build A Sleek Online Shop: (case studies, live stores and Short Cuts)
How To Create A Paid Content Membership Site: (Single payments, recurring payments, locked access)
How To Create Online Magazines: (The real next step for content publishers)
If you design web sites for other people, then right now, watching this video guide will be one of the smartest investments you can make of your time. You'll learn how to create, complex, database driven and highly customisable sites in just hours where it once took weeks. And you'll have clients falling over themselves to recommend you to their contacts based on the quality of your work.
If you publish content online you'll learn how to create beautiful and imaginative web sites fast. And so far removed from those 'cookie cutter' web sites that people will want to come back again and again. Your profits could be quadrupled within weeks.
If you own an online business, or have any kind of online presence and you want to create a positive, lasting impression with your customers then this video course holds the key.
Download:
http://rapidshare.com/files/48243539/Training_Fail_1_Joomla.part01.rar
http://rapidshare.com/files/48243535/Training_Fail_1_Joomla.part02.rar
http://rapidshare.com/files/48243505/Training_Fail_1_Joomla.part03.rar
http://rapidshare.com/files/48243540/Training_Fail_1_Joomla.part04.rar
http://rapidshare.com/files/48243523/Training_Fail_1_Joomla.part05.rar
http://rapidshare.com/files/48243544/Training_Fail_1_Joomla.part06.rar
http://rapidshare.com/files/48243541/Training_Fail_1_Joomla.part07.rar
http://rapidshare.com/files/48243520/Training_Fail_1_Joomla.part08.rar
http://rapidshare.com/files/48243537/Training_Fail_1_Joomla.part09.rar
http://rapidshare.com/files/48243515/Training_Fail_1_Joomla.part10.rar
Read More..
Lynda.com Search Engine Optimization
Table of contents:
1. Getting Started
2. Black Hat SEO/White Hat SEO
3. The Search Magician's Three Linking Rings
4. The First Linking Ring: Know Your Searchers
5. The Second Linking Ring: Know the Search Engines & Directories
6. SEO Tools: Browser Bars
7. SEO Tools: Keyword Research/Project Management
8. SEO Tools: Links, KDA, and Rank Checkers
9. SEO Tools: Code Checkers, & Web Site Analytics
10. Keywords: The Golden Key to Outstanding SEO
11. The Third Linking Ring: Creating Search Friendly Web Sites
12. Before We Begin: Site Setup the Wrong Way
13. SEO Hands-On: Site Setup in a Search Friendly Way
14. Optimized Web Pages: Submitting and Monitoring Page Rank
15. Santa Monica Carousel Fan Web Site
16. Link Building: The Company You Keep
17. Top Ten SEO Lists
18. Errata, Corrections, & Updates
Download:
http://rapidshare.com/files/26403046/wlayrnedzatseeaomws.part01.rar
http://rapidshare.com/files/26407780/wlayrnedzatseeaomws.part02.rar
http://rapidshare.com/files/26412480/wlayrnedzatseeaomws.part03.rar
http://rapidshare.com/files/26416924/wlayrnedzatseeaomws.part04.rar
http://rapidshare.com/files/26421259/wlayrnedzatseeaomws.part05.rar
http://rapidshare.com/files/26426227/wlayrnedzatseeaomws.part06.rar
http://rapidshare.com/files/26437806/wlayrnedzatseeaomws.part07.rar
http://rapidshare.com/files/26442845/wlayrnedzatseeaomws.part08.rar
Read More..
Building the Data Warehouse
Category: Database
Language: English
File Type: PDF
File Size: 8625 KB
The data warehousing bible updated for the new millennium Updated and expanded to reflect the many technological advances occurring since the previous edition, this latest edition of the data warehousing “bible” provides a comprehensive introduction to building data marts, operational data stores, the Corporate Information Factory, exploration warehouses, and Web-enabled warehouses. Written by the father of the data warehouse concept, the book also reviews the unique requirements for supporting e-business and explores various ways in which the traditional data warehouse can be integrated with new technologies to provide enhanced customer service, sales, and support-both online and offline-including near-line data storage techniques.
http://rapidshare.com/files/8734069/1727099411.zipFireworks CS3 Essential

Fireworks CS3 Essential Training
with: Tom Green
Fireworks CS3 Essential Training is all about using each tool in this tremendously powerful application to its full potential to make amazing web graphics. From understanding the interface to importing Photoshop and Illustrator files, from formatting text to editing and optimizing images, instructor Tom Green covers all the skills needed to best create and edit all kinds of web-based graphics. Exercise files accompany the training.
Download:
http://rapidshare.com/files/32684975/Lynda.com_-_Fireworks_CS3.part1.rar
http://rapidshare.com/files/32700728/Lynda.com_-_Fireworks_CS3.part2.rar
http://rapidshare.com/files/32717807/Lynda.com_-_Fireworks_CS3.part3.rar
http://rapidshare.com/files/32737814/Lynda.com_-_Fireworks_CS3.part4.rar
http://rapidshare.com/files/32802162/Lynda.com_-_Fireworks_CS3.part5.rar
http://rapidshare.com/files/32672482/Lynda.com_-_Fireworks_CS3.part6.rar
Digital Image Processing: PIKS Scientific Inside by William K. Pratt
Digital Image Processing: PIKS Scientific Inside by William K. Pratt (Author)
Publisher: Wiley-Interscience; 4 Har/Cdr edition (February 9, 2007) | ISBN-10: 0471767778 | PDF | 16,3 Mb | 782 pages
The Fourth Edition of Digital Image Processing provides a complete introduction to the field and includes new information that updates the state of the art. The text offers coverage of new topics and includes interactive computer display imaging examples and computer programming exercises that illustrate the theoretical content of the book.
Suitable as a textbook for students or as a reference for practitioners, this new edition provides a comprehensive treatment of these vital topics:
— Characterization of continuous images — Image sampling and quantization techniques — Two-dimensional signal processing techniques — Image enhancement and restoration techniques — Image analysis techniques — Software implementation of image processing applications
In addition, the bundled CD includes:
— A Solaris operating system executable version of the PIKS Scientific API — A Windows operating system executable version of PIKS Scientific — A Windows executable version of PIKSTool, a graphical user interface method of executing many of the PIKS Scientic operators without program compilation — A PDF file format version of the PIKS Scientific C programmer's reference manual — C program source demonstration programs — A digital image database of most of the source images used in the book plus many others widely used in the literature
Schirmer Encyclopedia of Film by Barry Keith Grant
Schirmer Encyclopedia of Film by Barry Keith Grant (Author)
Publisher: Schirmer Books; 1 edition (December 8, 2006) | ISBN-10: 0028657918 | PDF | 54 Mb | RS
Grade 9 UpDrawing on authoritative, international contributors, information on film is extensively documented in this set, which is intended as a film-studies staple. The alphabetically arranged volumes are titled as follows: "Academy AwardsCrime Films"; "CriticismIdeology"; "Independent FilmRoad Movies"; and "Romantic ComedyYugoslavia." Subtopics include countries, history, philosophies, and more, with information on individual movies often spread over several entries. Articles range from as few as 5 pages ("Slapstick comedy") to 17 pages ("Italy"). Contemporary topics, such as "Gay, lesbian and queer cinema," are included along with more-expected entries on "Teen films" and "Cinematography." See-also references guide readers to one or more related topics or subtopics, while further-reading suggestions provided after every entry list academic and popular articles and books. The more than 16,000 index entries, with major topics in bold type, make access straightforward. The text is highlighted with photographs varying in size, color, and clarity, along with brief biographies on related figures. While there is a plethora of good publications on film, such as Ephraim Katz's single-volume The Film Encyclopedia (HarperCollins, 2005) and his The Macmillan International Film Encyclopedia (2001), this set is more comprehensive and current. Public libraries and secondary schools, especially those with a focus on filmmaking, should plan to include it in their collections.
http://rapidshare.com/files/34443467/seof_-_2007_-_4vols_-_isbn0028657918.zipBalls Of Fury DVDRip
Balls Of Fury DVDRip


http://rapidshare.com/files/87483915/Balls.of.Fury.2007.DVDRip.Xvid.part1.rar
http://rapidshare.com/files/87487301/Balls.of.Fury.2007.DVDRip.Xvid.part2.rar
http://rapidshare.com/files/87490261/Balls.of.Fury.2007.DVDRip.Xvid.part3.rar
http://rapidshare.com/files/87493393/Balls.of.Fury.2007.DVDRip.Xvid.part4.rar
http://rapidshare.com/files/87496719/Balls.of.Fury.2007.DVDRip.Xvid.part5.rar
http://rapidshare.com/files/87500224/Balls.of.Fury.2007.DVDRip.Xvid.part6.rar
http://rapidshare.com/files/87503987/Balls.of.Fury.2007.DVDRip.Xvid.part7.rar
http://rapidshare.com/files/87505064/Balls.of.Fury.2007.DVDRip.Xvid.part8.rar

http://www.megaupload.com/?d=O6TXU9LT
http://www.megaupload.com/?d=2DI0KQCA
http://www.megaupload.com/?d=E8EBJRZ6
http://www.megaupload.com/?d=7479H8V5
http://www.megaupload.com/?d=SP4JDRMY
http://www.megaupload.com/?d=8XIEPHEE
http://www.megaupload.com/?d=ZKE2YIUO
http://www.megaupload.com/?d=Y81TIU6O
Nero 8 Ultra Edition 8.2.8.0 Full
* High Definition format support
* Xbox 360™ and PlayStation® 3 streaming features
* Blu-ray Disc and HD DVD burning support
* SecurDisc data protection support
* Copy a disc with just one click
* Graphics optimized for Windows Vista™
* Continual free updates
- Nero Micro Included:
Nero Burning ROM (with VideoCD Support and MauSau Audio Plug-ins)
Nero Express
- Nero Burning Rom (with VideoCD Support and MauSau Audio Plug-ins)Nero ExpressNero CoverDesignerNero WaveEditorNero Toolkit
Note on Portable Edition:
No installations needed.. just run it and here we go
Adobe Captivate v3.0.0.580 Incl Keymaker

Download Part 2
Read More..
Duran Duran [Greatest Hits]

Duran Duran Greatest Hits
Listen 1. Is There Something I Should Know 4:09 $0.99 Buy Track
Listen 2. The Reflex 4:24 $0.99 Buy Track
Listen 3. A View To A Kill 3:34 $0.99 Buy Track
Listen 4. Ordinary World 4:42 $0.99 Buy Track
Listen 5. Save A Prayer (Single Version) 3:47 $0.99 Buy Track
Listen 6. Rio (US Edit) 4:44 $0.99 Buy Track
Listen 7. Hungry Like The Wolf 3:25 $0.89 Buy Track
Listen 8. Girls On Film 3:27 $0.99 Buy Track
Listen 9. Planet Earth (Single Version) 3:57 $0.99 Buy Track
Listen 10. Union Of The Snake 4:22 $0.99 Buy Track
Listen 11. New Moon On Monday 4:16 $0.99 Buy Track
Listen 12. The Wild Boys 4:16 $0.99 Buy Track
Listen 13. Notorious 4:00 $0.99 Buy Track
Listen 14. I Don't Want Your Love (Shep Pettibone 7'' Mix) 3:47 $0.99 Buy Track
Listen 15. All She Wants Is (45 Mix) 4:26 $0.99 Buy Track
Listen 16. Electric Barbarella (Radio Edit) 4:16 $0.99 Buy Track
Listen 17. Serious (7'' Edit) 3:56 $0.99 Buy Track
Listen 18. Skin Trade (Radio Cut) 4:26 $0.99 Buy Track
Listen 19. Come Undone (Edit) 4:17 $0.99 Buy Track
Code:
http://rapidshare.com/files/84304249/DURAN_DURAN__greatest_hits_.part1.rar
http://rapidshare.com/files/84308780/DURAN_DURAN__greatest_hits_.part2.rar Read More..
Jimmy Eat World - Chase This Light - 2007

Info:
Chase This Light is Jimmy Eat World's sixth studio album, and is scheduled for release on October 16, 2007. The album is produced by legendary producer Butch Vig (Nirvana, The Smashing Pumpkins, Sonic Youth, Against Me!, AFI ).
Track Listing:
1. "Big Casino" - 3:40
2. "Let It Happen"
3. "Like She'll Always Be"
4. "Carry You"
5. "Electable (Give It Up)"
6. "Gotta Be Somebody's Blues"
7. "Feeling Lucky"
8. "Here It Goes"
9. "Chase This Light"
10. "Firefight"
11. "Dizzy"
File Size: 73.4mb
Download:
Code:
http://rapidshare.com/files/61453402/backup.rar
pass
[url]www.darkwarez.pl[/url] Read More..
Scary Movie 4 Dvd Rip

Download
http://rapidshare.de/files/27276218/Scary.Movie.4.DVDRip.XviD-DiAMOND.crc
http://rapidshare.de/files/27278182/Scary.Movie.4.DVDRip.XviD-DiAMOND.001
http://rapidshare.de/files/27278992/Scary.Movie.4.DVDRip.XviD-DiAMOND.002
http://rapidshare.de/files/27279686/Scary.Movie.4.DVDRip.XviD-DiAMOND.003
http://rapidshare.de/files/27280442/Scary.Movie.4.DVDRip.XviD-DiAMOND.004
http://rapidshare.de/files/27281080/Scary.Movie.4.DVDRip.XviD-DiAMOND.005
http://rapidshare.de/files/27281741/Scary.Movie.4.DVDRip.XviD-DiAMOND.006
http://rapidshare.de/files/27282406/Scary.Movie.4.DVDRip.XviD-DiAMOND.007
http://rapidshare.de/files/27282663/Scary.Movie.4.DVDRip.XviD-DiAMOND.008
Warcraft III - Frozen Throne

Download:
Code:
http://rapidshare.com/files/82485495/Warcraft.III-Frozen.Throne.part1.rar
http://rapidshare.com/files/82501924/Warcraft.III-Frozen.Throne.part2.rar
http://rapidshare.com/files/82552676/Warcraft.III-Frozen.Throne.part3.rar
http://rapidshare.com/files/82566433/Warcraft.III-Frozen.Throne.part4.rar
http://rapidshare.com/files/82571267/Warcraft.III-Frozen.Throne.part5.rar
Password:
Code:
http://loonatic.org/download.php?id=8411BC55
Anti-Porn v9.1.3.29
Anti-Porn v9.1.3.29

Anti-Porn v9.1.3.29
Anti-Porn parental controls has blocked ten thousands of porn websites, and it allows you to predefine websites you don't let kids visit by yourself. It always filters any porn website, which appears recently. Anti-Porn parental controls check the whole contents of webpage quickly, and will close the forbidden webpage before kids see it. It limits your kids to use popular chat software and access to major chat rooms. You can easily assign Internet access time at certain hours, even on specific day. It is very easy. This program provides history log and screen log to you. You can use these logs to watch all websites that your kids visited, filtered out or not. It makes screen snap every certain interval, which you set. This program also provides password protection to make sure that anyone can't close Anti-Porn parental controls without parental password.
Read More..
Paragon Partition Manager 9.0 Professional

Every PC owner sooner or later meets a task of hard disk management. An optimum allocation of disk resources is the key point to manage data and operating systems on your computer effectively. Paragon's award winning Partition Manager provides easy and reliable hard drive partitioning and full-range hard disk management. It enables to create, copy, resize and move hard drive partitions. This full function tool is suitable for home and professional use. Partition Manager helps you to: Enhance computer performance, convert operating systems, defragment partitions, optimize your hard disk partitions cluster size.
Resize, move, hide, merge, restore and convert partitions without data loss.
• Redistribute Unused Disk Space - easily resize your partition(s) without any data loss
• Perform advanced partitioning operations: resize/move/copy/merge/undelete partitions
• Change partition properties: hide/unhide, make active/inactive, assign/remove drive letter, change volume label, convert file system, etc.
• Change disk properties: change SID, change primary slots
• Clone hard disks or separate partitions
• Redistribute unused disk space - easily resize your partitions without any data loss
• Volume Explorer (fully embedded within the application) - quickly browse FAT, FAT32, NTFS, Ext2 or Ext3 FS partition, edit or copy files and folders
• Defragment partitions and optimize their cluster size
New and updated features:
• Install New OS Wizard prepares a hard disk for a new operating system installation
• Updated! Safely setup and manage multiple operating systems on the same PC with the Boot Manager
• Updated! Boot Corrector allows you to resolve most common boot problems.
• Simple Backup Wizard enables to back up system and data to a local or network disk before applying any critical operations.
• The Initial Backup Reminder which appearances on program startup, advices to back up system and data before critical partitioning operations.
• Restore entire disks or separate partitions and roll-back your unsuccessful partitioning operations with the Paragon Recovery CD
• File Transfer Wizard can restore separate files and folders from a previously created backup archive.
• Updated! Dynamic disk support (convert to basic, backup/restore, defrag, check file system).
• Updated! Disk Editor enables to view and manually edit hard disk/partition contents in a hexadecimal mode.
• Shrink/compact MFT allows compressing Master File Table for best performance of your system.
• Express Launcher provides user-friendly interface and quick access to most common operations.
• Updated! Improved Windows Vista support, including 64-bit editions.
• Included in the set Paragon Drive Backup 8.51 trial version allows you to evaluate powerful backup and restore tools.
Key Features and Benefits of Professional Edition at a glance:
Paragon Smart Partition™ technology
Paragon’s exclusive Smart Partition Technology TM ensures that your data is protected during all operations. Just specify the desired operations and then press the Apply button to carry out the changes.
Boot Manager
Allows you to run several OSes on your computer and switch between them easily at boot time. The Install New OS Wizard helps you to setup up Microsoft® Vista/XP on the same disk.
Simple Backup Wizard
Critical Partitioning information can be backed up prior to performing any partitioning operation. The Backup Wizard and Initial Backup Reminder help you to save initial partition layout and other critical items before applying any critical partitioning operations.
Paragon Recovery CD
Paragon Recovery CD allows you to use Partition Manager even when your machine cannot boot. It also can used to restore your system and data from previously created backup archive in case of system failure.
Advanced Recovery CD (sold separately)
Updated! Advanced Recovery CD contains Windows-based recovery environment which provides support for new hardware and Windows-like interface of Paragon Partition Manager 9.0.
Optimization and Defragmentation
Defragmentation is the best method for achieving top system performance. Paragon Software’s defragmenter provides you with powerful low-level defragmentation of FAT and NTFS partitions including critical system files and Master File Table defragmentation.
Intuitive user interface
The program includes easy-to-use wizard dialogs for the most common routines, such as merging and resizing partitions, redistributing disk space, undelete, recovering a partition and other operations including our exclusive initial backup and even OS Installations.
MS Windows Vista support
Improved Microsoft Vista Support. Basic and advanced operations take into account all Vista specifics. Includes support for Microsoft Vista 64.
Link
http://rapidshare.com/files/87681672/Paragon.Partition.Manager.v9.0.Professional.Retail-FOSI.rar
LimeWire Pro 4.17.4 Beta

LimeWire - The Fastest P2P File Sharing Program on the Planet, running on the Gnutella Network. It is open standard software running on an open protocol, free for the public to use. LimeWire allows you to share any file such as.mp3s, .avis, jpgs, tiffs, etc., allows you to search for multiple files at the same time, available in several different languages, and is most famous for its ease-of-use and cross-platform compatibility. Limewire is written in Java, and will run on Windows, Macintosh, Linux, Solaris, and other computing platforms.
- Ease of use - just install, run, and search
- Ability to search by artist, title, genre, or other metainformation
- Elegant multiple search tabbed interface
- "Swarm" downloads from multiple hosts help you get files faster
- iTunes integration for Mac and Windows users
- Unique "ultrapeer" technology reduces bandwidth requirements for most users
- Integrated chat
- Directly connect to a computer
- Browse host feature--even works through firewalls
- Added Bitzi metadata lookup
- International versions: Now available in many new languages
- Connects to the network using GWebCache, a distributed connection system
- Automatic local network searches for lightning-fast downloads
- Support for MAGNET links that allow you to click on web page links that access Gnutella
Auto social poster for Blog

automatically increase traffic to your blog, improve your website
popularity and generate buzz — “hands-free”!
More Information:
_http://www.autosocialposter.com/
Norton 2008 Antivirus

Norton 2008 Antivirus
Key Technology:
* Antispyware
* Antivirus
* Two-Way Firewall
* Identity Case
* Advanced protection against phishing
* Intrusion Prevention
* Detection Rootkit
Features:
* Improve the performance delivered faster and start scanning. NEW
* One-click access to expert help. NEW
* Network security monitoring helps protect your wireless network. NEW
* Norton Identity Fund offers greater protection i dentity theft. NEW
* It works silently in the background. NEW
* Protection of up to 3 PCs per household
* Blocks identity theft on the web sites of phishing
* Protects against hackers
* Detects and removes spyware
* Eliminates viruses and Internet worms automatically
* It protects e-mail and instant messaging virus
* Avoid infected by the virus of the spread of e-mails
* Rootkit Detection searched below the operating system using patented technology
* Includes protection updates and new product features as available throughout the period of service renewable *
* The course Protection option automatically renews your subscription **
* Need parental controls or spam? Add Norton Pack.
What’s New in 2008?
Norton Identity Safe. Safeguards your personal information and keeps your identity safe while you buy, bank and browse online. Start, scan and run faster. Improved performance delivers an enhanced online experience. Get help fast. One-click access to expert support—right from your Norton product. Protects your home network. Network security monitoring checks the status of your wireless network security, maps connected devices, and provides expert advice on managing your network security settings
Code:
http://rapidshare.com/files/67595193/Norton_Internet_Security_2008__Crack.rar
Password:
Code:
Whereisit.org
The Settlers VI: Rise Of An Empire

Windows XP, Windows XP (64-bit), Windows Vista, Windows Vista (64-bit)
DirectX 9.0c (la distribucion de Junio en adelante 2007)
Pentium 4 2.0 GHz, Athlon XP 2000+ processor
512 MB RAM
100% DirectX 9.0c tarjeta de video de 128 MB RAM
- NVIDIA GeForce4 Ti 4200
- ATI RADEON 9500
- 100% DirectX 9.0c compatible sound card
http://rapidshare.com/files/76253264/SetVI.part02.rar
http://rapidshare.com/files/76253103/SetVI.part03.rar
http://rapidshare.com/files/76253200/SetVI.part04.rar
http://rapidshare.com/files/76255162/SetVI.part05.rar
http://rapidshare.com/files/76253215/SetVI.part06.rar
http://rapidshare.com/files/76255241/SetVI.part07.rar
http://rapidshare.com/files/76253278/SetVI.part08.rar
http://rapidshare.com/files/76253287/SetVI.part09.rar
http://rapidshare.com/files/76253303/SetVI.part10.rar
http://rapidshare.com/files/76255157/SetVI.part11.rar
http://rapidshare.com/files/76253312/SetVI.part12.rar
http://rapidshare.com/files/76253281/SetVI.part13.rar
http://rapidshare.com/files/76255206/SetVI.part14.rar
http://rapidshare.com/files/76253277/SetVI.part15.rar
http://rapidshare.com/files/76255189/SetVI.part16.rar
http://rapidshare.com/files/76253284/SetVI.part17.rar
http://rapidshare.com/files/76253261/SetVI.part18.rar
http://rapidshare.com/files/76255135/SetVI.part19.rar
http://rapidshare.com/files/76253300/SetVI.part20.rar
http://rapidshare.com/files/76253271/SetVI.part21.rar
http://rapidshare.com/files/76253224/SetVI.part22.rar
http://rapidshare.com/files/76255249/SetVI.part23.rar
http://rapidshare.com/files/76253256/SetVI.part24.rar
http://rapidshare.com/files/76253223/SetVI.part25.rar
http://rapidshare.com/files/76253254/SetVI.part26.rar
http://rapidshare.com/files/76253260/SetVI.part27.rar
http://rapidshare.com/files/76255166/SetVI.part28.rar
http://rapidshare.com/files/76253250/SetVI.part29.rar
http://rapidshare.com/files/76253298/SetVI.part30.rar
http://rapidshare.com/files/76253272/SetVI.part31.rar
http://rapidshare.com/files/76253258/SetVI.part32.rar
http://rapidshare.com/files/76253179/SetVI.part33.rar
The Police - The Police

Tracklist:
1. Fall Out
2. Can't Stand Losing You
3. Next To You
4. Roxanne
5. Truth Hits Everybody
6. Hole In My Life
7. So Lonely
8. Message In A Bottle
9. Regatta De Blanc
10. Bring On The Night
11. Walking On The Moon
12. Dont Stand So Close To Me
13. Driven By Tears
14. Canary In A Coalmine
Disc: 2
1. De Do Do Do De Da Da Da
2. Voices Inside My Head
3. Invisible Sun
4. Every Little Thing She Does Is Magic
5. Spirits In The Material World
6. Demolition Man
7. Every Breath You Take
8. Synchronicity I
9. Wrapped Around Your Finger
10. Walking In Your Footsteps
11. Synchronicity II
12. King Of Pain
13. Murder By Numbers
14. Tea In The Sahara
Freedom Writers (2007)

DOWN LOAD
http://rapidshare.com/files/52243210/Fredm.Wrters.DvdRip.part1.rar
http://rapidshare.com/files/52243010/Fredm.Wrters.DvdRip.part2.rar
http://rapidshare.com/files/52238379/Fredm.Wrters.DvdRip.part3.rar
http://rapidshare.com/files/52241995/Fredm.Wrters.DvdRip.part4.rar
http://rapidshare.com/files/52242721/Fredm.Wrters.DvdRip.part5.rar
http://rapidshare.com/files/52258721/Fredm.Wrters.DvdRip.part6.rar
http://rapidshare.com/files/52242366/Fredm.Wrters.DvdRip.part7.rar
http://rapidshare.com/files/52210871/Fredm.Wrters.DvdRip.part8.rar
Password: iiifile
Windows PE Mini CD Edition (live CD)

bootCD | ISO | 210 Mb (unpacked) | 122 Mb (packed+3%RR)Windows PE Mini CD Edition is a Windows PE-based Windows XP SP2 + Hiren's Boot CD. For those who do not know what WindowsPE - is a mini version of Windows XP, zagruzhayuschayasya from the CD-ROM and intended to carry out various operations to restore the system. Thus, danaya system can work even if you have a non-hard drive, or he is just missing. Building WindowsPE mini CD Edition is designed for recording on a small CD ROM (210mb) and contains quite a complete set of programs - from data recovery and diagnosis system to hacking passwords, as well as beautiful graphical environment and support network, a complete list of programs can be seen on the screenshot. It is noteworthy enough quick loading system and low system requirements.
http://rapidshare.com/files/80365733/WINPE.part2.rar
NetSupport Manager v10.02

The latest evolution in Remote PC support and desktop management. Monitor multiple systems in a single action, deliver hands on remote support or interactive training. Gather real-time inventory and system data. NetSupport Manager provides the ability to support Windows, Mac, Linux, Solaris and mobile devices all from a single console.
DOWN LOAD
Part 1
Depositfiles
Rapidshare
Part 2
Depositfiles
Rapidshare
Rapid USDownloader v1.3.4.8 With Full Plugins

Allows an automated download from file sharing sites. Currently, the program can download from more than 20 sites with the use of plug-ins. Sample plug-in (plg file) is located in MyTempDir.src.zip (language Delphi).
This program can be so named RapidShare downloader, MyTempDir downloader and other words. But in Russian - this is universal rocker from the sites, which make it possible to place files to themselves. It is no secret that the part of these sites give to rock only 1 by flow, and 1 file at once. Plus part still is a pause into chas/dva before the gallop of the following file. To remember that skachal that no - is complicated. And to economize when it is possible to rock on the hours, but when no. For those, who want simply to drive in references, to leave computer and to be confident that program in time all it skachayet, and not minute will pass in vain and is written this program. Program will recognize the part of the shielding codes, which helps to valuably use services including blind people.
Introduce into it reference to the file from the hostings which it are supported (thus far are supported RapidShare.de, MyTempDir.com, qFile.de, WebFile.ru and still several hostings, but because of the open architecture it is possible to easily add the support of others. But you should only skachat' ~e0 kilo-byte faylik * of..plg and place it into papochku with the program - and it "will learn" to rock, also, from the new hostings). If want so that I it would write for some hosting this faylik - write, and everything will be;) So for those, who itself be friends with C/Delphi in the complete set it goes example plg of the file, for MyTempDir, which with a sufficient skill to easily alter for other hostings.
Download from rapidshare
http://rapidshare.com/files/53827756/800RUD.v1.3.4.8.rar Read More..
Ebook PayPal Hacks
Ebook PayPal Hacks
You can use PayPal to send and receive money, but you need a PayPal account to manage your payments and your business. There's something comforting about having your own account. Sure, it's yet another password to remember, but it's all yours. You can visit a site like PayPal, log in, and see your settings, your name, and your history—proof that you've been there before and that someone (er, something) remembers you. But a PayPal account [Hack #1], in particular, has the added bonus of being able to store cold, hard cash. You can't really touch it, but it's there, and it's yours.
You can use your PayPal balance to pay for stuff [Hack #11], or you can withdraw it [Hack #20] and add it to the shoebox under your mattress. You can also watch it grow, as your eBay bidders pay for your stuff, web site customers buy your products, or friends pay you back for sushi dinners.
But it's not about sending and receiving money; it's about finding new ways to handle transactions so that you can spend more time eating sushi (or curly fries, or whatever). The real power of PayPal is its invisibility; you can have strangers send you money and still keep your account all to yourself. Whether you're selling a single product [Hack #28], or a cart full of products [Hack #45], PayPal can be as slick as you need it to be. If you take things even further, you can have PayPal notify your server [Hack #65] when you receive money, or even write a standalone application [Hack #88] to manage your sales without ever having to log into your account.
Download from rapidshare Read More..Billing Explorer DeskPro 6 2007 F.06
Billing Explorer DeskPro 6 2007 F.06 FULL for Warnet

Feature BillingExplorer
1. Compatible Dengan Windows '95/'98/Me/2000/NT/XP
BillingExplorer berjalan dengan stabil pada Operating System Win'95/98/Me/2000/NT/XP. BillingExplorer juga Support Protocol TCP/IP dan Net-BEUI, Support DHCP dan Fix-IP Address.
2. Tidak Membebani PC Server & Client
Mampu menerima ratusan koneksi dari komputer Client tanpa harus membebani kerja dari komputer server. Kestabilan dan Sistem keamanan yang tinggi dan telah teruji pada PC's LAN Games sehingga tidak menyebabkan komputer atau PC menjadi hang (macet).
3. Variasi Login Client[b/]
Fasilitas login Client yang bervariasi seperti Personal, Member, Pre-Paid, Student, Game, Login Group dan sebagainya.
[b]4. Report Database
Fasilitas Report Database per hari/bulan/tahun
Merupakan ringkasan laporan yang menampilkan pendapatan masing-masing per operator Report database dapat dicetak ke Printer maupun di save ke File Text. File Report ini juga dapat dikirim melalui Email.
5. Customize Setting Biaya & Discount Happy Hour
Setting biaya yang dapat di customize serta menentukan beragam jenis tarif dan discount yang berbeda yang dapat diatur pada setiap member, maupun Login lainnya.
Misal Warnet menetapkan perhitungan tarif biaya sbb:
08:00-21:00 Waktu normal Rp 4000/jam
21:00-23:00 discount 25% = (4000 x 75%= Rp 3000)
23:00-04:00 discount 50% = (4000 x 50%= Rp 2000)
04:00-08:00 discount 75% = (4000 x 25%= Rp 1000)
Dengan Perhitungan waktu normal sbb:
Per 15 Menit = Rp. 1000,-
Minimal Pemakaian = 15 Menit = Rp. 1000,-
6. Security#1 File Database
File Database Report dan File Database Member menggunakan Data yang telah di Encrypt. File Database hanya dapat dibuka melalui Program Billing Server dengan verify Password Database Administrator. Hanya administrator atau Pemilik yang diberi hak akses dan berhak untuk mengedit file database report.
7. Auto backup dan Auto Connection
Apabila PC Server atau PC Client mengalami hang (macet), data otomatis akan diback-up. Apabila PC tersebut aktif kembali, secara otomatis akan melakukan connection dan Proses perhitungan akan diteruskan lagi
8. Disable CTRl+Alt+Del - TASK MANAGER .
BillingExplorer berfungsi untuk mengunci komputer Client dengan cara mematikan fungsi CTRL-ALT-DEL, CTRL-ESC, ALT-Tab ALT-F4, ALT-SPACEBAR-C, TASK-LIST, TASKBAR (Win95 / 98 / Me / NT / 2000 / Xp).
9. Ganti/Change Operator
Fungsi ini digunakan untuk mengganti operator yang aktif untuk saat ini dengan cara men-scroll atau memilih pada daftar operator.
10. Bersifat Universal
BillingExplorer sangat cocok digunakan untuk warnet, multiplayer games, rental komputer ( pengetikan ), perpustakaan, kursus maupun bisnis yang lain.
11. User Friendly
Proses installasi yang sangat cepat dan mudah ( settingless ) sehingga mudah dimengerti oleh semua orang maupun operator bisa melakukannya meskipun belum mengenal sama sekali tentang Komputer.
12. Time Warning from Server
Pengaturan pengiriman pesan peringatan secara otomatis maupun pada durasi tertentu yang dikirim dari komputer server ke komputer terminal baik secara satu persatu maupun keseluruhan.
13. Time Warning from Client
Pengiriman pesan peringatan secara otomatis maupun pada durasi tertentu yang dikirim dari komputer Client ke komputer server ( operator ) atau peringatan yang digunakan untuk mengingatkan pemakai itu sendiri.
14. Calculator
Fungsi ini sebagai calculator untuk perhitungan keuangan seperti penjumlahan, pengurangan, pembagian atau perkalian serta untuk mengurangi sisa jumlah uang yang telah dibayarkan dengan biaya pemakaian internet.
15. Lock All Client
Fungsi ini akan melalukan Lock (mengunci PC Client) sehingga PC client tidak bisa digunakan untuk Login.
16. Un-Lock Client
Fungsi ini akan membuka (Un-Lock) PC client yang telah dikunci. Untuk Un-Lock Client, dapat dipilih untuk tiap PC client tertentu atau Semua PC Client.
17. Jenis Login Client
Fungsi ini secara remote akan mengontrol Login PC Client, sehingga server dapat memilih Login apa saja yang ingin ditampilkan pada PC Client.
18. Disconnect Client
Apabila user lupa untuk men-disconnect Billing, Maka Server secara remote dapat mendisconnect PC Client. Server dapat men-disconnect untuk tiap PC Client atau untuk Semua PC Client.
19. Move Client
Pindah tempat dari komputer satu ke komputer yang lain tanpa harus finish sehingga total harga yang pertama akan langsung pindah ke komputer yang kedua.
20. Shutdown Client
Komputer server dapat melakukan secara remote proses shutdown, restart, log-off PC client Proses ini dapat dipilih untuk satu PC client tertentu atau semua PC Client.
21. Counter Time
Komputer server dapat melakukan secara remote proses counter time. Fungsi ini sebagai time counter yang secara otomatis akan men-disconnect PC untuk tiap waktu yang telah disetting sebelumnya.
22. Messages Server-Client
Mengirim Pesan dari komputer server/operator ke komputer Client, begitu juga antar PC client ke PC client atau dari PC client ke PC server.
23. Transaksi Penjualan (On-Line)
Memasukkan data transaksi penjualan non akses, seperti pembelian makanan, minuman, diskett, jasa scanner, jasa printer dsb. Dimana pembeli makanan tersebut sedang memakai komputer ( on line ) sehingga pencetakan dilakukan dalam satu tagihan bersama billing penyewaan.
24. Transaksi Penjualan (Off-Line)
Proses pemasukan data transaksi penjualan non akses, seperti makanan, minuman, Scan, Print, Pembelian Diskett dan sebagainya dilakukan dalam nota tersendiri.
25. Stock Data Barang
Persedian barang ( makanan, minuman, snack, rokok, kertas dll ) dapat dimasukkan pada menu stock yang mana nantinya akan berkurang dengan sendirinya (otomatic).
26. Autorun at Startup windows Client
Setelah BillingExplorer terinstall dengan sempurna maka secara otomatis akan berjalan dengan stabil pada startup Windows tanpa harus meletakkan pada startup secara manual.
27. Compatible Semua Proxies
BillingExplorer sangat kompatibel dengan semua jenis proxy maupun ISS seperti winproxy, Winroute, Wingate dan lain sebagainya, sehingga tidak akan terjadi crash, billing tidak jalan ataupun windows anda rusak.
28. Members Pra-Bayar
System bayar di depan yang bisa dicustome berdasarkan tarif maupun jam pemakaian dan secara otomatis men-disable account member yang telah expired yang sebelumnya ada warning terlebih dahulu ke member dan sisa uang masih tersimpan dalam database.
29. Profile Members
Fasilitas ini memungkinkan pemilik warnet untuk mendapatkan informasi yang lebih jelas dari setiap member, seperti data Nama member, Alamat, Kota, Email, Jumlah Account, Jenis Member dan sebagainya.
30. Quick Member
System member cepat dimana username dan password di-generate langsung oleh komputer itu sendiri. Ini sering sekali digunakan pada system bayar didepan karena sangat cocok sekali digunakan untuk pemakai Multiplayer Game.
31. Client Status on Server
Status masing-masing komputer client akan ter-display langsung di komputer server secara realtime seperti durasi, harga, discount, account member, maupun total harga yang harus dibayar.
32. Charge Status on Client
Status harga, mulai durasi, berapa jam pemakain, jam berapa mulainya, setiap hitungan berapa menit/detik, berapa total yang harus dibayar akan tampil pada komputer client sehingga user bisa memutus kapan harus finish (selesai).
33. Member Account
Semua account member bisa di non-aktifkan dari server sehingga account member tersebut tidak bisa digunakan lagi.
34. Update Member Accounts
Melakukan pencarian serta update account member dengan cepat dan cukup diketikkan nama member ID tersebut.
35. Masa Aktif Member
Secara otomatic account member tidak bisa digunakan apabila masa berlakunya sudah habis.
36. Remote Client
Komputer Server dapat melakukan remote atau melihat aplikasi yang dijalankan oleh tiap-tiap PC Client sehingga Server dapat memantau atau mengontrol penggunaan aplikasi oleh PC Client.
37. Blocking Internet
Mematikan fasilitas Internet Explorer dan Internet Option sehingga setting proxy maupun setting yang lain tidak dapat dirubah oleh user
Terdapat Pada Versi Dinamic2 Game dan DeskPro4.
38. Option Disable Fasilitas Windows
Me-nonaktif-kan fasilitas Windows, seperti Display Vga Control Panel, Network Neighborhood, Windows registry, Windows Property, Menu Run, Command DOS Prompt dan lain-lain.
39. ON/Off Auto Print
Apabila printer dalam keadaan on maka secara otomatic akan mencetak nota pint out pada kertas kasir.
40. Remote Kill Applikasi
Menutup serta mematikan (Kill and Destroy) aplikasi ( program ) baik internet maupun non-internet yang ada pada PC client.
41. Multi Server/User
Program BillingExplorer mempunyai fungsi Multi Server/User sehingga file database baik member maupun report dapat digunakan secara bersama-sama. Pemilik Warnet-Game dapat menempatkan PC server untuk tiap-tiap lokasi ruangan. Setiap ruangan mempunyai 1 kasir (PC Operator), tetapi antara PC operator satu dengan PC-Operator lainnya bisa berhubungan, sehingga data dari masing-masing PC-Operator dapat saling berhubungan.
42. Support Internet & Multiplayer Online Game
Semua aplikasi yang dijalankan pada PC baik Server maupun Client, dapat berjalan dengan baik. Aplikasi internet seperti browser IE, Netscape, dan Program Chatting lainnya serta aplikasi Multiplayer Game seperti Counter Strike, Nexia, Dsb dapat berjalan dengan baik.
43. Variasi Biaya System Group
Dengan biaya system group / tabel, Setting biaya menjadi bervariasi dan fleksible. Biaya bisa disetting dengan waktu minimal tertentu, baik per 1 menit, 5 menit, 15 menit atau di-isi bebas sesuai dengan keperluan. Tiap-tiap biaya system group tersebut dapat pula disetting untuk tiap-tiap login dan tiap-tiap user pemakai. Tersedia juga diskon untuk system group.
44. Report Data via Web (Web-Base Edition)
Program BillingExplorer Versi Web-base Edition Dilengkapi Dengan Fasilitas Report Database to Web. Data-data Seperti User Name, Waktu Start, Durasi, Total Biaya Pemakaian PC Tiap-tiap Client, Nama Operator Dsb. akan dikirim ke Website. Pemilik Warnet - Multiplayer Game Dapat Memantau Database Pendapatan Langsung baik Per-Hari/Bulan/Tahun, dari Lokasi Lain diluar Warnet.
45. Tidak menyebabkan System #Crash
Program BillingExplorer telah diuji Coba, Baik Pada Semua Jenis Windows serta Mesin CPU untuk merk/type yang berbeda-beda, dan tidak menyebabkan system tersebut menjadi crash-macet-hang.
46. Fasilitas Lain-Lain ...
Masih Banyak Fasilitas Lain dari Program BillingExplorer Yang Belum Sempat dijelaskan semuanya di website, Tetapi bagi Bpk/Ibu Yang Ingin mencari Program Billing untuk System Warnet / Multiplayer Game, Kami menyarankan Sebaiknya Pilihan Pertama Yang Harus Dilakukan untuk Uji Coba adalah Apakah Billing Tersebut Stabil dan Tidak Menyebabkan System PC menjadi crash-hang-macet, Jika aplikasi billing tersebut dijalankan untuk Waktu yang lama?. Untuk mencoba Program BillingExplorer, Silahkan download file instalasi yang terdapat pada website ini
Get Free Download
Here from rapidshare
pass : http://yobookku.blogspot.com Read More..
Magazine 2008
Windows Vista Magazine N° 16 - Avril 2008
The Plot - March 2008
The Plot magazine is a publication from Adlabs Cinemas which is owned by Anil Dhirubhai Ambani Group. Adlabs is largest chain of cinema in India.
The magazine is about Indian movies, movie stars, forthecoming movies and latest happenings in Indian and International Film Industry.
Create a Monet masterpiece
Use Photoshop's brushes and tools to create your very own Impressionist delight.
Fake a night photo
Use Photoshop's colour tools to transform day into evening.
Create space, part 2
After creating the planet last issue, this time we turn out attention to the nebula.
Use the Lighting Effects
With the Lighting Effects filters, it's possible to get a pro studio look for your photos.
Remove red-eye
Get rid of glowing eyes and even learn how to change eye colour altogether.

Playboy Hungary January 2008
JPG | 10 pics | HUN | 12.1 Mb
Pass : http://yobookku.blogspot.com
Song Ebook
Guns N' Roses - Use Your Illusion I
Guns N' Roses - Use Your Illusion I Guitar Tablature
Book: pdf 26.7 mb| Cherry Lane Publishing|1991
- Right Next Door To Hell
- Dust N' Bones
- Live And Let Die
- Don't Cry (Original)
- Perfect Crime
- You Ain't The First
- Bad Obsession
- Back Off Bitch
- Double Talkin' Jive
- November Rain
- The Garden
- Garden Of Eden
- Don't Damn Me
- Bad Apples
- Dead Horse
- Coma
Download from rapidshare part 2
Guns N' Roses - Use Your Illusion II
Guns N' Roses - Use Your Illusion II Guitar Tablature
Book: pdf 18.3 mb| Cherry Lane Publishing|1991
- Civil War
- 14 Years
- Yesterdays
- Knockin' On Heaven's Door
- Get In The Ring
- Shotgun Blues
- Breakdown
- Pretty Tied Up
- Locomotive (Complicity)
- So Fine
- Estranged
- You Could Be Mine
- Don't Cry (Alt. Lyrics)
- My World
Download from rapidshare
Bon Jovi - Bounce

Bon Jovi - Bounce
1RAR file containing
Book: PDF | 90 Pages | 12.2Mb | Amsco Wyse
Guitar transcriptions of all the songs from the New Jersey rockers' 2002 hit album. Includes guitar tablature and standard notation, with full lyrics, chord boxes, tunings and strum patterns where appropriate.
Includes:
* UNDIVIDED
* EVERYDAY
* THE DISTANCE
* JOEY
* MISUNDERSTOOD
* ALL ABOUT LOVIN YOU
* HOOK ME UP
* RIGHT SIDE OF WRONG
* LOVE ME BACK TO LIFE
* YOU HAD ME FROM HELLO
* BOUNCE
* OPEN ALL NIGHT
Download from rapidshare
R.E.M. - In Time 1988-2003 (The Best of)
R.E.M. - In Time 1988-2003 (The Best of) - Authentic Guitar TAB
2 RAR files containing
Book: PDF | 132 Pages | 14.2Mb | Alfred publishing
Fifteen years of R.E.M.'s reflective and visceral music is packed into this one compilation. This album-matching folio includes all of the greatest hits of the Grammy award-winning band.
Titles are:
* Man on the Moon
* The Great Beyond
* Bad Day
* What's the Frequency, Kenneth?
* All the Way to Reno (You're Gonna Be a Star)
* Losing My Religion
* E-Bow the Letter
* Orange Crush
* Imitation of Life
* Daysleeper
* Animal
* The Sidewinder Sleeps Tonite
* Stand
* Electrolite
* All the Right Friends
* Everybody Hurts
* At My Most Beautiful
* Nightswimming.
Download from rapidshare
Song book | Foreigner - The Best of
Foreigner - The Best of - Play-It-Like-It-Is
2 RAR files containing
Book: PDF | 87 Pages | 16.8Mb | Cherry Lane Music | 2001
Note-for-note tab transcriptions for 14 faves from these Juke Box Heroes, selected from their 2000 double-disc retrospective.
Contents:
* Long Long Way From Home
* Night Life
* Blue Morning, Blue Day
* Cold As Ice
* Dirty White Boy
* Double Vision
* Feels Like The First Time
* Head Games
* Hot Blooded
* I Want To Know What Love Is
* Juke Box Hero
* That Was Yesterday
* Urgent
* Waiting For A Girl Like You
Song book | Original Randy Rhoads
Original Randy Rhoads - by Wolf Marshall pdf file containing Book: PDF | 58 Pages | 3.93Mb | Music Sales| 1986 An Annotated Guide to the Guitar Technique of Randy Rhoads.
Includes:
* Glad All Over
* I Don't Know
* Crazy Train
* Goodbye To Romance
* Steal Away (The Night)
* Flying High Again * Dee
* S.A.T.O.
* Mr. Crowley
* No Bone Movies
* Over The Mountain
Download from rapidshare
Song book | Disturbed - Believe
Disturbed - Believe
1RAR file containing
Book: PDF | 120 Pages | 15.5Mb | Alfred Publishing
Performed by Disturbed. For Guitar.
Includes:
*Prayer
*Liberate
*Awaken
*Believe
*Remember
*Intoxication
*Rise
*Mistress
*Breathe
*Bound
*Devour
*Darkness
Download from rapidshare
Song book | Alice Cooper - Trash
Alice Cooper - Trash
1PDF file containing
Book: PDF | 101 Pages | 18.7Mb | Hal Leonard
Performed by Alice Cooper. For Guitar.
Includes:
* Poison
* Spark in The Dark
* House Of Fire
* Why Trust You?
* Only My Heart Talkin'
* Bed Of Nails
* This Manics' In Love With You
* Trash
* Hell InsLiving Without You
* I'm Your Gun
Download from rapidshare
Song book | Extreme - Pornograffiti
Extreme - Pornograffiti
1RAR file containing
Book: PDF | 113 Pages | 10.1Mb | Hal Leonard
Performed by Extreme. Guitar tablature songbook for guitar and voice.
* Li'l Jack Horney
* Hole Hearted
* More Than Words
* Decadence Dance
* When I'm President
* Get The Funk Out
* Money (In God We Trust)
* It('s A Monster)
* Pornograffitti
* When I First Kissed You
* Suzi (Wants Her All Day What?)
* Song For Love
Download from rapidshare
Skid Row - Slave To The Grind

Skid Row - Slave To The Grind
1RAR file containing
Book: PDF | 80 Pages | 11.6Mb | Hal Leonard
Performed by Skid Row. Guitar tablature songbook for guitar and voice.
* Monkey Business
* Slave To The Grind
* The Threat
* Quicksand Jesus
* Psycho Love
* Get The Fuck Out
* Livin' On A Chain Gang
* Creepshow
* In A Darkened Room
* Riot Act
* Mudkicker
* Wasted Time
* Beggar's Day
Download from rapidshare
Labels: Song book
Posted by Aidz at 18:34 0 comments
Song Book | Retro '80s

Retro '80s
PDF Book, 192 Pages, 37.7 mb, Hal Leonard Publishing (GRV)
30 Hits from the '80s
- Alone - Heart
- Back On The Chain Gang - The Pretenders
- Bang A Gong (Get It On) - Power Station
- Centerfold - J. Giles Band
- Dont Stand So Close To Me - The Police
- 876-5309/Jenny - Tommy Tutone
- Eye Of The Tiger - Survivor
- Footloose - Kenny Loggins
- Heart And Soul - Huey Lewis & The News
- The Heat Is On - Glen Frey
- Heaven Is A Place On Earth - Belinda Carlisle
- Hold Me Now - Thompson Twins
- I Love Rock And Roll - Joan Jett & The Blackhearts
- In A Big Country - Big Country
- Jack And Diane - John Mellencamp
- Love Is A Battlefield - Pat Benatar
- Love Shack - B-52's
- Maniac - Michael Sembello
- One Thing Leads To Another - The Fixx
- Our Lips Are Sealed - Go-Go's
- Owner Of A Lonely Heart - Yes
- She Drives Me Crazy - The Fine Young Cannibals
- Time After Time - Cyndi Lauper
- Voices Carry - 'Til Tuesday
- Walk Of Life - Dire Straits
- Walking On Sunshine - Katrina & The Waves
- What I Like About You - The Romantics
- Whip It - Devo
- Working For The Weekend - Loverboy
- Your Love - The Outfield
Download from rapidshare part 2 Readmore...»»»
Labels: Song book
Posted by Aidz at 18:10 0 comments
Song book | The Offspring - Conspiracy Of One
The Offspring - Conspiracy Of One - Guitar Recorded Versions
12.9Mb RAR containing
Book: PDF | 63 Pages | 13.6Mb | Hal Leonard | 2001
12 songs from the 2001 release "Conspiracy of One" from the popular SoCal punk/metal outfit The Offspring.
Includes
* Come Out Swinging
* Original Prankster
* Want You Bad
* Million Miles Away
* Dammit, I Changed Again
* Livin' In Chaos
* Special Delivery
* One Fine Day
* All Along
* Denial, Revisited
* Vultures
* Conspiracy Of One
Download from rapidshare
Labels: Song book
Alice in Chains
Alice in Chains - Acoustic
Author: Alice in Chains
Paperback: 64 pages
Publisher: Hal Leonard Corporation (June 1, 1997)
Language: English
ISBN: 0793572401
Download from rapidshare
Eric Clapton - From The Cradle
Eric Clapton - From The Cradle - Guitar Recorded Versions
3.6Mb pdf containing
Book: PDF | 121 Pages | 3.6Mb | Hal Leonard |
With standard guitar notation, guitar tablature, vocal melody, lyrics, chord names and guitar chord diagrams. Blues Rock and Adult Contemporary.
Contains:
* Groaning The Blues
* Sinner's Prayer
* Motherless Child
* Driftin' Blues
* Five Long Years
* Goin' Away Baby
* Blues Leave Me Alone
* Third Degree
* Standin' Around Crying
* I'm Tore Down
* Someday, After Awhile
* Blues Before Sunrise
* How Long, How Long Blues
* I'm Your Hoochie Coochie Man
* It Hurts Me Too
* Reconsider Baby
Download from rapidshare
Song book | U2 - War - Full Band Score
U2 - War - Full Band Score
3.78Mb file containing
Book: PDF | 77 Pages | 3.78Mb | Rittor Music
Japanese full band score of U2's album War. Not high quality scan but still usable. Songs 40 and Drowning Man are not included.
Includes the following songs:
* Sunday Bloody Sunday
* Seconds
* New Year's Day
* Like A Song
* The Refugee
* Two Hearts Beat As One
* Red Light
* Surrender
Download from rapidshare
Soundgarden - Superunknown

Soundgarden - Superunknown Guitar Tablature
Download from rapidshare
Eric Clapton - Journeyman
Eric Clapton - Journeyman Guitar Tablature
Book:pdf 135pgs|32.7mb|Hal Leonard Publishing|1990
Songs included in this book are the follwing:
- Anything For Your Love
- Bad Love
- Before You Accuse Me
- Breaking Point
- Hard Times
- Hound Dog
- Lead Me On
- No Alibis
- Old Love
- Pretending
- Run So Far
- Running On Faith
Download from rapidshare
'80s Flashback
Book:PDF, 145 Pages, 29mb, Hal Leonard Publishing
22 Great Rock Hits
- Addicted To Love - Robert Palmer
- Another One Bites The Dust - Queen
- Brass In Pocket - Pretenders
- Devil Inside - INXS
- Every Breath You Take - The Police
- Eye In The Sky - The Alan Parsons Project
- Eye Of The Tiger - Survivor
- Heat Of The Moment - Asia
- Hit Me With Your Best Shot - Pat Benatar
- Hold Me Now - The Thompson Twins
- Jessie's Girl - Rick Springfield
- Juke Box Hero - Foreigner
- Love Stinks - J. Geils Band
- Maniac - Michael Sembello
- Money For Nothing - Dire Straits
- Owner Of A Lonely Heart - Yes
- Should I Stay Or Should I Go - The Clash
- Time After Time - Cyndi Lauper
- We Built This City - Starship
- We Got The Beat - The Go Go's
- What I Like About You - The Romantics
- Your Love - The Outfield
Download from rapidshare Read More..
Ebook Nirvana Nevermind
PDF Book, 15 mb, 64 Pages, Hal Leonard Publishing
In 1991 Nirvana released their seminal second album Nevermind and literally reinvigorated alternative music. With the final line-up of Kurt Cobain, Kris Novoselic and Dave Grohl in place they had perfected and honed their raucous heavy sound– Grohl’s hard-hitting drumming adding a new dynamic to the abrasive alternative rock.
This is the album that set the template for the scores of punk-rock bands that have followed. Tracks like Smells Like Teen Spirit and Lithium demonstrate how Kurt’s music was even angrier and more visceral— yet more accessible and tuneful, allowing them to gatecrash the mainstream consciousness worldwide.
This Guitar Recorded Versions edition of Nevermind contains all 12 tracks from the album, all accurately transcribed in standard notation and guitar tab, complete with full lyrics and chord symbols.
- Smells Like Teen Spirit
- In Bloom
- Come As You Are
- Breed Lithium
- Polly
- Territorial Pissings
- Drain You
- Lounge Act
- Stay Away
- On A Plain
- Something In The Way
Download from rapidshare Read More..
PDF Transformer 2.0
ABBYY PDF Transformer 2.0

Yahoo! Go For Mobile2.0

Yahoo has just release their new handy widgets(mini-applications), you can easily to letting search email, view maps or read local news, sports data, financial info, weather and flickr photos.
The widget is fast, updates frequently, and has an attractive interface. You’ll be easily navigate to read top news headlines, on the small screen.
This widgets completed by search facility, oneSearch, which help you find anything on the phone. It programmed with prioritize result so you’ll find the most likely on a mobile device.
Even you dont need a Yahoo!ID for using this widget, I wish you to get one free account on www.yahoo.com because you’ll get instant access of your customized when logging into Yahoo!Go. This service will be disable if you’re not yahoo member. So, Youll find that the content setting you’ve made on your PCwill be applied automaticallyon your mobile device.
Yahoo!Go works on java, Symbian, and windows mobile phone. It doesnt work on BREW, Linux or Palm OS. But, Dont worry if this widget doesnt work on your mobile device, Yahoo promises that this widget will be rolling out in the near future.
Read More..Free Download Anti virus
SpywareBlaster 4.0
![]() |
| SpywareBlaster 4.0 |
SpywareBlaster doesn't scan and clean for spyware - it prevents it from ever being installed.
Spyware, adware, browser hijackers, and dialers are some of the fastest-growing threats on the Internet today. By simply browsing to a web page, you could find your computer to be the brand-new host of one of these unwanted fiends!
The most important step you can take is to secure your system and SpywareBlaster is the most powerful protection program available.
Features of SpywareBlaster 4.0 :
· Prevent the installation of ActiveX-based spyware, adware, browser hijackers, dialers, and other potentially unwanted pests.
· Block spyware/tracking cookies in Internet Explorer and Mozilla/Firefox.
· Restrict the actions of potentially dangerous sites in Internet Explorer.
SpywareBlaster can help keep your system spyware-free and secure, without interfering with the "good side" of the web. And unlike other programs, SpywareBlaster does not have to remain running in the background.
How to update SpywareBlaster :
1.) AutoUpdate - keep your protection up-to-date automatically!
2.) Check for Updates - manually check for and download the latest updates
The built-in Check for Updates function is completely free.
To access Check for Updates, simply click on the "Updates" tab on the left side of the SpywareBlaster interface, and then press the "Check for Updates" button.
If you would like the convenience of the AutoUpdate feature, more information can be found in SpywareBlaster itself.
(Click on the "Updates" tab, and then the "AutoUpdate" tab.)
A SpywareBlaster AutoUpdate subscription is $9.95 (US) per computer, per year, and is good on the computer from which it is purchased.
Subscriptions do not automatically renew - you will be prompted to purchase a new subscription when your current subscription expires.
xp-AntiSpy 3.96.8

The xp-AntiSpy is a little utility that lets you disable some built-in update and authentication 'features' in WindowsXP.
For example, there's a service running in the background which is called 'Automatic Updates'. I don't know what this service transfers from my machine to other machines on the internet, especially the MS ones. So I play it safe and disable such functions. If you like, you can even disable these functions manually, by going through the System and checking or unchecking some checkboxes. This will take you approximately half an hour. But why wast time when a little neat utility can do the same in 1 minute?
xp-AntiSpy was successfully tested by lots of users, and was found to disable all the known 'Suspicious' Functions in WindowsXP. It's customiseable, but comes up with the Default settings, which are recommended.
This utility is DONATIONWARE! This means, you don't have to pay anything for this program and you can give it to anyone who's interested in it, as long as you don't sell it. If you find this tool useful, and wanna gimme something back, think about donating a small amount of money.
What's New in xp-AntiSpy 3.96.8 :
· Fixed bug in the setting 'Disable identification of player by websites'
· Added setting: 'Disable Java Script in the PDF-Reader'
· Fixed bug in the time server settings dialog
· Fixed bugs in the command line options
SPAMfighter Standard 6.2.29

SPAMfighter is Europe's leading Anti Spam Filter developer, providing Spam Protection for hundreds of thousands of home and corporate users on PC's and Servers.
If you need a spam filter for your home/office PC or you need to spam protect a server, you have come to the right place.
SPAMfighter Standard is free and can only be used in private homes and schools. In SPAMfighter Standard, a short text ad is displayed in your e-mail client, and an "I'm protected by SPAMfighter" message is appended to your outgoing e-mails. You don't have the language filter and other useful features are missing
SPAMfighter supports the following mail servers: ArGoSoft, CMailServer, CommuniGate, Courier, DynFX, GroupWise, IMail, Kerio, Domino, MDaemon, Merak, MERCUR, MS SMTP MAIL Service, Netscape Messaging Server, NTMail, Postfix, QMail, Sendmail, Winmail, Winroute, WorkgroupMail, XMail and more.
Features of SPAMfighter Standard 6.2.29 :
· SPAMfighter Standard is 100% free for private use
· Award winning spam blocking technology
· Protects against "phishing" and other email fraud
· Protects all the email accounts on your PC
· Unique language filtering tool that empowers you to stop emails written in specific languages
· Automatic "real mail" protection - means no lost business mails!
· Blacklist domains and emails
· Spam Abuse Reporting with one click
· Automatic Whitelist management
· Privacy Guaranteed - we don't see any of your email
· Does not filter based on simple phrases or "trigger" words. Allows any content
· Language support: English, German, Spanish, French, Italian, Dutch, Swedish, Norwegian, Suomi and Danish.
There are two versions of SPAMfighter: SPAMfighter Standard, available for download, here and SPAMfighter Pro.This is the product you download and get free for 1 month. After the trial, you can choose to pay only $29 and keep the Pro version, otherwise you are automatically downgraded to the free SPAMfighter Standard.
SPAMfighter Pro can be used in companies and other commercial environments and gives access to better protection.
What you get with SPAMfighter Pro :
· The right to use SPAMfighter in a company/organization
· Unique language filtering tool - Stop emails in languages you don't understand
· Option to move the toolbar in Microsoft Outlook
· Premium support - Typical same answer within 24 hours
· Unlimited Blacklist/Whitelist entries
· Option to remove the SPAMfighter Footer in your emails
· Commercial-free email client
If you want to upgrade to SPAMfighter Pro, please click here.
What's New in SPAMfighter 6.2.29 :
· Improved spam detection
· Added Thai translations
· Fixed bug in Outlook Express plugin when composing Japanese emails
SystemExplorer 1.4 RC1

SystemExplorer helps you to find out everything you need to know about your system: detailed informations about Processes, Startups, Explorer, IE Addons, Uninstallers and much more!
Features of SystemExplorer 1.4 :
· Detailed informations about Processes, Startups, Explorer, IE Addons, Uninstallers, Windows, Services, Drivers, Connections and Opened Files
· Action History for monitoring processes activities
· Making of Registry & Files snapshots for easy comparing of system changes. Result of comparation is displayed in tree view and text list. Can be used for analysation of product installers/uninstallers (like Total Uninstall)
· Performance graphs for monitoring usage of system resources in time
· Easy check of suspicious files via VirusTotal
· Easy search details about file/process via online databases
· Easy access to System Utilities
What's New in SystemExplorer 1.4 Beta 4 :
· Added Portuguese translation
· Added Japanese translation
· Performance Optimisation
· Added config.ini option - Main > CheckNewVersion - Set to 0 for disabling checking of new
version
· Added config.ini option - Main > HideWindowOnTrayClick - Set to 1 for enable "Hide Window
On Tray Click" feature
· Added checking for "Not Responding" Status in Application Tab
· Changed View of Process CPU Usage
· Fixed special characters in Espanol translation
· Fixed bug in File Certificate Loader
· Fixed bug in File Info Icon Loader
· Fixed Process CPU Usage Computing
· Fixed Virus Total Uploader
What's New in SystemExplorer 1.4 RC1 :
· Added System Utilities Menu to Tray Popup
· Added Shutdown Menu to Tray Popup
· Added option to "Allow one instance only"
· Added hotkey Shift+F10 for showing of content menu.
· Added config.ini user section value snapshotsPath for setting snapshots directory
· Added loading of SnapshotFilter.txt primary from snapshots directory
· Fixed Start with config.ini readonly access
· Fixed Few Snapshots Tool Issues
· Fixed Minor Bugs
Trojan Remover 6.6.8.2518

Trojan Remover was written to aid in the removal of Trojan Horses and Internet Worms when standard anti-virus software has either failed to detect the problem or is unable to effectively eliminate it.
Trojan Remover has been written for Windows 95/98/NT/Millennium/XP. It has been successfully used by Windows 2000 users, although this platform has not been officially tested.
The majority of Virus and Trojan Scanners are well able to detect malicious Trojan Horses and Internet Worms but are not always very efficient in removing them once they have been triggered.
Trojan Remover was written specifically to carry out such a removal without the user having to manually edit system files, including the Registry. The program also removes the additional system modifications some Trojans carry out which are ignored by other Virus and Trojan Scanners.
Features of Trojan Remover 6.6.8 :
Trojan Remover will examine all the system files, including the Windows Registry and determine the programs and files that are loaded at boot time. The majority of Trojan Horses (once triggered) are loaded this way.
Trojan Remover will scan ALL the files loaded at boot time for Remote Access Trojans ('backdoors', like NetBus, SubSeven, Optix Pro, Back Orifice etc.), Internet Worms and other malware.
For each identified Trojan Horse, Worm, or other malware, Trojan Remover will pop up an alert screen showing the file location and name; it will offer to remove the program's reference from the system files and allow you to rename the file to stop its activation.
Most modern Trojans make themselves memory-resident, making their de-activation more difficult. How many times have you been told to start your computer in 'Safe' mode, or even worse, in DOS? Trojan Remover will do all this for you. When a Trojan is found that is memory-resident, Trojan Remover will (on request) reboot your system and completely DISABLE the Trojan before Windows restarts. It also protects the system files whilst doing so by making them read-only.
Trojan Remover writes to a detailed logfile each time a Scan is performed. This file contains information on which programs are loaded at boot-time, and what (if any) actions Trojan Remover carried out. This logfile can be printed out for future reference.
The program incorporates the ability to automatically scan for Trojans every time you start your computer.
You can scan individual files and directories from within Windows Explorer.
Trojan Remover incorporates an integral Updater allowing for quick and easy Database updates.
What's New in Trojan Remover 6.6.8 :
· Added new detection and removal routines for maliciously patched drivers.
· Improved heuristic detection routines for Adware.VirtuMonde/Trojan.Vundo.
Kaspersky Internet Security 8.0.0.268 Beta

Kaspersky Internet Security 7.0 is a comprehensive computer defense system from all types of electronic threats, such as malware, hacker exploits, spam, rootkits, spyware, phishing messages, persistent popup ads, etc
Download [ Kaspersky Internet Security 7.0.1.325 Final ]
Download [ Kaspersky Internet Security 8.0.0.268 Beta ]
In addition to the Anti-Viruses, the application includes a new generation personal Firewall, a Proactive Defense component offering protection from unknown threats, a Privacy Control component providing protection from Internet fraud, and an Anti-Spam component which filters out unsolicited emails.
Kaspersky Internet Security Version 7.0 includes a number of improvements which expand its functionality and the level of protection significantly. Thus, the new Parental Control module monitors users' browsing activity and blocks access to web resources containing violence, pornography, promotion of drugs or limits time online. The Confidential Data Protection module of the Privacy Control component prevents theft of important information, such as, email addresses, passwords, banking information, and credit card numbers.
Even with the added functionality and comprehensive protection, controlling the Kaspersky Internet Security 7.0 application has become even simpler and more convenient: a beginner would be able to select an application installation type and a protection mode to suit his or her needs from the provided list of options.
Kaspersky Internet Security 7.0 was initially developed for the new Microsoft Windows Vista operating system. It is fully compatible both with the 32 and the 64-bit versions of the operating system. The product interface follows the style of Microsoft Windows Vista and integrates naturally with its graphic environment.
Features of Kaspersky Internet Security 7.0 :
• The Best Anti-Virus Protection
· Ranked #1 for anti-virus detection
· The industry's fastest response time to new Internet threats
· Standard automated hourly anti-virus updates (Tiny at ~50 Kb each!)
· The most monthly updates available
· Real-time e-mail, file and web scanning for safe surfing
• Robust Spyware Protection
· #1 in spyware & adware detection
· Prevents rootkits and keyloggers from stealing personal data
· Automatically removes hidden spyware
· Detects unauthorized activity & probes
· Blocks unwanted pop-ups & banners
• Anti-Hacker Protection
· Fully integrated personal firewall
· New generation Intrusion Detection/Prevention System (IDS/IPS)
· Privacy controls protect passwords and confidential data
· Parental controls limit online time and access to forbidden sites (with tracking)
· Stealth mode to remain invisible online
• Anti-Spam Protection
· Sophisticated self-learning system
· Robust phishing protection against identity theft
· E-mail header previewing before down-loading messages
· Blacklist and whitelists for addresses and phrases
· Analysis of graphics in spam
• Impressive System Performance
· The least processor, memory and bandwidth resources required
· Rapid iSwiftT and iCheckerT virus scanning for accelerated performance
· Automatic balancing of scan speeds with increased user activity
· Ideal for instant messaging and WiFi
• Minimize Any Downtime
· Easy-to-create rescue disk instantly restores your system if damaged
· Rapidly rollback any malicious changes including restoring encrypted data
Improvements in Kaspersky Internet Security 7.0 :
· Feature added to check for and download the installer package for the latest version from the Kaspersky Lab web servers when the program installation is started.
· Web page interception and processing mechanims of the Parental Control module improved. Now the component analyzes both the contents of the root node of the site and each specifically requested page.
· Data processing speed increasing and proxy server resource consumption reduced.
· Support added for IP protocol version 6 (IPv6).
· Option added to disable Firewall from checking for changes to files in a monitored application on every attempt to join the network.
· Recent Terms technology added to Anti-Spam, analyzing message text for phrases typical of spam.
· Anti-Spam training now possible using outcoming emails on the setup wizard after installing the program.
· Option added to import addresses from the Microsoft Office Outlook/ Microsoft Outlook Express to the Anti-Spam whitelist.
· Option added for skipping trusted remote administration programs (for example, RAdmin) from Kaspersky Internet Security self-defense.
· Improvements made to interface of the program activation wizard.
· Feature added for testing network connections and updating the program when the connection is restored.
· Program behavior when changing system time changed: the program continues to run.
· Support added for Arabic-script languages.
· Proactive Defense has a new mechanism for detecting next-generation keyloggers.
· Extended capability for intercepting driver downloads (LoadAndCallImage).
· Improved program self-defense mechanism for automatic selection of actions in notifications on dangerous object detection.
AVG Anti-Virus Professional Edition 8.0.81

AVG 8.0 Anti-Virus is one of a range of award winning AVG products designed to provide you with peace of mind and total security for your PC. As with all AVG products AVG 8.0 Anti-Virus has been completely re-designed, from the ground up, to deliver AVG’s renowned and accredited security protection in a new, more user friendly and efficient way.
more aggressive and faster scanning. More security features have been automated for your convenience, and new ‘intelligent’ user options have been included so that you can fit our security features to your way of life. No more compromising usability over security!
Features of AVG Anti-Virus Professional Edition 8.0 :
· Easy to download, install and use
· Protection against viruses, spyware, adware, worms and trojans
· Real-time security while you surf and chat online
· Top-quality protection that does not slow your system down
· Free support and service around the clock and across the globe
· Compatible with Windows Vista and Windows XP
Unlocker 1.8.6

Download [ Unlocker 1.8.6 ]
Download [ Unlocker 1.8.6 - Mirror ]
Download [ Unlocker 1.8.5 ]
Download [ Unlocker 1.8.5 - Mirror ]
What's New in Unlocker 1.8.5 :
· New feature: Copy locked file. There is a new drop entry in the drop down menu which allow you to copy a file which has a handle opened. Very useful to copy .ncb files opened by Visual Studio for example.
· Improved UI: Unlocker Assistant is now multilanguage. Thanks to RDPK7 (Bulgarian), Jiun-Liang Lin (Chinese traditional), Toma Bendasek (Czech), Hoder Balder Marcus Jensen (Danish), Raphael Fetzer (German), Javier L. (Spanish), Tuukka Rantala (Finnish), Ilya Dan (Hebrew), DirektX (Hungarian), Marco D'Amato (Italian), Catbaron (Japanese), Dae-Seok Kim and Kim JaeGeun (Korean), Tommy Skaue (Norwegian), Marcin Wawer (Polish), Rhadoo (Romanian), Dmitry Yerokhin (Russian), Emperror (Slovak), Egzon Beqa (Albanian), Pruthisith Prateepavanich (Thai), Aleg Azarousky (Belarusian), Aleksander 'Quattro' Hropot (Slovenian), Igor Gubaidulin (Lithuanian), Ozzii (Serbian), Adis Imamovich (Bosnian)
· Fixed bug: Denied access issue when selecting several files.
· Fixed UI: Fixed many languages problems.
Note: Unlocker is completely free and will always remain free, which means you can use it free of charge for any purposes. If you are satisfied with Unlocker and want to help Unlocker improve or motivate the development of other quality programs, any amount of donation small or large will be welcome and gratefully appreciated. Visit author's homepage
Process Explorer 11.11

Process Explorer shows you information about which handles and DLLs processes have opened or loaded.
The Process Explorer display consists of two sub-windows. The top window always shows a list of the currently active processes, including the names of their owning accounts, whereas the information displayed in the bottom window depends on the mode that Process Explorer is in: if it is in handle mode you'll see the handles that the process selected in the top window has opened; if Process Explorer is in DLL mode you'll see the DLLs and memory-mapped files that the process has loaded.
Process Explorer also has a powerful search capability that will quickly show you which processes have particular handles opened or DLLs loaded.
Changes in Process Explorer 11 :
· New treelist control for better UI responsiveness
· Asynchronous thread symbol resolution on threads tab of process properties
· More flags on groups in security tab and SID display
· Thread IDs on threads tab
· On-line search uses default web browser and search engine
· Vista ASLR column for processes and DLLs
· Vista Process and thread I/O and memory priorities in process and thread properties
· Vista Process and thread I/O and memory columns
· PROCESS_QUERY_LIMITED_INFORMATION support on process permissions on Vista
· Run as limited user runs with low IL on Vista
· Reports information for all object types on Vista
· Show details for all processes elevation menu item on Vista
· Supports replacement of task manager on Vista
· /e to launch elevated
· /s switch to select a process at startup
· Compiled w/ASLR, DEP
· Faster startup
· Miscellaneous bug fixes and minor improvements
Autoruns 9.13

Autoruns shows you what programs are configured to run during system bootup or login, and shows you the entries in the order Windows processes them.
These programs include ones in your startup folder, Run, RunOnce, and other Registry keys. You can configure Autoruns to show other locations, including Explorer shell extensions, toolbars, browser helper objects, Winlogon notifications, auto-start services, and much more. Autoruns goes way beyond the MSConfig utility bundled with Windows Me and XP.
Autoruns' Hide Signed Microsoft Entries option helps you to zoom in on third-party auto-starting images that have been added to your system and it has support for looking at the auto-starting images configured for other accounts configured on a system. Also included in the download package is a command-line equivalent that can output in CSV format, Autorunsc.
You'll probably be surprised at how many executables are launched automatically Read More..
Top 10 Scientists who Committed Suicide
10. Viktor Meyer

Viktor Meyer was a German chemist and significant contributor to both organic and inorganic chemistry. Born in Berlin in 1848, he is best known for inventing an apparatus to measure vapour densities, the Viktor Meyer apparatus, and for discovering thiophene.
A hugely gifted chemist, Meyer was a workaholic whose taxing lifestyle took tolls on his nervous system. After a series of mental breakdowns, he killed himself by taking cyanide in 1897, at the age of 49.
9. David Kelly

David Christopher Kelly was an employee of the United Kingdom Ministry of Defence (MoD), an expert in biological warfare and a former United Nations weapons inspector in Iraq.
His doubts about the veracity of the WMD dossier compiled by the Blair Government caused a political scandal, and he was forced to attend a Parliamentary committee hearing about the remarks. A modest man, David Kelly was savagely grilled by the Committee, and spoke in a voice so soft that the air conditioning had to be turned off so that his words could be heard.
On July 17th 2003, Kelly went on his daily walk through the Oxfordshire country, and, according to the official report, swallowed up to 29 painkillers and slashed his wrist.
However, many figures, including MPs and paramedics, continue to raise doubts over the exact cause of Kelly’s death, with some going to so far as to say it was murder.
8. Ludwig Boltzmann

Ludwig Eduard Boltzmann was an Austrian physicist famous for his founding contributions in the fields of statistical mechanics and statistical thermodynamics. He was one of the most important advocates for atomic theory when that scientific model was still highly controversial.
Born in Vienna, February 20th 1844, Boltzmann attended the University of Vienna, gaining a PhD degree at age 22, and becoming Professor of Mathematical Physics at the University of Graz at age 25. In 1893, he achieved his goal of becoming Professor of Theoretical Physics at the University of Vienna, succeeding his old mentor, Joseph Stefan.
Most likely suffering from bipolar disorder, Boltzmann took his own life while on holiday with his family. He is buried in Vienna in a tombstone that reads S=k*logW.
7. Valeri Legasov

Valeri Alekseevich Legasov was a prominent Soviet scientist in the field of inorganic chemistry, a member of the Academy of Sciences of the USSR. He is most famous for his work as the chief of the investigation committee of the Chernobyl disaster on April 26th 1986.
After the Chernobyl disaster, Legasov became a key member of the government commission formed to investigate the causes of the catastrophe and to plan the liquidation of its consequences. In August, 1986 he presented the report of the Soviet delegation at the special meeting of International Atomic Energy Agency in Vienna. His report struck the Western colleagues with the depth of analysis and full honesty in discussing the extent and consequences of the tragedy.
Legasov’s open and firm stance, however, caused a lot of trouble for him at home: the Soviet government was very uncomfortable with the frankness and rigor of his position. As a result, when in 1986-1987 his name was twice entered into the list for those to be awarded the title of Hero of Socialist Labor in recognition for his work, both times it was rejected: the second time his name was crossed out by Gorbachev himself.
Having exposed himself to the radiation on the ground of Chernobyl, Legasov’s health began to rapidly deteriorate, which coupled with his depression over his lack of recognition, led him to take his own life on April 27th 1988.
On September 20, 1996 Russian President Boris Yeltsin conferred to Legasov the honorary title of Hero of the Russian Federation (posthumously) for his “courage and heroism” shown in the course of the liquidation of the after-effects of Chernobyl disaster.
6. Hans Berger

Hans Berger, born in Neuses, Germany in 1873, is best known as the first person to record electroencephalograms (EEGs) from human subjects and is the discoverer of the rhythmic Alpha brain waves.
Berger studied medicine, neurology, psychiatry and psychology at the University of Jena. He concentrated on neurology, and following the pioneering work done by British scientist Richard Caton on animals, successfully recorded the first EEG from a human in 1924. This allowed him to discover the alpha wave and described, for the first time, the effect epilepsy had on the brain.
Disturbed by the rise of Nazism and the effects of the Second World War, Berger hanged himself on June 1st 1941.
5. Edwin Armstrong
Edwin Armstrong, born on December 18th 1890, was an American electrical engineer, who invented FM radio. He first began work on the idea of FM radio at university, and patented his idea in 1914.
However numerous patent disputes, and a blocking attempt by the Radio Corporation of America, who thought it would destroy AM radio, halted its advancement.
Determined that FM radio would never succeed, Armstrong jumped from the 13th floor of his apartment in 1954. He was 63 at the time.
4. Nicolas Leblanc

Nicolas Leblanc was a French chemist and surgeon, famed for being the first person to manufacture soda from common salt.
Born in 1742, Leblanc developed an interest in medicine at a young age and enrolled in the Paris College of Surgeons in 1759. In 1780, he became private physician to the household of Louis Philip II, Duke of Orleans.
In 1775, the French Academy of Sciences offered a prize for a process whereby soda ash could be produced from salt. The French Academy wanted to promote the production of much-needed sodium carbonate from inexpensive sodium chloride. By 1791, Nicolas Leblanc had succeeded in producing sodium carbonate from salt by a 2-step process. The prize was awarded to Nicolas Leblanc for a process which used sea salt and sulphuric acid as the raw materials. Later, a plant of his own was in operation producing 320 tons of soda ash per year.
Two years later the plant was confiscated by the French revolutionary government, which refused to pay him the prize money he had earned ten years earlier.
In 1802, Napoleon returned the plant (but not the prize money) to him, but by then Leblanc was so broke he could not afford to run it. He killed himself in 1806.
3. George Eastman

George Eastman, born in Waterville, New York in 1854, founded the Eastman Kodak Company and invented roll film, helping to bring photography to the mainstream, and setting the seeds for the invention of motion picture film in 1888.
In 1874, Eastman became intrigued with photography, but was frustrated by the awkward method that required coating a glass plate with a liquid emulsion that had to be used before it dried. In 1884, he patented a photographic medium that replaced fragile glass plates with a photo-emulsion coated on paper rolls. The invention of roll film greatly speeded up the process of recording multiple images. On September 4th 1888 Eastman registered the trademark Kodak.
In 1932, Eastman committed suicide, leaving a note that read, “My work is done. Why wait?” He is buried in Rochester, New York.
2. Wallace Carothers

Wallace Hume Carothers was an American chemist, credited with the invention of Nylon.
Carothers was a group leader in DuPont’s Experimental Station laboratory, near Wilmington, Delaware, where most polymer research was done. In addition to first developing nylon, also helped lay the groundwork for Neoprene. After receiving his Ph.D, he taught at several universities before he was hired by the DuPont Company to work on fundamental research.
After his monumental discovery, Carothers suffered depression stemming from ‘inventor’s block’, which coupled with the sudden death of his sister, caused him to take his own life by poisoning in 1937. He was 41 at the time.
1. Alan Turing

Alan Turing was an English scientist, mathematician, logician, and cryptographer, and arguably the greatest British scientist of the 20th century.
Often considered to be the father of modern computer science, Turing provided an influential formalisation of the concept of the algorithm and computation with the Turing machine. With the Turing test, he made a significant and characteristically provocative contribution to the debate regarding artificial intelligence: whether it will ever be possible to say that a machine is conscious and can think. He later worked at the National Physical Laboratory, creating one of the first designs for a stored-program computer, although it was never actually built. In 1948 he moved to the University of Manchester to work on the Manchester Mark I, then emerging as one of the world’s earliest true computers.
During the Second World War Turing worked at Bletchley Park, Britain’s code-breaking centre, and was for a time head of Hut 8, the section responsible for German naval cryptanalysis. He was largely responsible for the breaking of the German Enigma code.
In 1952, he was convicted of ‘Acts of Gross Indecency’, after admitting a sexual relationship with another man. He was given a choice between 18 months prison time (which considering his crime, was not exactly wise), or chemical castration, which included side effects such as breast enlargement. He chose the latter.
On the 8th June 1954, unable to endure the humiliation and pain of his punishment, Turing took his own life by eating an apple laced with cyanide. Despite this, it would take another 13 years for homosexuality to be decriminalised in the Britain.
Read More..DVD and transfer Video to PSP
DVD and transfer Video to PSP
This guide contains two parts:
Part1. How to rip DVD and convert MOV/AVI/WMV/ASF/Divx/Xvid/MPEG/RM to PSP MP4 video.
Part2. How to upload/transfer PSP files to your PlayStation Portable (PSP).
PSP compatible Movie/Video formats:
You can save and play movies/videos on your PSP (PlayStationPortable) system in the following file formats:
MPEG-4 Simple Profile (AAC)
H.264/MPEG-4 AVC Main Profile (CABAC) (AAC) and Baseline Profile (AAC)
In this guide we use Cucusoft PSP Video Converter, you can download this software from here for free. http://www.iphone-converter-soft.com/psp/index.htm
Part 1: How to rip DVD and convert AVI/WMV/MPEG to PSP
1. Run Cucusoft PSP Video Converter Suite. If you want to rip DVD movie to PSP MP4 Video, press the first button to open "DVD to PSP Converter". Then click the "Open DVD" button to load your DVD files and click start to rip your DVD to MP4 video.
If you want to convert MOV/AVI/WMV/ASF/Divx/Xvid/MPEG/RM or limewire and YouTube video to PSP MP4 video. Press the second button to open "PSP Video Converter”
2. Click "Open file" to import your video files which you want to convert to PSP video.
3. Modify your output file settings.On "Audio/Video Output Settings" panel you can chose output format for you files such as H.264 Movie (.mp4), PSP - PSP MPEG-4 Movie (.mp4), MP3 Audio (.mp3).
Note: If you cannot find "Audio/Video Output Settings" press "Profile" button. And you can change some Audio/Video Options and save to a new output format.
4. Click "Output" button to chose where you want to put your converted PSP files.
5. Click "Convert" button to convert your video files to PSP format.
6. After conversion, there will be a Dialog window. You can choose "Open output folder to check the output file(s)" to go to the output folder or "launch PSP Video Manager to upload output file(s) to your PSP device" to go to the PSP Video Manager.
Part 2: How to transfer video to PlayStation Portable (PSP)
1. When the converting finished, this "Conversion Done" window will pop up. If you want to upload the output file to PSP right now, please choose the second option. The program will load the Cucusoft PSP Manager automaticlly. If you choose the first option, you can upload the file by lunching the Cucusoft PSP Manager Program.
2. Please make sure:
A) Your PSP/Memeory Stick is connected to your PC.
B) The PSP is power on.
C) The PSP is in USB mode.
3. After your PSP connected to pc, you will see the following right UI. Or you can run Cucusoft PSP Video Suite, and click the third button on the main window to go PSP Video Manager.
4. Choose the video you converted, click the "upload to psp" button. The file will be transferred to psp.
Ok, now you have converted your video files to PSP video and uploaded PSP video into PSP successfully.
DVD to PSP
Tattoo's Unlimited E-book 3rd edition
Table of Contents:
Beginners Guide to Getting a Tattoo
Tattoo Safety Precautions
Choosing a Tattoo Parlor
Tattoo Care
History of Tattoos
Tribal
Celtic
Decorative
Dragons
Assorted Flash
Angels
Butterflies
Floral
Patriotic
Zodiac
Chinese Zodiac
Chinese Characters
Site Source
Download
ebook 2008 Pet of The Year from Penthouse
2008 Pet of The Year from Penthouse

Download :
All Software Download Free
SizeExplorer.Pro.v3.7.6.Win2KXP-iNViSiBLE
http://rapidshare.com/files/11718352/SizeE...iSiBLE.rar.html
ScreenVirtuoso.Pro.v2.50.WinALL-ECLiPSE
http://rapidshare.com/files/11718177/Scree...CLiPSE.rar.html
Runtime.RAID.Reconstructor.v3.03.Datecode.010507-ARN
http://rapidshare.com/files/11717975/Runti...07-ARN.rar.html
Runtime.GetDataBack.for.NTFS.v3.03.12.Multilingual-ARN.rar
http://rapidshare.com/files/11717741/Runti...al-ARN.rar.html
http://rapidshare.com/files/11717528/Runti...al-ARN.rar.html
Replay.Converter.v2.50-TE
http://rapidshare.com/files/11717196/Repla....50-TE.rar.html
PassMark.PerformanceTest.v6.1.1001-MiNT
http://rapidshare.com/files/11715474/PassM...1-MiNT.rar.html
MagicISO.v5.3.229-YAG.rar
http://rapidshare.com/files/11715252/Magic...29-YAG.rar.html
InternetSoft.FTP.Commander.Deluxe.v8.76.retail-FOSI
http://rapidshare.com/files/11715128/Inter...l-FOSI.rar.html
Internet.Resource.Assistant.v1.0.3-CFF
http://rapidshare.com/files/11714991/Inter....3-CFF.rar.html
Hexprobe.Hex.Editor.v2.42-ZWT.rar
http://rapidshare.com/files/11714894/Hexpr...42-ZWT.rar.html
FlashStats.2006.v2.0.18-ENGiNE
http://rapidshare.com/files/11714755/Flash...ENGiNE.rar.html
DiskChart.v3.0.0.62.Beta.WinAll-LAXiTY
http://rapidshare.com/files/11714030/DiskC...LAXiTY.rar.html
Funduc.Search.and.Replace.v5.6.retail-FOSI
http://rapidshare.com/files/11713971/Fundu...l-FOSI.rar.html
File.Rescue.Plus.Network.Enterprise.v4.0.0.16-CORE
http://rapidshare.com/files/11708440/File....6-CORE.rar.html
CoffeeCup.Visual.Site.Designer.v5.6.retail-FOSI.rar
http://rapidshare.com/files/11708071/Coffe...l-FOSI.rar.html
CoffeeCup.Flash.Photo.Gallery.v5.5.retail-FOSI
http://rapidshare.com/files/11707526/Coffe...l-FOSI.rar.html
Avast.Pro.v4.7.936-CORE
http://rapidshare.com/files/11707173/Avast...6-CORE.rar.html
Allok.MPEG4.Converter.v2.7.2-EiTheL
http://rapidshare.com/files/11706308/Allok...EiTheL.rar.html
AceReader.Pro.v4.5e-CFF
http://rapidshare.com/files/11706157/AceRe...5e-CFF.rar.html
ZoneLabs.ZoneAlarm.Pro.v7.0.302.000-ZWT
http://rapidshare.com/files/11706009/ZoneL...00-ZWT.rar.html
River.Past.Video.Cleaner.Pro.v7.2.2.4576.WinALL-CHiCNCREAM
http://rapidshare.com/files/11705304/River...NCREAM.rar.html
River.Past.DVD.QuickRip.v1.2.2.4576.WinALL-CHiCNCREAM
http://rapidshare.com/files/11705163/River...NCREAM.rar.html
River.Past.Audio.Converter.Pro.v7.2.2.4576-CHiCNCREAM
http://rapidshare.com/files/11705050/River...NCREAM.rar.html
Ashampoo.Magical.Defrag.v2.05-TE
http://rapidshare.com/files/11704902/Asham....05-TE.rar.html
AdsGone.Spyware.Blocker.and.Popup.Killer.2007.v7.0.0.2-CFF
http://rapidshare.com/files/11704677/AdsGo....2-CFF.rar.html
Reaper.v1.64.WinAll-CRD
http://rapidshare.com/files/11704508/Reape...ll-CRD.rar.html
HDDlife_Pro_v2.9.109
http://rapidshare.com/files/11592134/HDDli....9.109.rar.html
WebcamXP.Pro.2007.v3.03.315-TE
http://rapidshare.com/files/11819564/Webca...315-TE.rar.html
UltimateDefrag.v1.36-F4CG
http://rapidshare.com/files/11819348/Ultim...6-F4CG.rar.html
TweakNow.PowerPack.2006.Professional.v1.4.0.retail-FOSI
http://rapidshare.com/files/11819201/Tweak...l-FOSI.rar.html
The.Collectors.Crown.SE.v5.2.34-ARN.rar
http://rapidshare.com/files/11819003/The.C...34-ARN.rar.html
SpyCop.Evidence.Terminator.v4.0.0-EiTheL.rar
http://rapidshare.com/files/11818365/SpyCo...EiTheL.rar.html
Sophos.Client.Firewall.v1.0.1.For.Sophos.Antivirus.6.Multilingual.Win2kXP-ARN
http://rapidshare.com/files/11818306/Sopho...XP-ARN.rar.html
Selteco.Alligator.Flash.Designer.v7.0-VTX
http://rapidshare.com/files/11817562/Selte....0-VTX.rar.html
Rooster.1.0.3.1.WinAll-FALLEN
http://rapidshare.com/files/11817470/Roost...FALLEN.rar.html
Registry.Medic.v5.0-ARN
http://rapidshare.com/files/11817433/Regis....0-ARN.rar.html
Purge.v2.0.0.0.454.Beta.WinAll-LAXiTY
http://rapidshare.com/files/11817357/Purge...LAXiTY.rar.html
Helpware.FAR.v4.2.660-ZWT
http://rapidshare.com/files/11817314/Helpw...60-ZWT.rar.html
ForYourSoft.MessengerLog.Pro.v6.09-ARN
http://rapidshare.com/files/11817184/ForYo...09-ARN.rar.html
ForYourSoft.MessengerLog.Pro.v6.0.9-Lz0
http://rapidshare.com/files/11817103/ForYo....9-Lz0.rar.html
Holdem.Indicator.1.1.0-CRD
http://rapidshare.com/files/11817005/Holde....0-CRD.rar.html
Hitek_All_Apps_Enterprise_v7.21-DIGERATI
http://rapidshare.com/files/11816925/Hitek...GERATI.rar.html
History.Sweeper.v2.77.WinALL-iNDUCT
http://rapidshare.com/files/11816611/Histo...iNDUCT.rar.html
HiFi-Soft.RM.WMA.Converter.v1.01.WinALL-CHiCNCREAM
http://rapidshare.com/files/11816592/HiFi-...NCREAM.rar.html
HiFi-Soft.RM.WAV.Converter.v1.01.WinALL-CHiCNCREAM
http://rapidshare.com/files/11816365/HiFi-...NCREAM.rar.html
HiFi-Soft.RM.OGG.Converter.v1.01.WinALL-CHiCNCREAM
http://rapidshare.com/files/11816105/HiFi-...NCREAM.rar.html
HiFi-Soft.RM.MP3.Converter.v1.01.WinALL-CHiCNCREAM
http://rapidshare.com/files/11815872/HiFi-...NCREAM.rar.html
HiFi-Soft.Afree.DVD.Ripper.v1.00.WinALL.READNFO-CHiCNCREAM
http://rapidshare.com/files/11815619/HiFi-...NCREAM.rar.html
EasyCollage_Pro_v1.9.2.1370-DIGERATI
http://rapidshare.com/files/11815530/EasyC...GERATI.rar.html
DiskTrix.UltimateDefrag.v1.38-CORE
http://rapidshare.com/files/11814114/DiskT...8-CORE.rar.html
Delete.Duplicates.for.Outlook.v2.6.0.3-FALLEN
http://rapidshare.com/files/11813937/Delet...FALLEN.rar.html
DBRecovery.Enterprise.2006-AGAiN
http://rapidshare.com/files/11813873/DBRec...-AGAiN.rar.html
pass: AdaMskI
Download SurfAnonymous
SurfAnonymous - Hide IP Address Over the net !
Business2Go Small Business v2.10

this is a business management and accounting program specifically designed for small companies. In this product you will find a wealth of features normally found in mid-sized software programs, yet at a very reasonable price. The features provided by the Small Business Edition will allow you to handle small business information more efficiently. We hope we'll make your small business develop by offering software that will help you manage your information more intuitively than ever before.
Features :
Key Features
Double-Entry General Ledger.
Unlimited Customers, Vendors, Inventory Items, Invoices, etc.
Flexible and Customizable Numbering for Customers, Vendors, Inventory Items, Invoices, etc.
Enhanced Data Search Mechanism with User Modifiable Searches.
Strong Reports Capabilities.
Built-in E-Mail Client Module.
Editing of Formed Reports in Preview Mode.
Reports Export in a Quantity of Formats by One Click.
E-Mailing Reports by One Click.
Security Controls User Access to Modules.
Multi-Volume Backup and Restore Data.
Task Bar for Easy Window Switching.
Network Ready.
Available Modules
Sales
Purchases
Inventory Control
Banking
Accounting
Tools
Add-On Products
System Manager
Data Migration Tool
Sales
Set Customer Address Type as Ship to, Bill to, Both or Quote.
Unlimited Ship to Addresses for Each Bill to Customer.
Separate Bill to and Ship to Areas for Each Order.
Possibility of Individual Pricing for Every Customer.
Sales Commission Setup and Tracking.
Checks Customer Credit Balance and Status.
Automatically Create Sales Order from Quotation and Invoice from Sales Order.
Credit Memo.
Sell Inventory or Non-Inventory Items.
Create and Track Partial Shipments and Back Orders.
Apply Unlimited Payments to Invoice.
Enter a Single Payment and Quickly Pay Multiple Invoices.
Payments Posted Automatically to GL.
Customer Statements.
Purchases
Create Purchase Orders and Handle Multiple Receipts.
Receive Partial Shipments.
Each Receipt Updates and Re-Costs Inventory.
Debit Memo.
Create a Bill for Each Purchase and Auto Fill Billing Info from Purchase Receipt and Vendor Defaults.
Track Payments to Vendors.
Make Unlimited Payments Against One Invoice.
Payments Posted Automatically to GL.
Vendor Statements.
Inventory Control
LIFO, FIFO or Weighted Average Costing.
Inventory Classes.
Inventory Categories and Sub Categories.
Select Default and Unlimited Other Vendors, Including Price and Lead Time.
Handles Inventory in Multiple Warehouses.
Easily Transfer Goods Between Warehouses.
Supports Unlimited Multi-Pricing Levels by Qty Low, Qty High, Percentage and Fixed Price.
Include Long Text Description and Picture for Each Item.
Inventory Adjustments.
Banking
Unlimited Bank/Checking/Saving Accounts.
Record Checks, Deposits, Withdrawals and Adjustments.
Includes Standard Bank Transaction Types or Add Your Own.
Bank Account Register.
Bank Account Reconciliation.
Accounting
Maintain Account and Sub Account Information.
Includes Assets, Liabilities, Equity, Revenue, COGS, Expense, Other Revenue and Other Expense.
Double Entry General Ledger.
General Ledger Adjustments.
Set Default Accounts to Use for Inventory, Sales and Purchases, etc.
Ledger Displays Date, Debit, Credit, Transaction Description.
View Beginning and Current Balance.
Tools
Reports module.
E-Mail client module.
Screenshots
System Manager
Security Controls User Access to Modules.
Supports Roles for Easy and Quick Security Setup.
Backup and Restore Data to Disk, Network Drive, or Floppy Disks.
Supports Multi-Volume Backup Files.
Data Migration Tool

Download Read More..
Full Software Download
INFO:
Hard Drive Inspector is a new software application that monitors hard-drives for possible problems and alerts PC owners when things go or might go wrong. The program is based on the S.M.A.R.T technology, which is a part of almost every hard-drive manufactured in the world today
CheckMail 4.10
INFO:
CheckMail is a powerful POP3 email checking program, which notifies you when you have received new email. It allows you to check all your email accounts for new messages and preview or delete them before downloading to your computer. CheckMail saves time and money by allowing you to delete unwanted or large emails directly from the server without downloading them and you can even compose and send new emails directly with CheckMail, or reply to or forward existing ones. It supports custom notifications, multiple email accounts, sorting and filtering and much more. It is absolutely immune to viruses and other harmful email content, because it will never start any attachments, scripts, programs, etc. For home offices or small businesses, CheckMail can act as a server by collecting and sending emails for many users. CheckMail is ideal for computers with permanent internet connection, because it can check for new emails at regular intervals. If you connect to the internet manually, CheckMail will ask you to connect whenever you want to check for new emails.
Agnitum Outpost Security Suite Pro 2008 v6.0.2162.205.0402
INFO:
Proactive Protection for Intelligent Internet Users What you get: * Advanced firewall for secure connections * Combined antivirus and antispyware for all-in-one malware defense * Host protection to block zero-day threats * Web control to protect your PC from web-borne threats * Antispam to automatically keep your inbox junk-free

Recover4all Professional 2.32

With the Recover4all® Software you can easily recover (undelete) files that were accidently deleted under Windows. It does not matter if the files went through the recycle bin (and have been lost since the bin was emptied) or were directly deleted. The program is fast and very easy to use. The deleted files can be restored with a few mouseclicks. To prevent files that were already deleted from becoming overwritten, Recover4all® does not require installation and can run directly from a floppy disk. Recover4all® Professional main features:
* Recovers files which were deleted directly or through the recycle bin.
* Supports all file types including documents, images, movies, music etc.
* Can recover from formatted drives and within deleted folders.
* Supports all NTFS and FAT files systems, all kinds of compressed drives and files, Windows ME/XP protected files, all RAID levels, all third party encrypted drives not encrypted by Windows.
* Supports long filenames in all languages.
* Supports drives recognized by Windows with IDE, SCSI, USB, PCMCIA and other interfaces.
* Supports local internal and external drives like hard disks, removable drives like Zip drives, floppy disks, magneto optical disks and all memory cards like Compact Flash, Smart Media, Secure Digital and Memory Stick.
* Multithreaded on FAT drives: you can browse and recover while the program still searches more deleted files.
* Does not require installation to protect already deleted files from becoming overwritten.
* Does not recover files to the drive where they were deleted from in order to protect them from becoming overwritten.
Recover4all® Professional
for Windows Vista/XP/2000/NT/Me/98/95
PASS : yallamazika.net
Download The History Channel
Download The History Channel: Civil War - A Nation Divided

Genre: First Personal Shooter
This is a historical first-person shooter video game developed by Cauldron. The story line for A Nation Divided is relatively short, spanning twelve levels based on some of the most well known battles of the American Civil War. One can play as either the Confederacy or the Union. The player plays as a different soldier during each battle. During the game, you will play through a total of twelve different battles from the Civil War. The battles are divided into two campaigns: North and South. Each campaign contains six historic battles. You must play through each battle to unlock the next one.
• Windows® 98SE/ME/2000/XP
• Pentium™ III 1.0 GHz
• 256 MB Ram
• 4X CD-ROM
• 64 MB DirectX® 9.0c Compatible 3D accelerated video card with pixel/vertex shaders
• DirectX® 9.0c (included)
• Mouse and Keyboard
• 2.3 GB uncompressed hard drive space
• Sound Card – DirectX® 9.0c Compatible
Recomended requirements
• Pentium™ 4 2.5GHz
• 512 MB Ram
• 256 MB DirectX®9.0c Compatible 3D accelerated video card with pixel/vertex shaders. ATI®Radeon or nVidia® GeForce preferred.
You need to unrar, mount or burn CD images and install
http://rapidshare.com/files/95696444/THC-civil_war.part02.rar
http://rapidshare.com/files/95708847/THC-civil_war.part03.rar
http://rapidshare.com/files/95713250/THC-civil_war.part04.rar
http://rapidshare.com/files/95718819/THC-civil_war.part05.rar
http://rapidshare.com/files/95725963/THC-civil_war.part06.rar
http://rapidshare.com/files/95785924/THC-civil_war.part07.rar
http://rapidshare.com/files/95790188/THC-civil_war.part08.rar
http://rapidshare.com/files/95793877/THC-civil_war.part09.rar
http://rapidshare.com/files/95797624/THC-civil_war.part10.rar
http://rapidshare.com/files/95930236/THC-civil_war.part11.rar
http://rapidshare.com/files/95925524/THC-civil_war.part12.rar
http://rapidshare.com/files/95934624/THC-civil_war.part13.rar
http://rapidshare.com/files/95961976/THC-civil_war.part14.rar
http://rapidshare.com/files/95968678/THC-civil_war.part15.rar
http://rapidshare.com/files/95980594/THC-civil_war.part16.rar
http://rapidshare.com/files/95985441/THC-civil_war.part17.rar
http://rapidshare.com/files/95990317/THC-civil_war.part18.rar
http://rapidshare.com/files/96046038/THC-civil_war.part19.rar
http://rapidshare.com/files/96049647/THC-civil_war.part20.rar
http://rapidshare.com/files/96053275/THC-civil_war.part21.rar
http://rapidshare.com/files/96056803/THC-civil_war.part22.rar
http://rapidshare.com/files/96061671/THC-civil_war.part23.rar
http://rapidshare.com/files/96065923/THC-civil_war.part24.rar
http://rapidshare.com/files/96273456/THC-civil_war.part25.rar
http://rapidshare.com/files/96278823/THC-civil_war.part26.rar
http://rapidshare.com/files/96284284/THC-civil_war.part27.rar
http://rapidshare.com/files/96287249/THC-civil_war.part28.rar
download Pro Evolution Soccer 2008 (PSP)

Pro Evolution Soccer 2008 (PSP)
Developed by Konami’s football Studio in Tokyo, the game contains all the realism and intuitive controls associated with the series. The PSP version of PES 2008 shares a lot in common with the existing PlayStation 2 game, with a wide range of tournaments and leagues on offer, alongside an all-new World Tour mode, wherein users are set a series of challenges as they tour the globe. As each task is successfully completed, further tests designed to show the capability of your chosen squad are unlocked.
Full Edit modes have also been incorporated into PES 2008, while the data sharing aspect has been totally reworked to allow users to continue building their team while away from their home system. As such, Master League information can now be swapped between the PSP and PlayStation 2 versions, as can League, World Tour and Cup Mode data.


